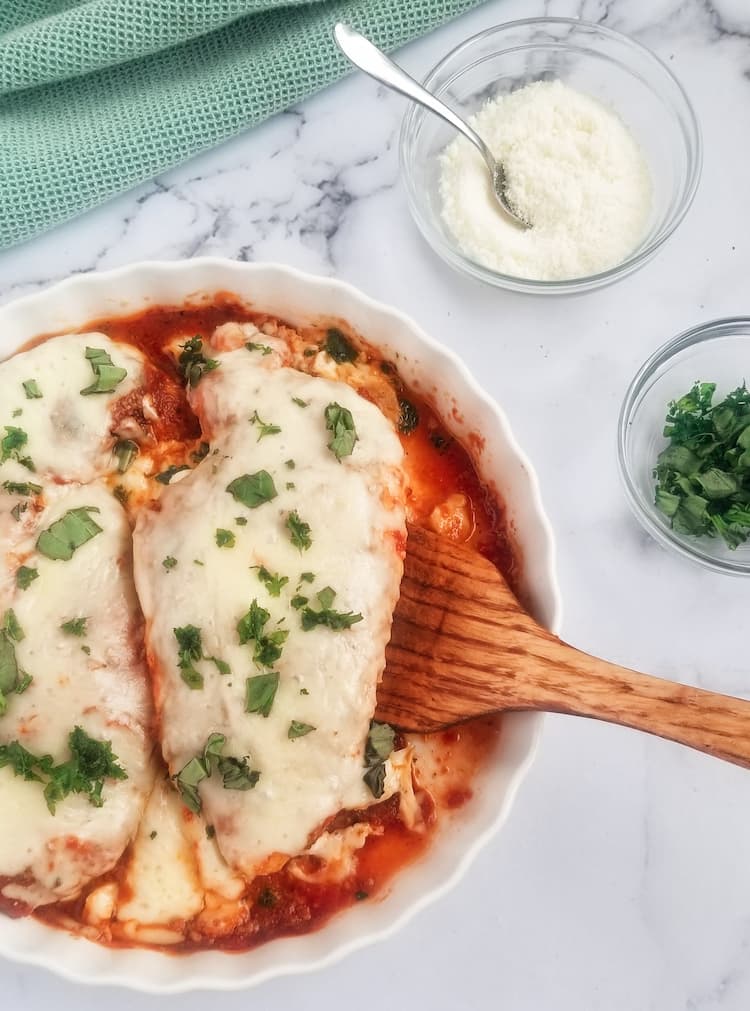
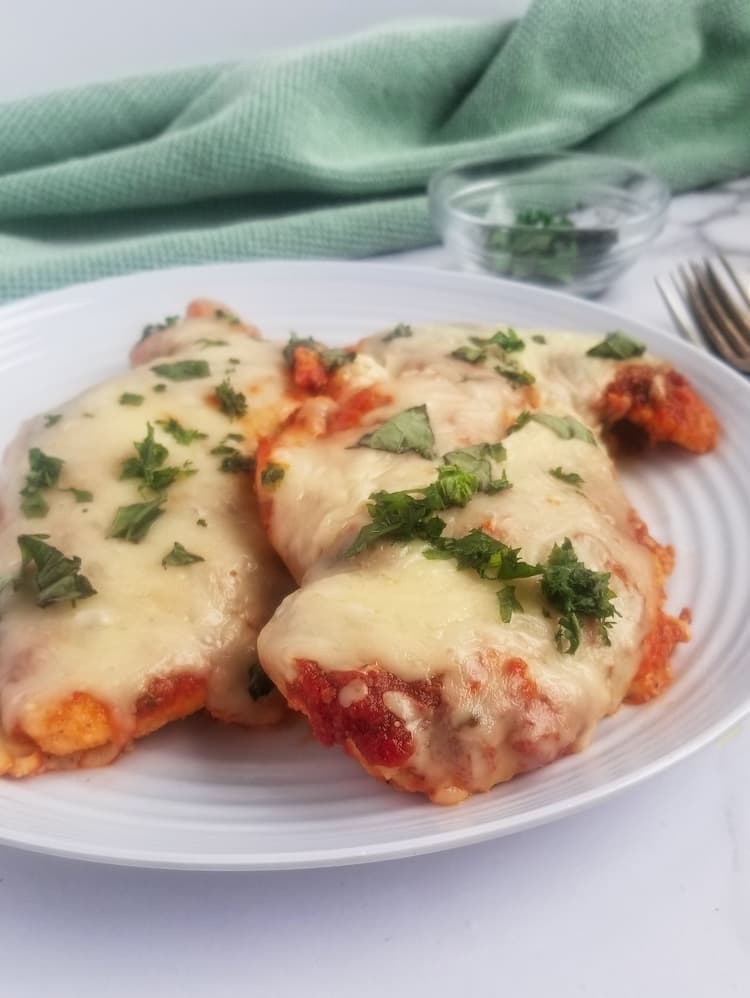
This is the best recipe for Easy Chicken Parmesan and is exactly as good as it sounds. Chicken breasts, parmesan cheese, mozzarella cheese, tomato sauce, and fresh basil are the key components that make up this classic and comforting dish that is always a family favourite.
Ah, we all need a good ol’ reliable recipe for chicken parmesan. Am I right?! I mean, it’s just too loved of a dish to not have a recipe for easy chicken parmesan lying around. This one is exactly that and so much more! It’s fresh, flavourful and easily customizable.
On the keto diet? Use almond flour for the breading instead of regular flour. Prefer gluten free? Take it away with gluten free flour instead. You can use however much tomato sauce and cheese your little heart desires. You can use both mozzarella and parmesan. Or, just one or the other.

See where I’m going with this? This easy chicken parmesan is not complicated. It comes out TASTY AF no matter which way you slice it, trust me.
Being Italian, it was only a matter of time before chicken parmesan or “chicken parmigiana” as we call it at home, found its way to the blog. I mean, there’s absolutely no way something could be covered in tomato sauce, fresh basil, mozzarella, and parmesan cheeses without automatically having a home here. Nonna just wouldn’t allow it.
Enter: this recipe for easy chicken parmesan. It’s a pretty simple dinner (perfect for weeknights), one that everyone loves (you had me at covered in cheese) and really feels like you’re eating a restaurant quality Italian meal at home. Without the hefty price tag, that is.
Although this Recipe for easy chicken parmesan requires a few steps, they require minimal effort but are KEY in Italian cooking. At least in my family they are. We got the breading. We got the frying. And in the case of this easy chicken parmesan, we got the baking.
WHAT YOU’LL NEED TO MAKE THIS RECIPE FOR EASY CHICKEN PARMESAN

Easy chicken parmesan is exactly that….easy! So, minimal, fresh and easy to find ingredients is all it takes to get started. Let’s get into them in a little bit more detail down below:
- Chicken Breast: Breasts weighing between 4-6oz. are best for this recipe. I prefer boneless skinless chicken breasts for this recipe. However, bone-in may be used instead if you prefer. Just note that you will have to adjust the cooking time by a few minutes as bone-in breasts generally take a bit longer to cook. PRO TIP: If you have thicker breasts, use a meat mallet to pound them to thinner, uniform sizes before breading to ensure even cooking.
- Parmesan Cheese: Well, duh. It’s impossible to have a chicken parmesan without this one. Honestly, any kind of parmesan cheese will work well here. You can use freshly grated or pre-grated, your choice.
- Mozzarella Cheese: More cheese = better, am I right? Any dish that uses more than one cheese is an automatic win in my books. This is the cheese responsible for making our chicken parmesan oeey, gooey, super melty and cheesy. PRO TIP: Cover the dish with foil while baking to ensure the cheese doesn’t burn as it cooks. Use toothpicks to prevent the foil from touching the cheese.
- Flour: You can use whatever flour you want to suit your personal needs. This recipe is actually keto because I used almond flour but any flour under the sun should do the trick. Use gluten free, if needed or whole wheat if preferred…it’s totally up to you on this one!
- Egg: Essentially the “glue” for sticking our breading to the chicken breasts. PRO TIP: Let the excess egg drip back into the bowl before pressing the chicken breast into the breading. This will ensure you don’t end up with a clumpy breaded mess!
- Fresh Basil: I just love the taste of fresh basil! I think it automatically deserves a spot in every Italian dish buuuut fresh parsley may be used instead. Hell, you can even use both if you fancy like that.
- The Spices: Italian seasoning, garlic powder, onion powder, salt, and pepper are used to spice up our breading a little bit. Feel free to add more or less or omit altogether if you want to make this recipe for easy chicken parmesan even easier.
- Tomato Sauce: Again, any/your favourite tomato sauce is going to do the trick here. Bonus points for homemade. If you’re following a specific diet, just be mindful of the type of sauce you’re choosing. I.e. If it’s the low FODMAP diet you’re following, make sure the tomato sauce has no onions or garlic and also that you’re using the correct amounts in order for this dish to be considered low FODMAP in the first place. If you’re keto, get a low carb version and watch the added sugars.
KEY TIPS TO MAKING THIS RECIPE FOR EASY CHICKEN PARMESAN
You can find full instructions for how to make this keto chicken parmesan in the recipe card down below, but here are a few quick tips to keep in mind:
- Make sure your chicken breasts are relatively similar in size. 4-6oz. breasts work best in this recipe however, if you only have one larger one on hand, just cut it into two even pieces (split vertically down the middle) before pounding each individual piece out with the meat mallet.
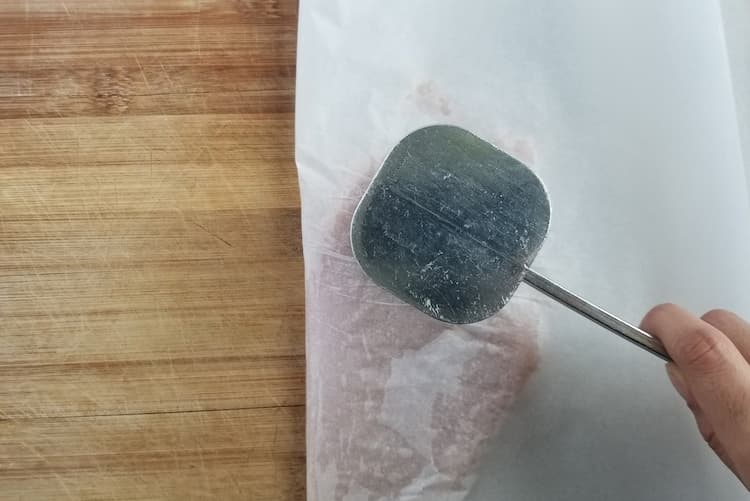
- Place a piece of parchment paper in between the meat mallet and the chicken breast before pounding it out. This will ensure they don’t stick to each other and is generally a more hygenic way of doing things since the mallet never actually comes in contact with the meat and the meat never comes in contact with the counter or cutting board.
- When pounding out the chicken breasts with the meat mallet, be gentle and don’t go overboard. The point is to get the meat thinner (but we still want a nice thickness to it) while maintaining the same thickness all the way throughout.
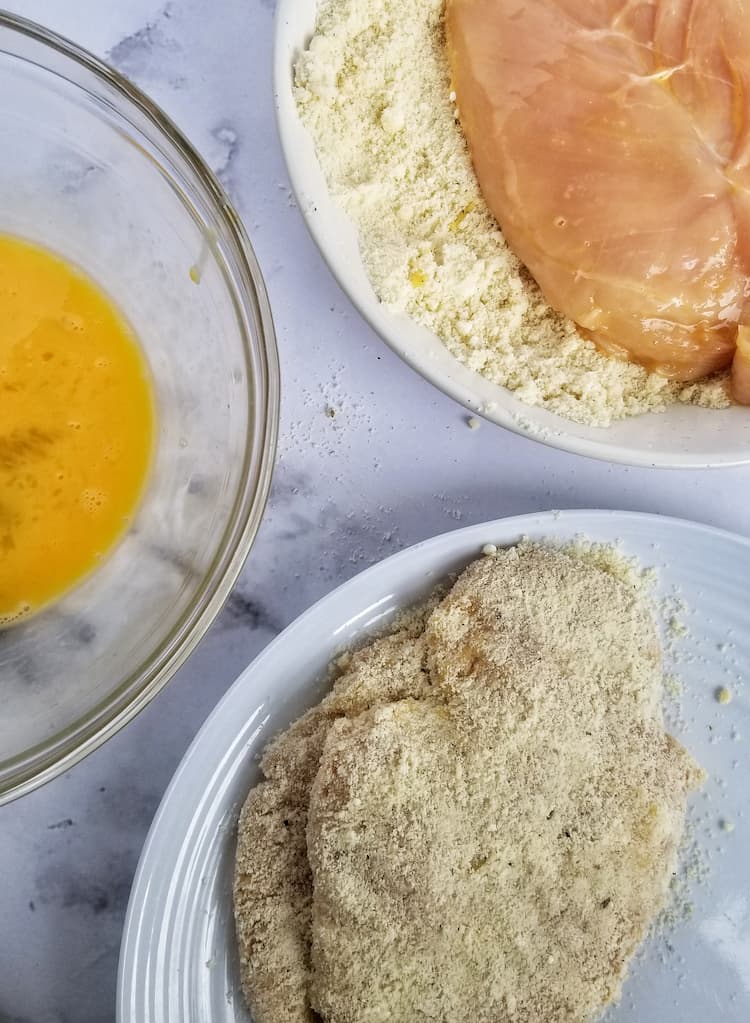
- Set yourself up what I like to refer to as an “assembly line” as this is a fast moving process and once your hands get dirty, you won’t have much luxury to do much else! You want to have a bowl with your beaten egg first. Next to it, goes the plate with your premixed breading and spices. And finally, an empty plate where you can put the breaded/coated breasts prior to cooking. PRO TIP: If you have more than 2 chicken breasts, place a piece of parchment paper in between the layers to avoid the chicken sticking to one another by being directly placed on top of each other.
- When you dip the chicken breasts into the egg mixture, allow the excess to fall back into the bowl before dunking it into the breading mixture. This will ensure you don’t end up with clumpy breading!
- Alternate between hands – Use one to dip (dredge) the chicken breast into the egg mixture and the other, dry hand, to coat it/press it down into the breading.
- When breading the chicken, ensure you get a nice, even, thick-as-you-can coding on all sides. You want to see all breading and no chicken!
- Wash and dry your hands after the breading part and before starting a new dredge for another piece of chicken. This will alleviate the stickiness and stop the mixture from caking up too much on your fingers (which, by the way, is completely unavoidable).
- Allow the coated chicken breasts to rest about 10-15 minutes before cooking. This ensures the breading adheres to the chicken and doesn’t fall off when frying.
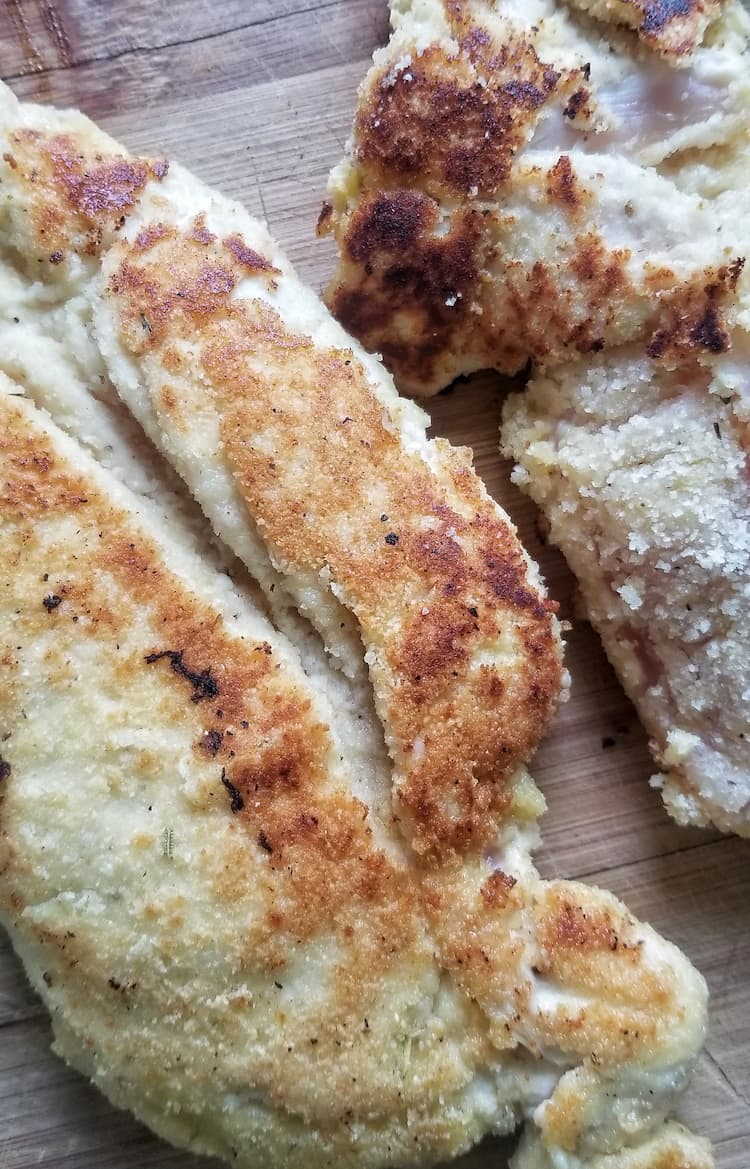
- When frying the chicken, we’re only going for a shallow pan fry a few minutes per side in order to develop a nice, golden crust. The oven will do the remainder of the cooking as the chicken bakes.
- When ready to bake, cover the dish loosely with aluminum foil to ensure the cheese doesn’t burn while baking. PRO TIP: Place a toothpick in the center of each chicken breast (sticking out…so not too deep) so when you put the piece of aluminum foil on top, it’s not right up against/doesn’t stick to the cheese. Thanks to my mama for that lifelong tip 😉


FREQUENTLY ASKED QUESTIONS
To bread chicken, I find it best when you set up a sort of “assembly line” meaning have all your dishes in line and ready to go! In the case of this chicken parmesan, we only need three “stations” as part of our assembly line. The first being a bowl with a beaten egg. The second is a larger bowl with our breadcrumb/coating mixture which contains flour, parmesan cheese and spices. And finally, an empty plate to put all the coated chicken breasts prior to cooking.
The obvious Italian answer is none other than Pasta! Try my family’s famous pasta sarde recipe, pasta with cauliflower and bacon or this vegetable and cream cheese spaghetti bake. Homemade garlic bread is also key for soaking up the delicious sauce or a tossed side salad or spaghetti squash to keep things keto/low carb and light.
This easy chicken parmesan will be good in the fridge in an airtight container for up to 5 days. Simply reheat in the oven or microwave when ready to eat again.

MORE ITALIAN FOOD FAVS
ITALIAN STYLE RICE BALLS (ARANCINI)
MOM’S FAMOUS MINI ITALIAN MEATBALLS
PESTO ROSSO (SUN-DRIED TOMATO PESTO)
EASY CHICKEN AND BOCCONCINI SKILLET
LOVE THIS RECIPE? PIN IT FOR LATER!

BEST RECIPE FOR CHICKEN PARMESAN
Video
Ingredients
- 2 Boneless, Skinless Chicken Breasts (pounded thin with a meat mallet)
- ½ cup Flour*
- ¼ cup (+1 Tbsp for topping) Parmesan Cheese (freshly grated)
- 1 cup Mozzarella Cheese
- ½ cup Tomato Sauce*
- 1 Egg
- ¼ tsp Italian Seasoning
- ¼ tsp Garlic Powder
- ¼ tsp Onion Powder
- Fresh Basil or Parsley (chopped, for garnish)
- Salt and Pepper (to taste)
- 1 tbsp Extra Virgin Olive Oil
Instructions
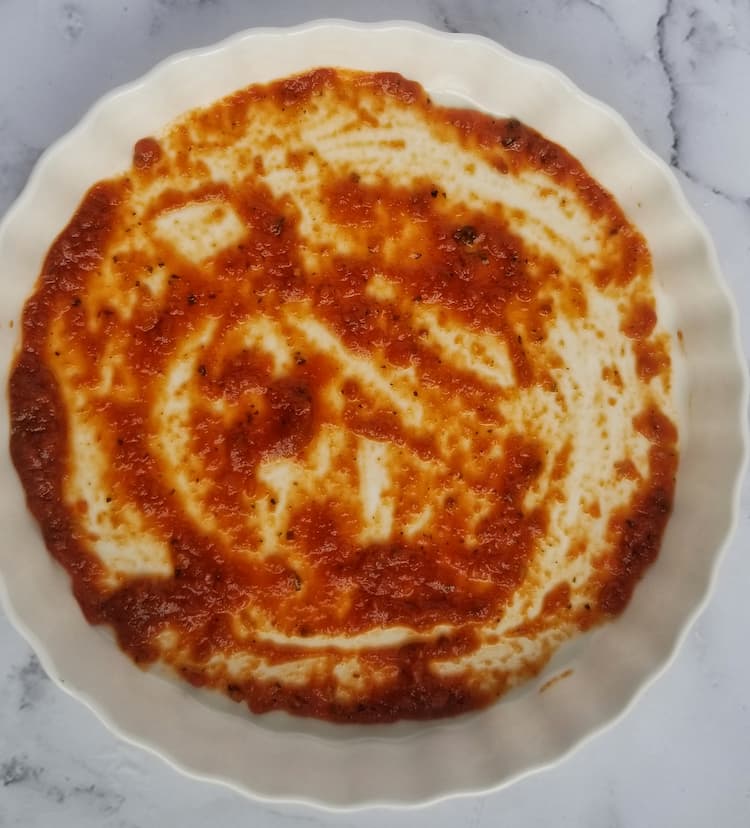
- Preheat the oven to 400°F. Lightly brush an even thin layer of tomato sauce into the bottom of a baking dish and set aside.

- Pat the chicken breasts dry with paper towel then place individually on a piece of parchment paper on a stable, level surface. Pound the chicken, firmly but also gently, with a meat mallet until a desired consistent thickness is achieved. 1/2 inch thickness works great here.

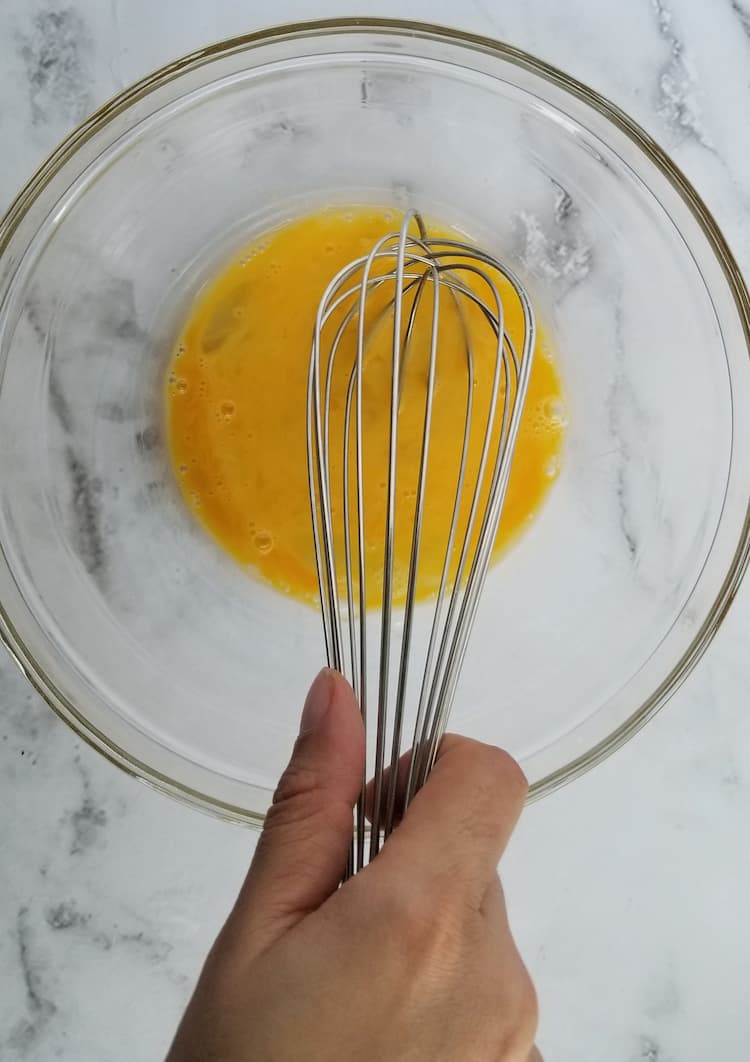
- Whisk the egg in a shallow bowl and set aside.

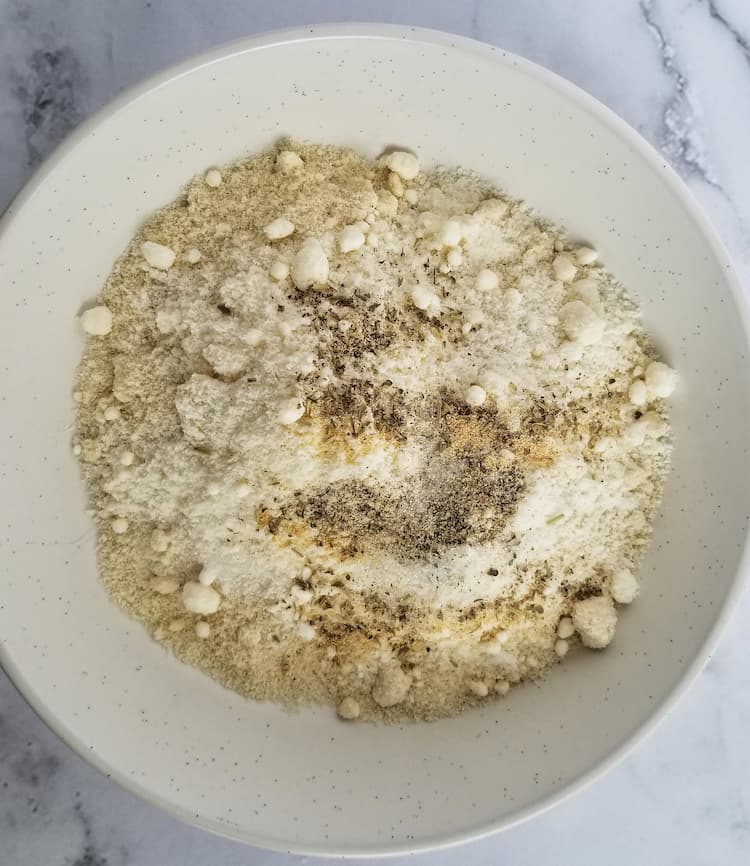
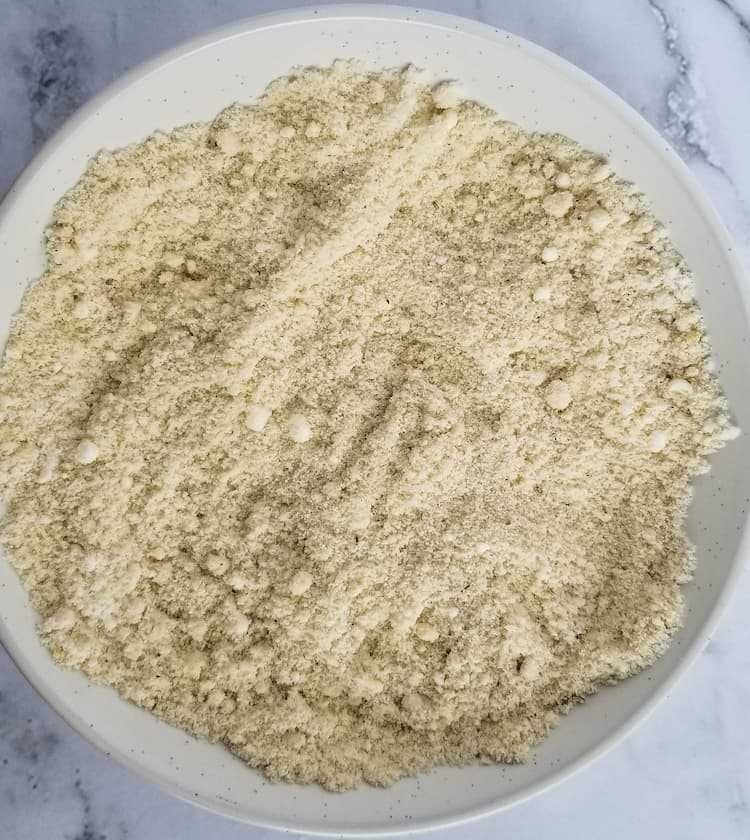
- Add flour, 1/4 cup parmesan cheese, italian seasoning, garlic powder, onion powder, salt, and pepper to a separate larger bowl.

- Mix until well combined.

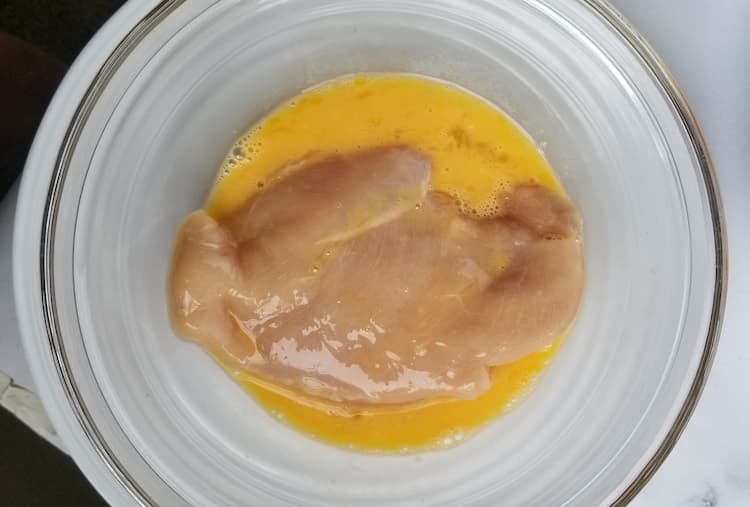
- Working individually, take a chicken breast and dip it into the egg mixture, rotating to evenly coat. Use only one hand for this so the other remains dry. TIP:Ensure you let the excess egg drip back into the bowl before moving on to the next step.

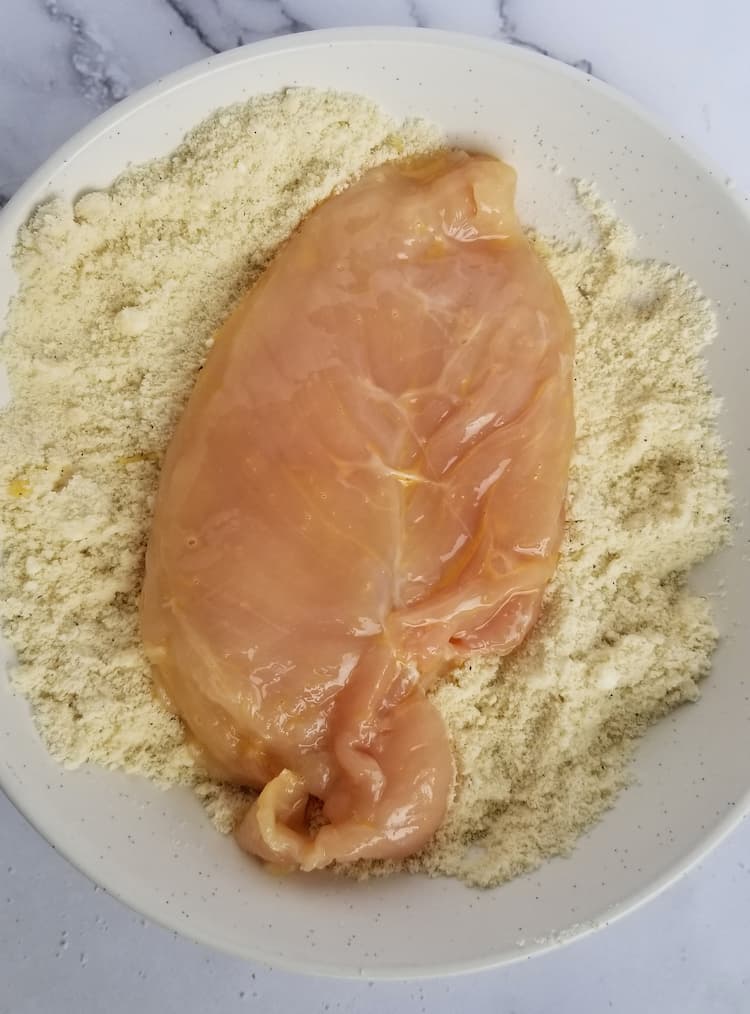
- Take the wet chicken breast and place it in the bowl of the flour mixture.

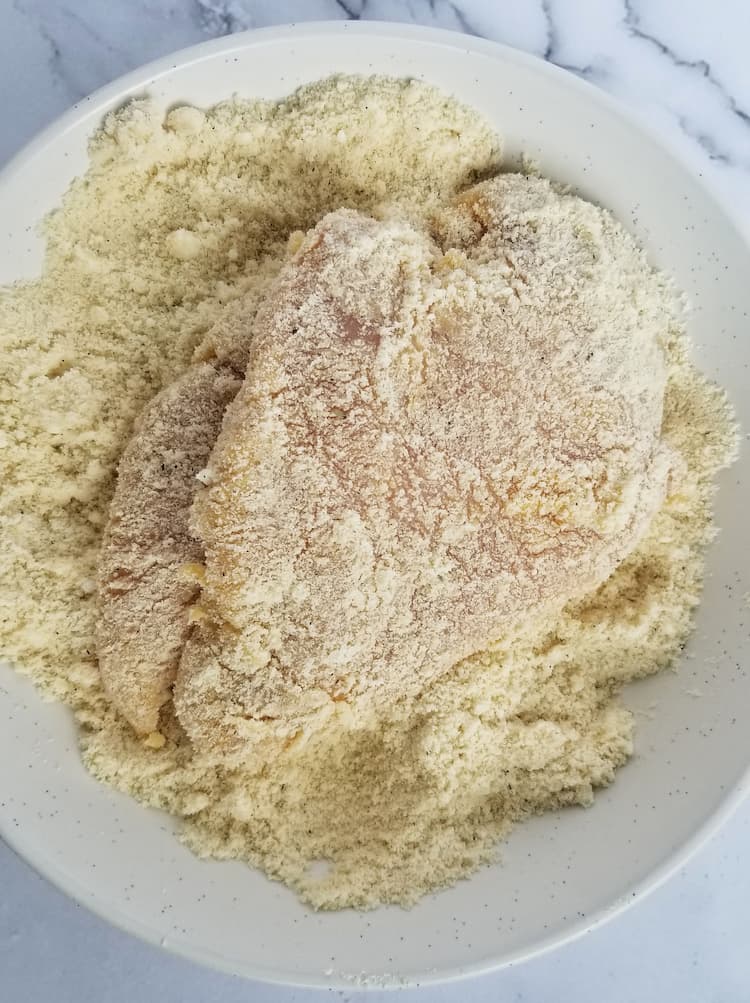
- Using your dry hand, cover the chicken breast evenly with the mixture and press it down to ensure all sides are nicely coated.

- Repeat for each chicken breast allowing the others to rest on a plate. TIP: Allow all the chicken to rest 10-15 minutes before cooking to ensure the breading adheres to the chicken.

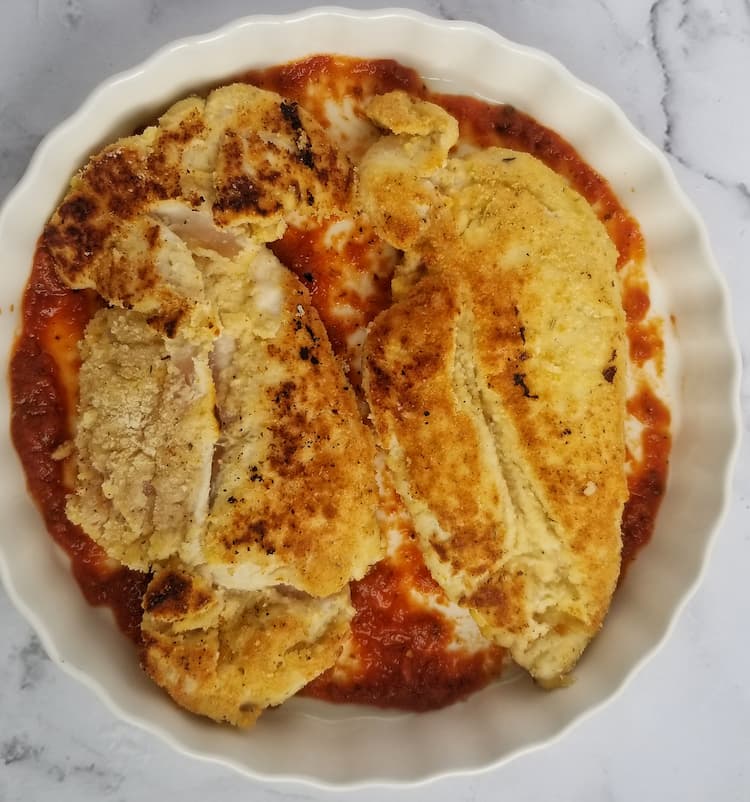
- Heat the olive oil in a non stick skillet oven medium heat. Once hot, add the chicken breasts (working in batches, if needed) and lightly fry, a few minutes per side, or until a light golden brown crust forms. The chicken won't be cooked all the way through here but don't worry, that's what the oven is for!

- Transfer the chicken to the prepared baking dish.

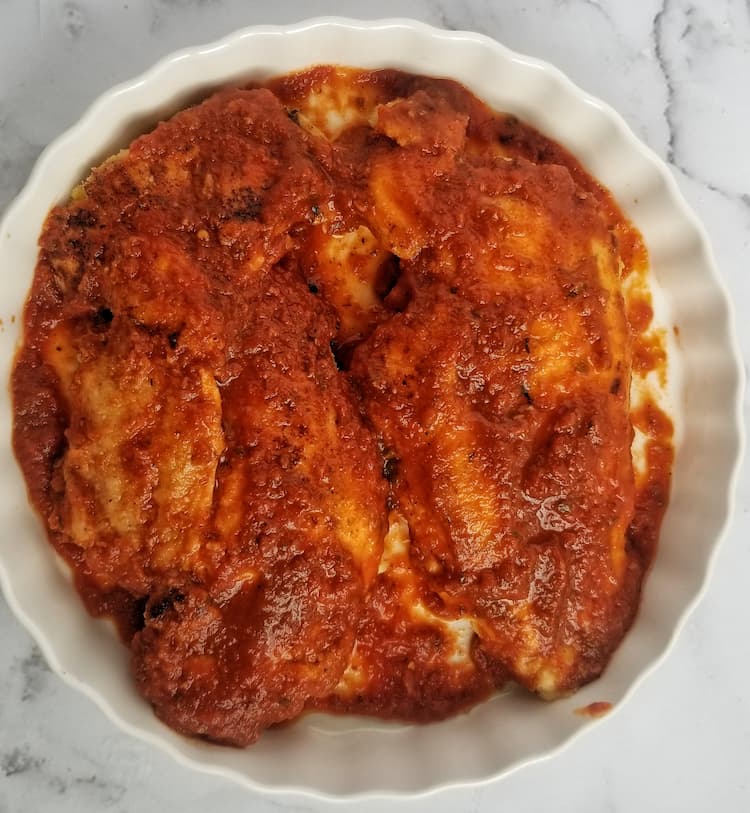
- Evenly spoon the remainder of the tomato sauce onto the sides and top of the chicken.

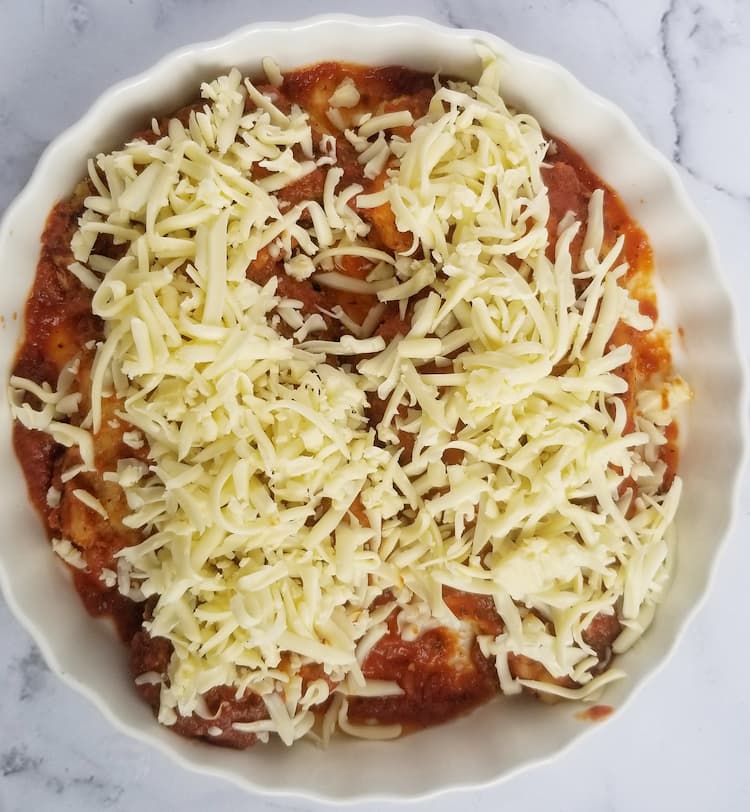
- Evenly divide the shredded mozzarella cheese over the chicken breasts and sprinkle with the extra tbsp of Parmesan Cheese.

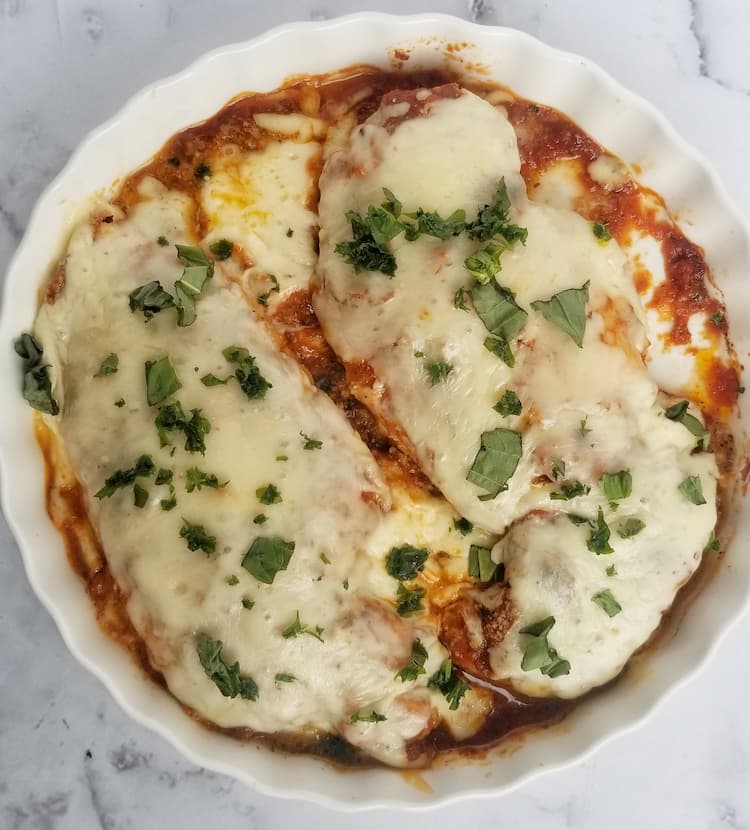
- Cover with aluminum foil (place a toothpick sticking out of each breast to avoid the cheese and foil touching) and bake for 25-30 minutes, until the cheese is bubbly and the centers of the chicken cooked through. An instant read thermometer inserted into the center should read at least 165°F.

Notes
Nutrition
Don’t skip the good stuff —
scroll up above the recipe card for ingredient notes, tips & tricks, and easy swaps/variations.Made it? Tell me everything.
I LOVE seeing what you made! Tag @hiphipgourmet on Instagram (or use #hiphipgourmet) so I can see it — then rate it + upload your photo below. 💖
The links in this post are affiliate links. Thanks for supporting HipHipGourmet!