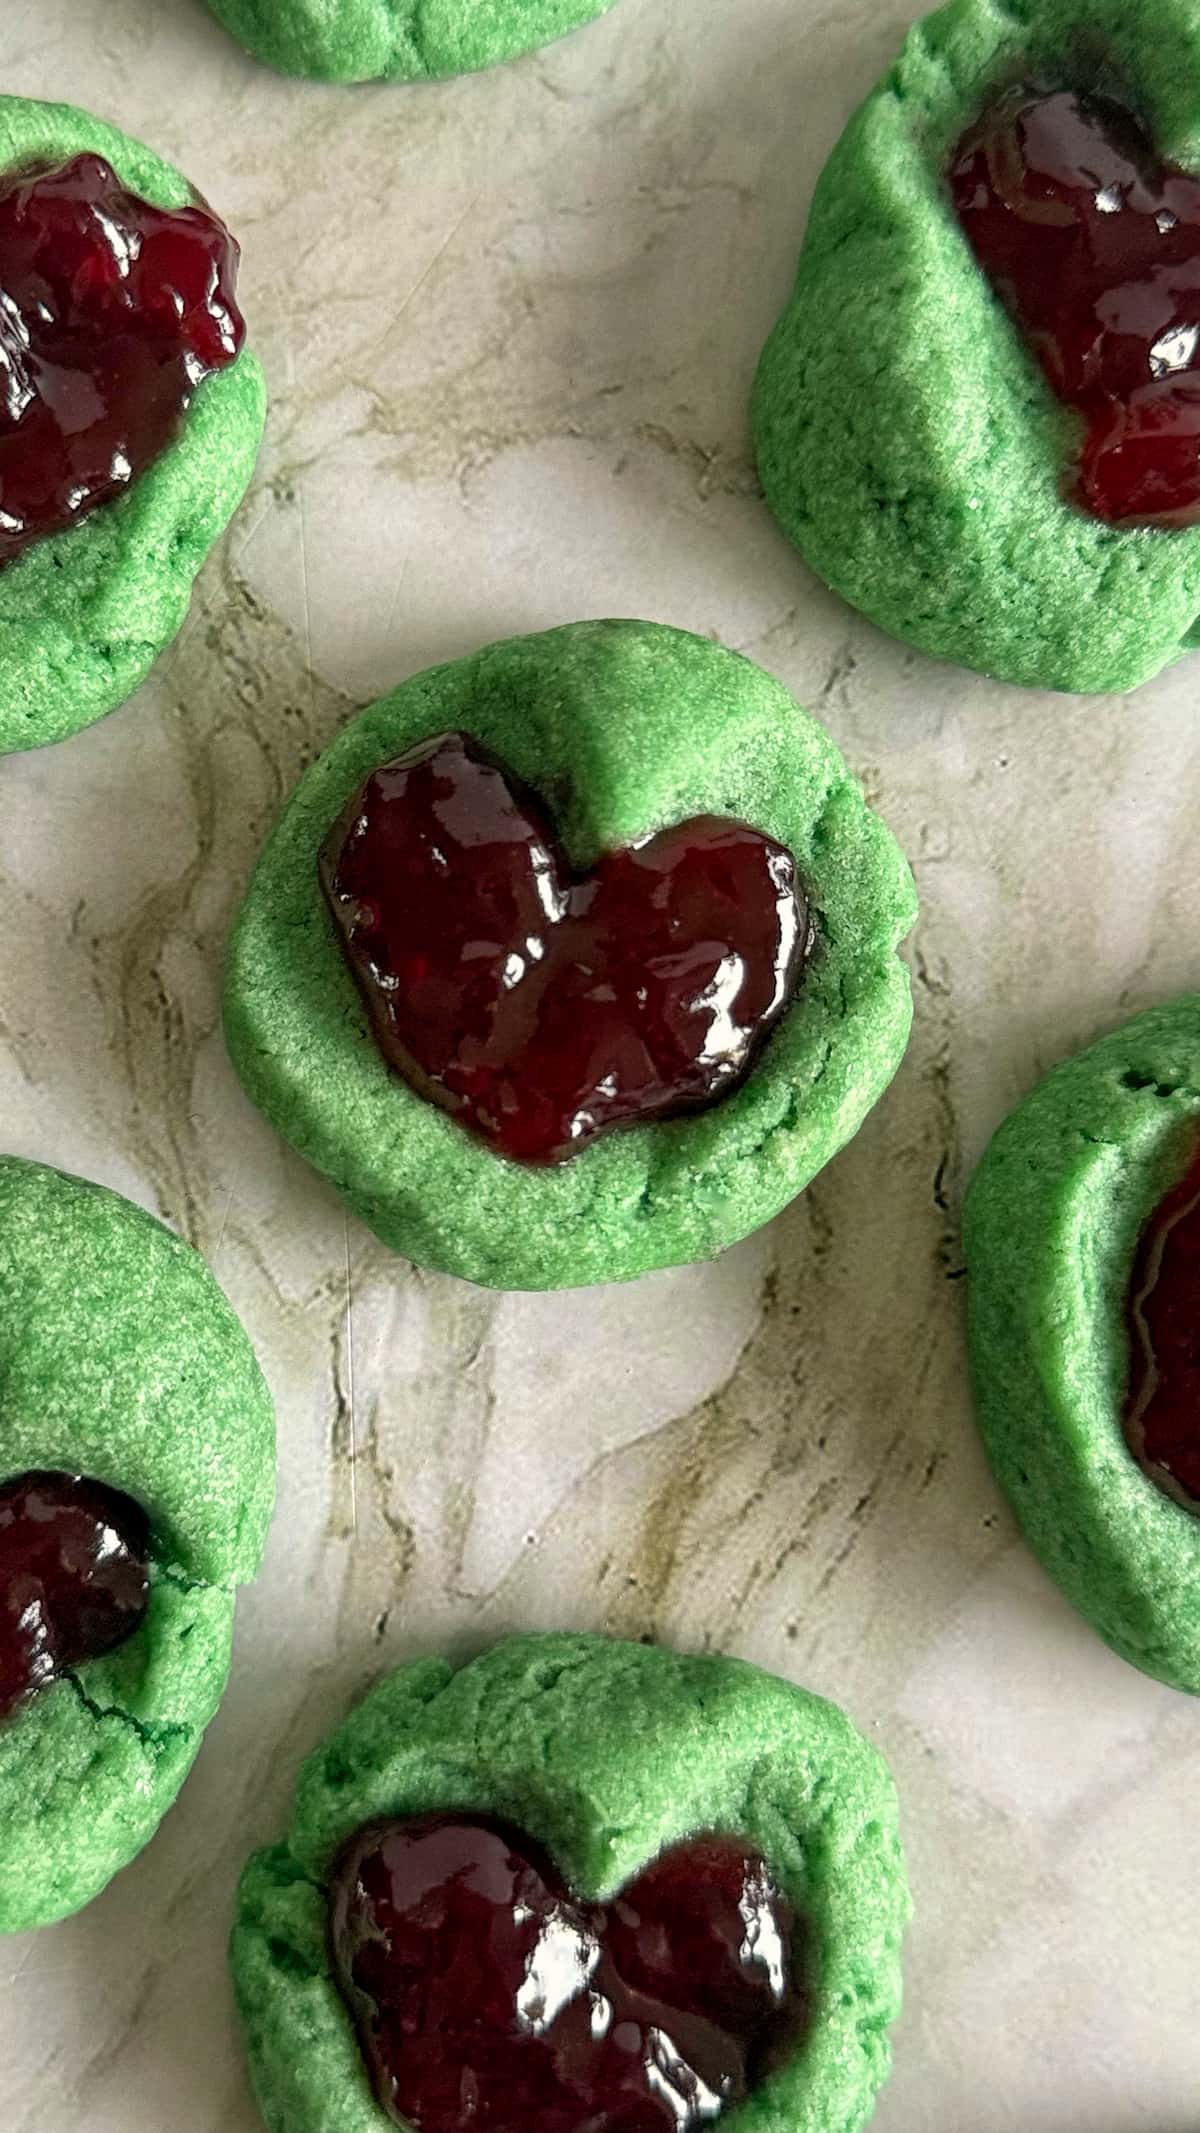
There’s something about Grinch Thumbprint Cookies that just makes the whole kitchen feel a little more… mischievous in the best Christmas way. And yes, they really do make your heart grow three sizes.
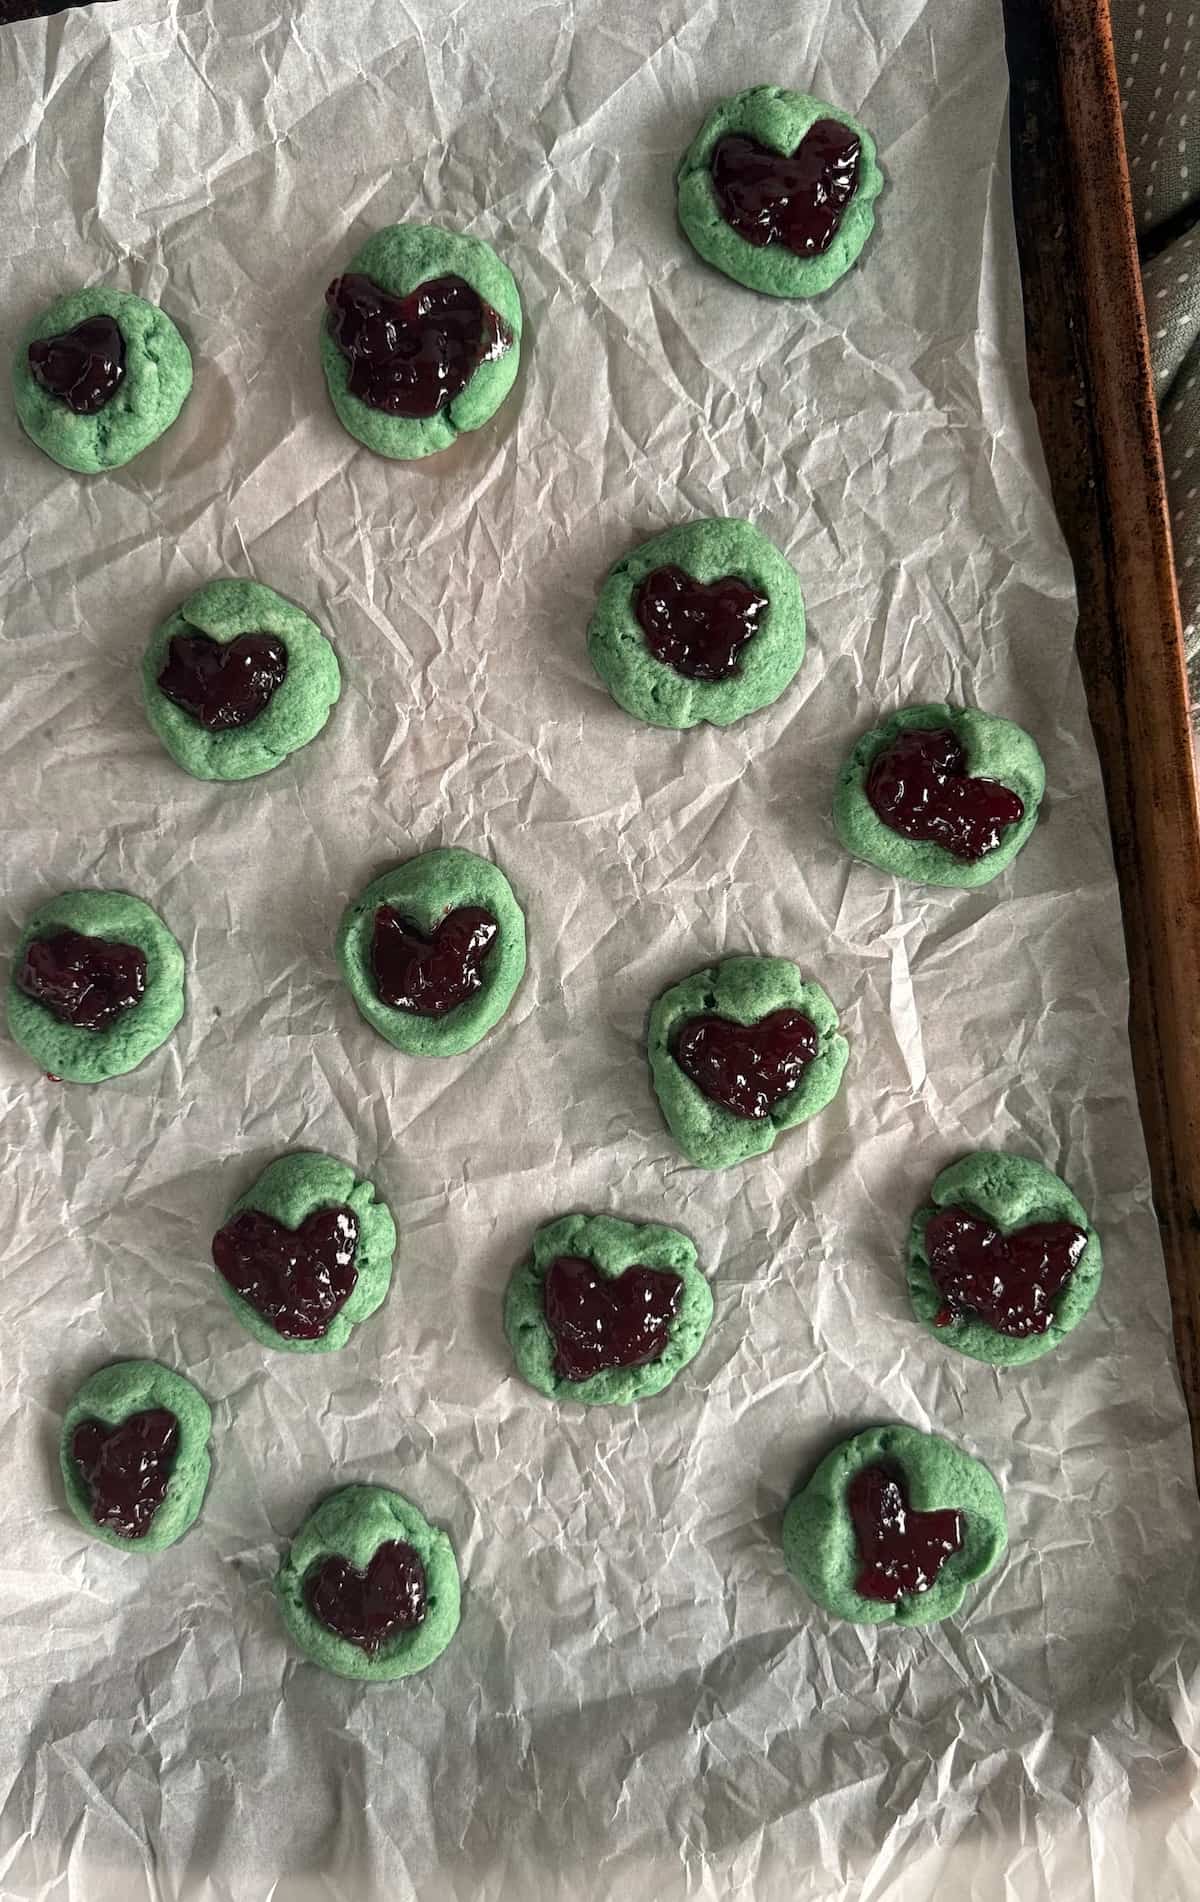
These Grinch thumbprint cookies are soft and buttery with that classic tender bite that makes thumbprints so lovable. The green dough keeps things fun and festive and the bright red jam settles right into the center like it was meant to be there. They look cheerful on the cooling rack and even better on a cookie plate which is probably why they disappear faster than expected.
Whether you serve these up with a cozy London Fog or a warm turmeric latte, they just hit right on a winter afternoon. They’re also great with a glass of classic homemade eggnog, especially if you’re leaning into the full holiday moment. However you pair them, these cookies add something playful to the table without asking for much in return.
If you’re into all things Grinch, make sure to check out my Grinch crinkle cookies too — they’re just as festive and just as fun.
Why You’ll Love These Grinch Thumbprint Cookies
- They bake up soft, tender, and thick — the kind of texture that makes you slow down for the second bite.
- You get that perfect sweet-tart pop of jam right in the center, which balances the buttery cookie like magic.
- The colour alone is a showstopper. They brighten any cookie tray without trying too hard.
- They come together fast. No complicated steps, no fuss, just a solid holiday bake that works every single time.
- Kid-approved, grown-up-approved, cookie-box-approved. They’re festive in a way that feels fun, not fussy.
What You’ll Need to Make These Heart Jam Cookies

Before we jump into the measuring, here’s the good news. This ingredient list is as classic as it gets — nothing fussy, nothing hard to find, just everyday pantry staples that turn into something cute and festive with almost no effort. Here’s what you’ll need to make these green thumbprint cookies in a little bit more detail:
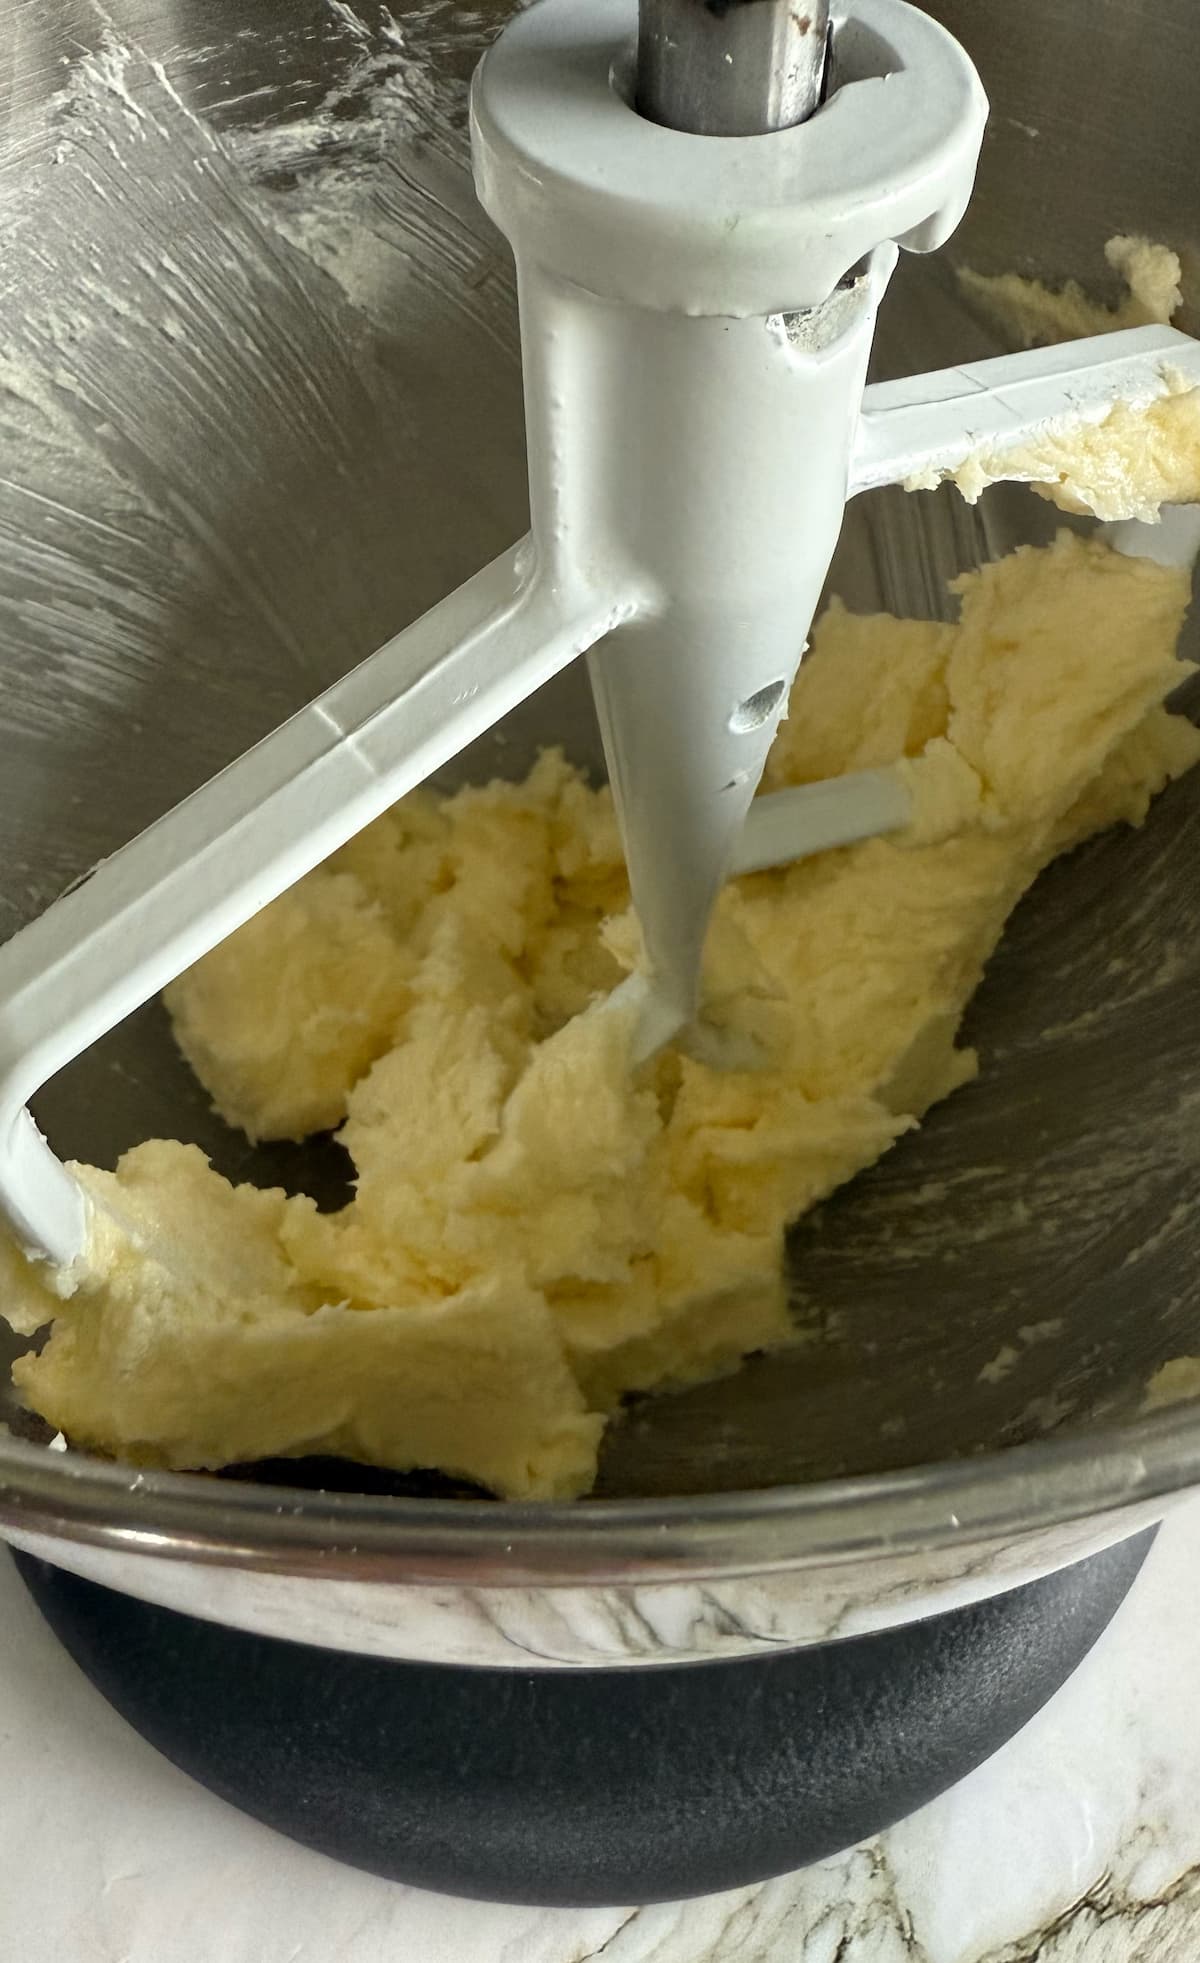
- Butter: Softened butter is the base of any good thumbprint. It gives you that tender melt as soon as you take a bite. Make sure it’s soft enough to press a finger into but not melty.
- Granulated Sugar: Keeps the cookie sweet without weighing it down. It also helps the edges stay soft instead of crumbly.
- Egg: Just one does the job. It binds everything and gives the dough a smooth, scoopable texture.
- Vanilla Extract: Adds warmth and that cozy holiday aroma we all want in a Christmas cookie.
- Almond Extract (optional, but highly recommended): A tiny splash makes them taste bakery-level. It’s subtle but it makes a difference.
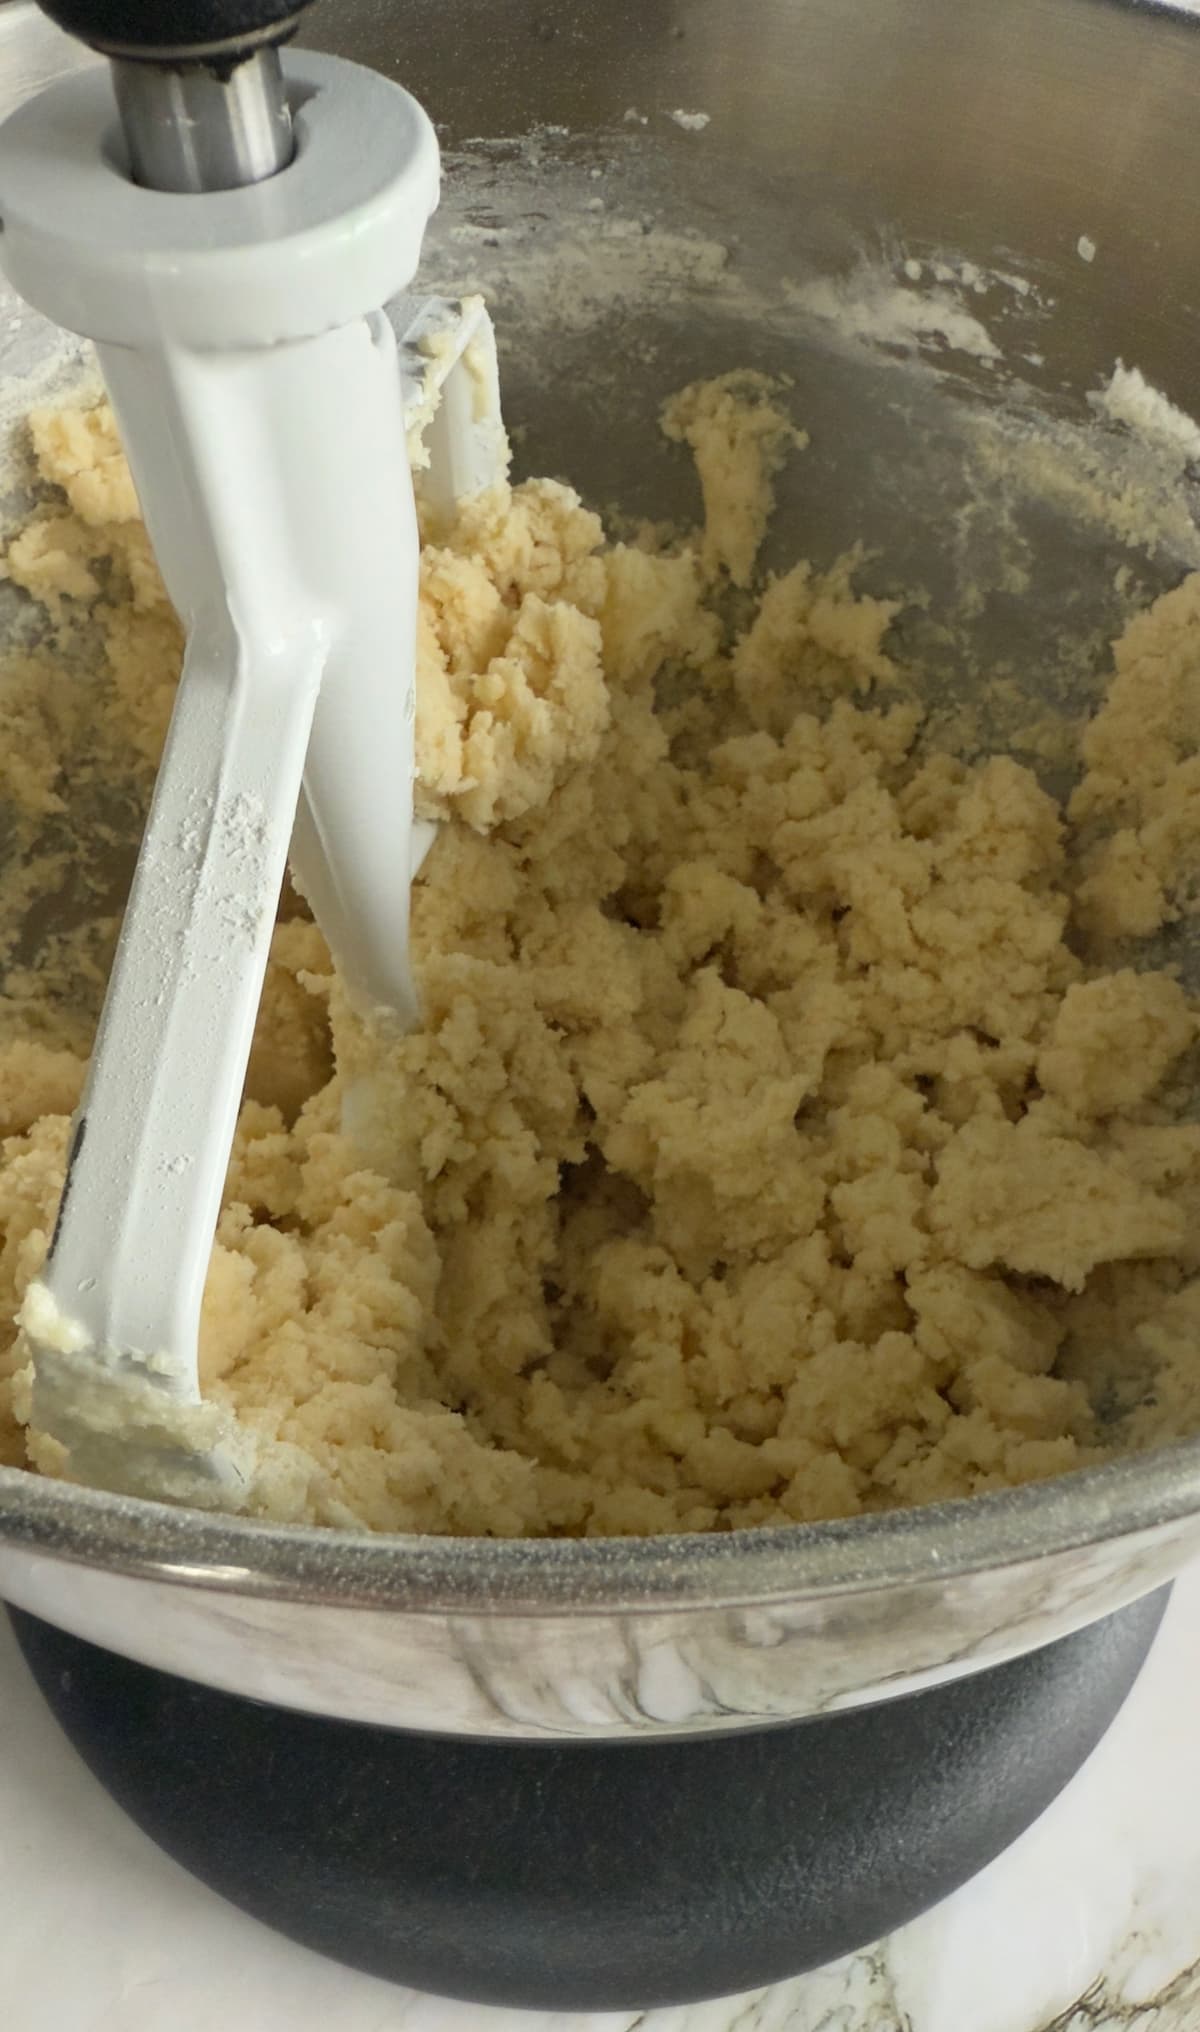
- All-Purpose Flour: The structure of the cookie. Nothing fancy needed here.
- Salt: Just a pinch to balance the sweetness and brighten the flavours.
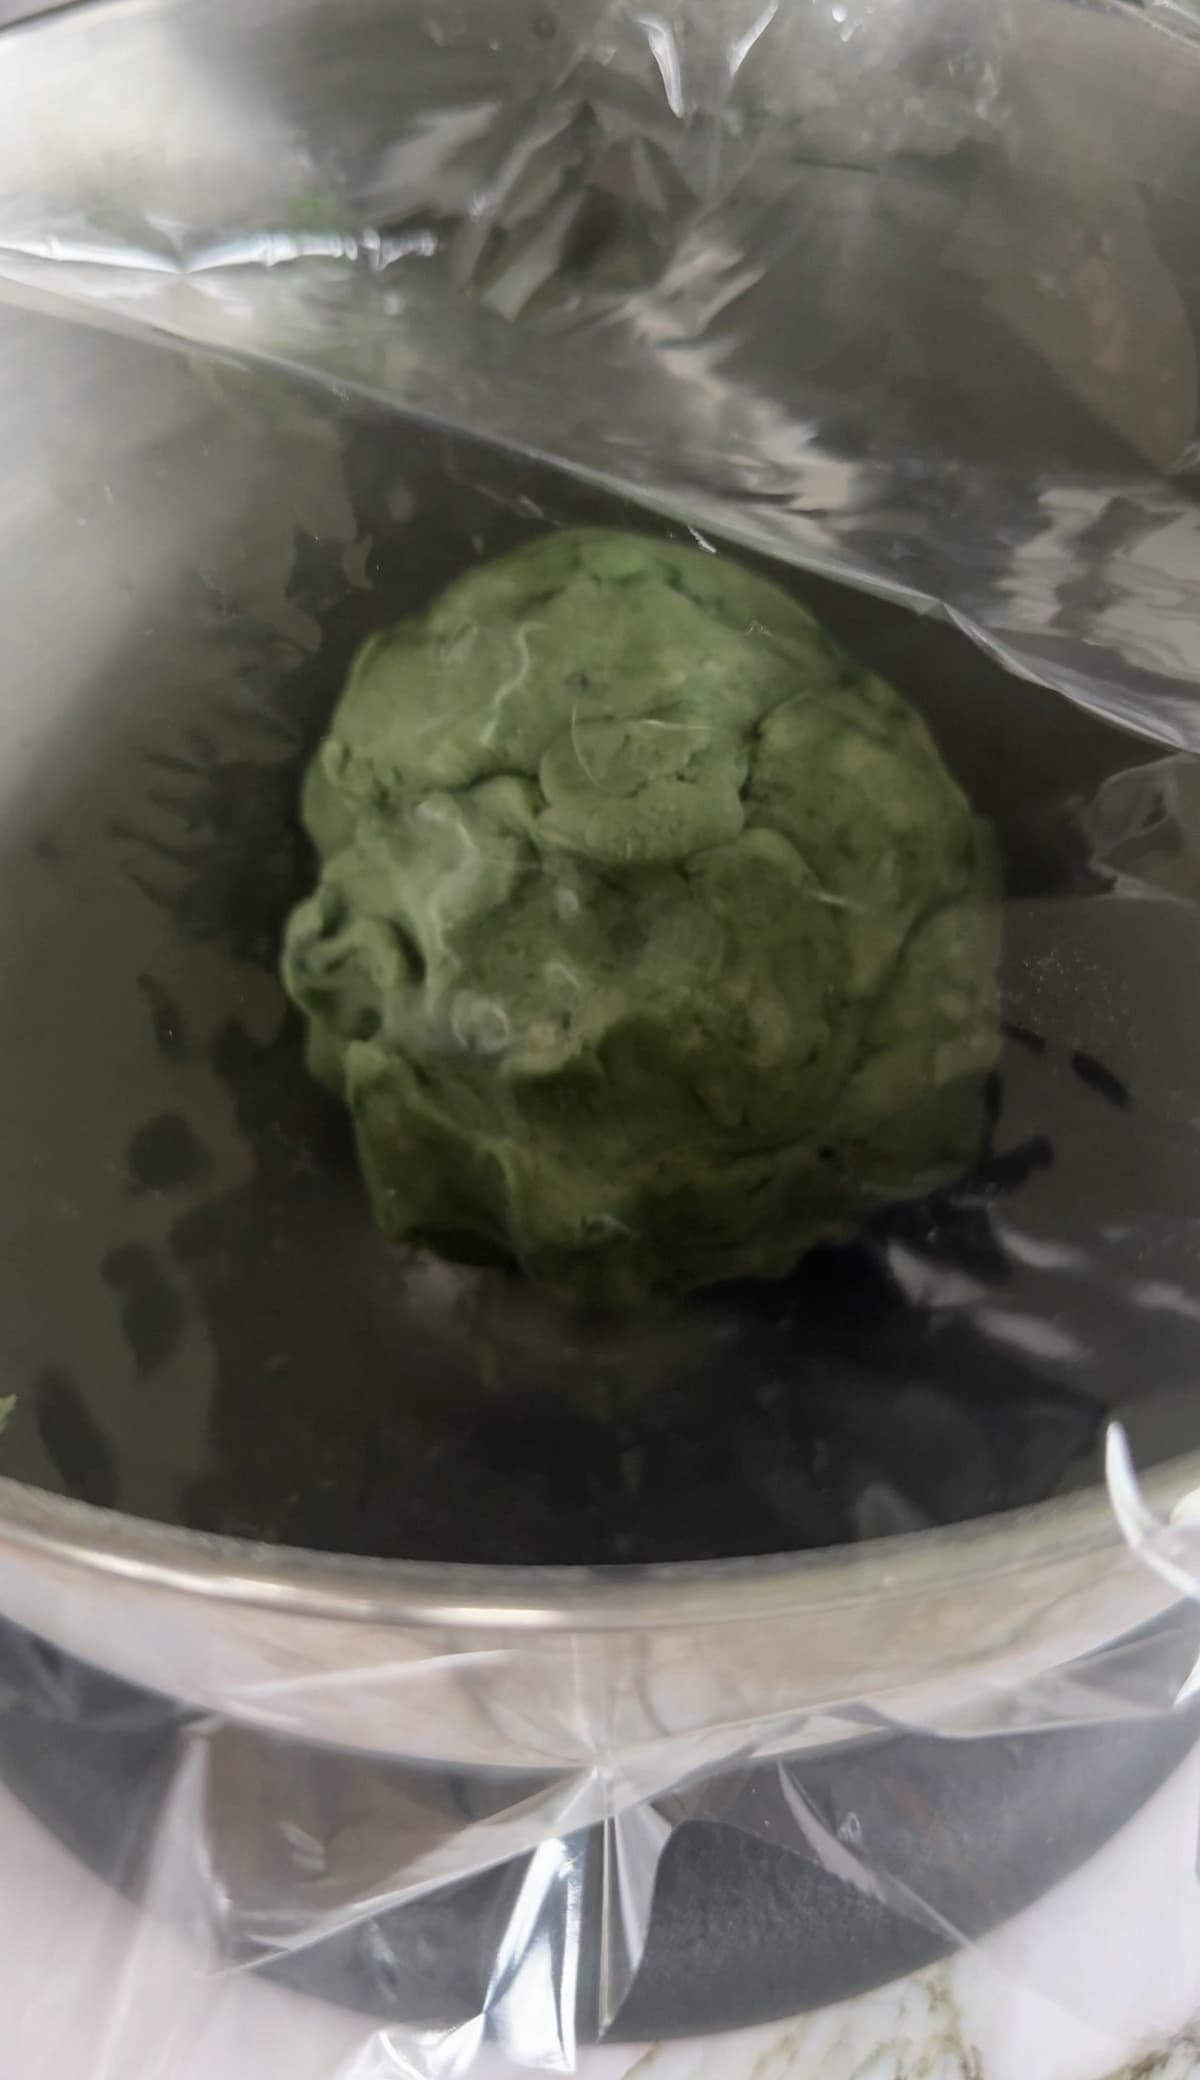
- Green Gel Food Colouring: Gel is the way to go. You get that bright Grinchy green without watering down the dough.
- Seedless (Raspberry or Strawberry) Jam: This is your heart center. Raspberry is slightly tart and gives a gorgeous red colour. Strawberry works too and tastes a little sweeter.
- Red Food Colouring (optional): Just a tiny drop or two brightens the jam if you want that vivid, glossy heart you see in the photos. Totally optional, but helpful if your jam looks a little dull.

Key Tips for Perfect Christmas Thumbprint Cookies

You can find full instructions for how to make these Grinch thumbprint cookies in the recipe card down below, but here are a few quick tips to keep in mind:
- Soften the butter just right. You want butter that dents easily but isn’t shiny or starting to melt. Too soft and the cookies spread. Too firm and the dough won’t come together smoothly.
- Cream the butter and sugar fully. This step sets the texture. Give it a good minute or two so the mixture looks fluffy. It gives you that tender, melt-in-your-mouth bite.
- Don’t overmix once the flour goes in. Mix until the streaks disappear and stop. Overmixing makes thumbprints tough instead of soft.
- Chill the dough. A short chill helps the cookies hold their shape and keeps the green colour vibrant. Thirty minutes is perfect.
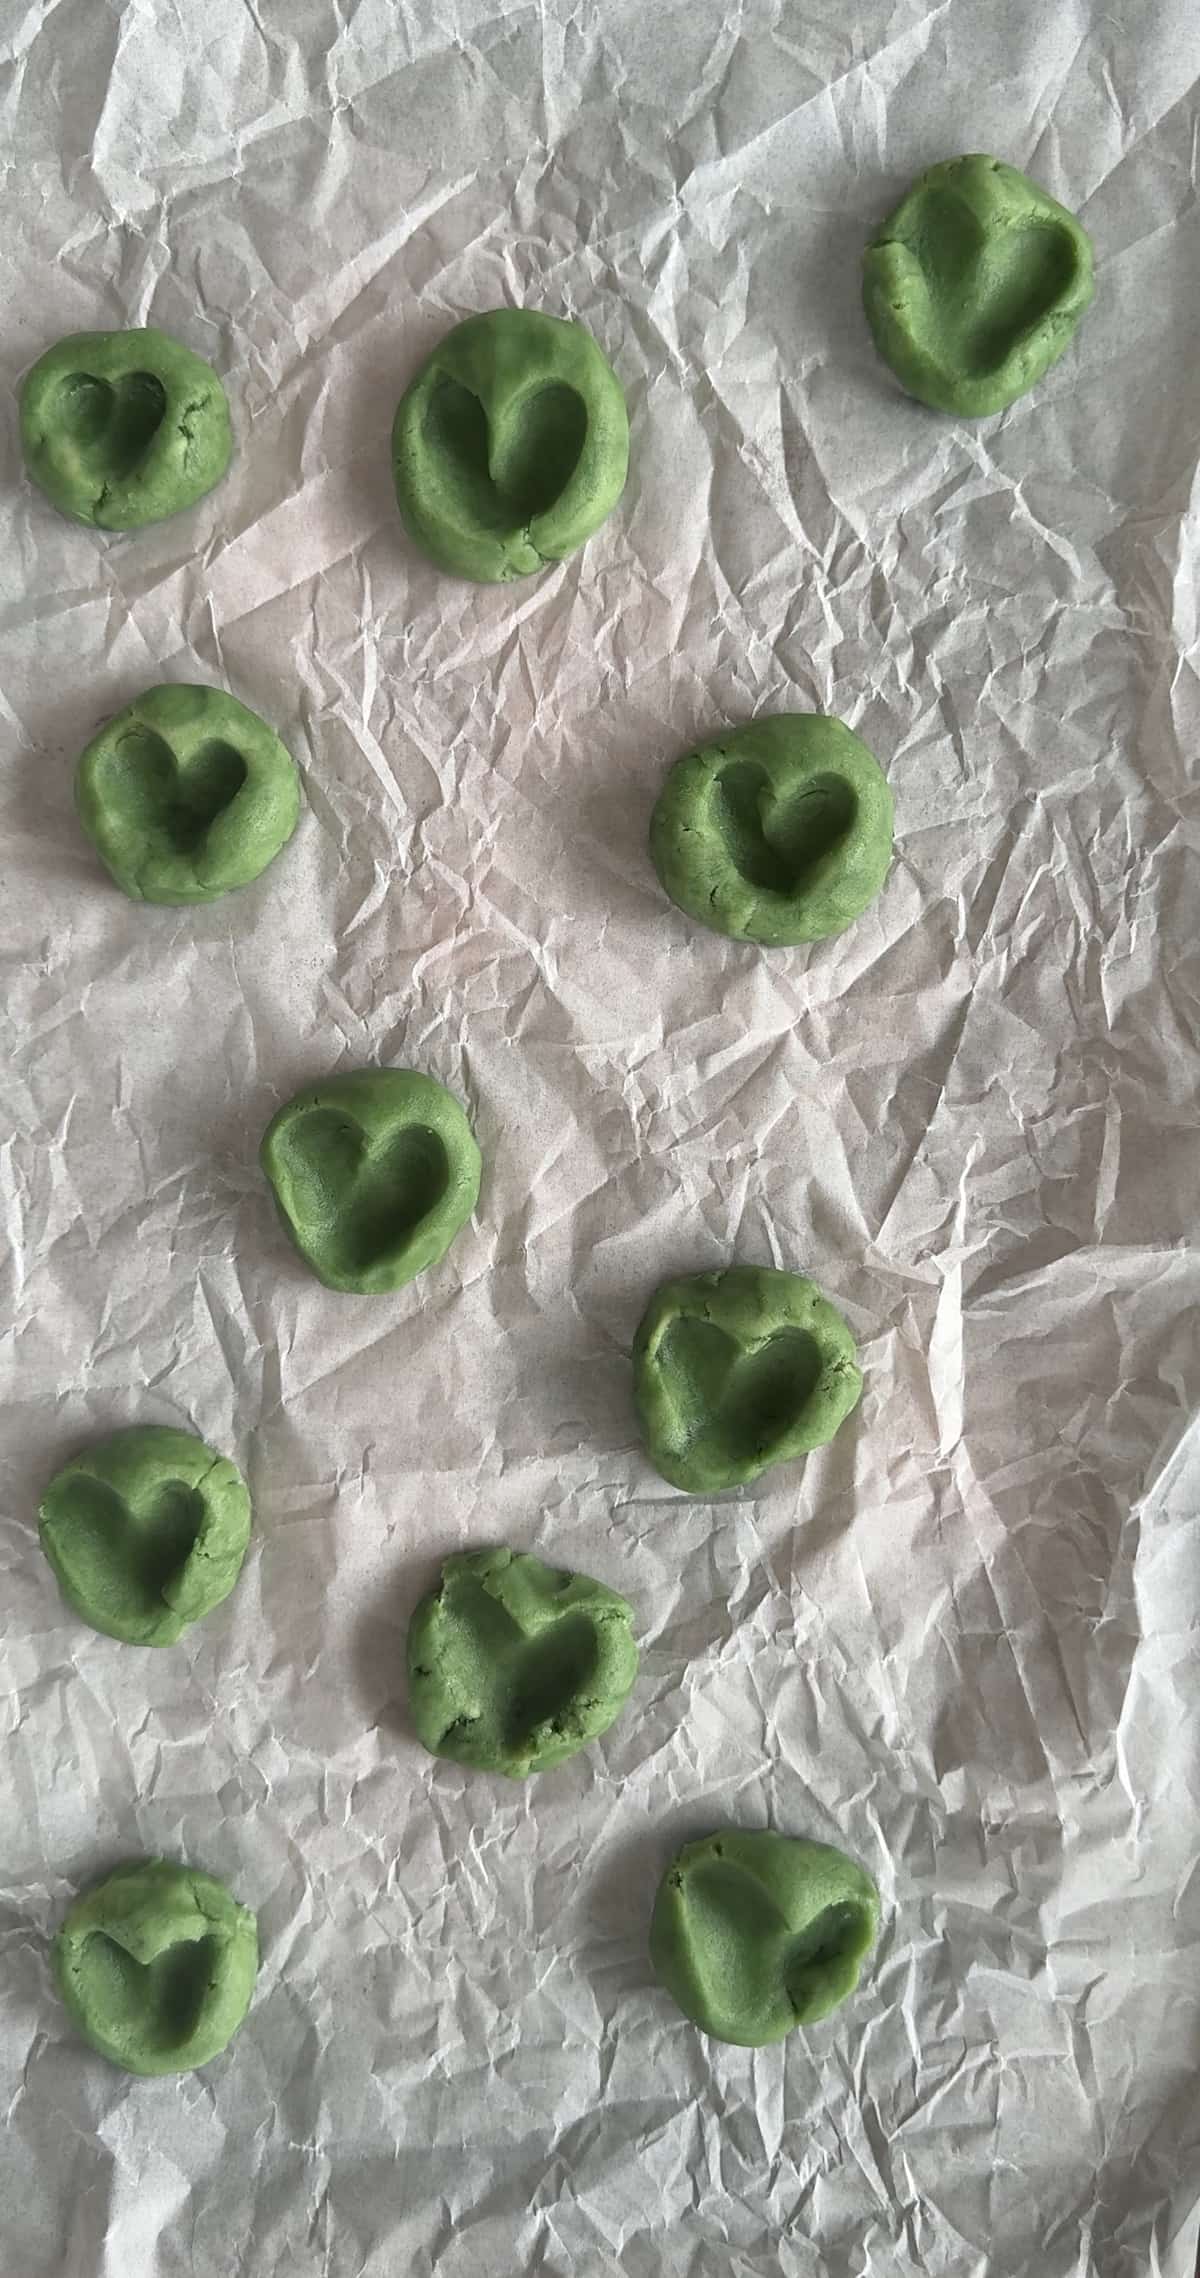
- Make a clear indentation. Use your thumb, the back of a round measuring spoon, or the end of a small silicone spatula. Press gently so the indent is deep enough to hold jam but doesn’t crack the edges.
- Warm the jam slightly. Ten seconds in the microwave makes it easier to spoon into each center. It also settles into a smoother heart once the cookie cools.
- Add the heart while the cookies are warm. If you’re using a candy heart or sprinkle, press it in while the tops are soft. If you’re sticking with jam only, let it cool completely so the colour sets.
- Optional: Brighten the jam. If you want that extra-vibrant red you see in the photos, a tiny drop of red food colouring does the trick. Totally optional, but a nice little pro move.

How to Store, Freeze, and Make These Thumbprints Ahead
These cookies are easy to keep fresh, and they hold up beautifully if you’re planning ahead for a party or cookie box.
Storing
Keep your thumbprint cookies in an airtight container at room temperature for 3–4 days. The jam helps them stay soft, and the flavour actually settles in a bit after the first day. If you need them to last longer, move the container to the fridge and let the cookies come back to room temp before serving.
Freezing
These freeze really well. Place the baked cookies in a single layer on a sheet pan and freeze until firm, then stack them gently in a container with parchment between the layers. They’ll stay fresh for about a month. Thaw them on the counter and they taste just as soft as the day you made them.
You can also freeze the dough hearts (unfilled) for about a month. Freeze on a sheet pan first, then store in a bag. Bake from frozen and add an extra minute or two.
Make-Ahead
You can prep the dough a day or two in advance. Keep it wrapped tightly in plastic in the fridge, then let it sit out for a couple of minutes before scooping so it’s easier to work with. If you’re baking in stages for a cookie box, these are one of the best cookies to slot in early because they hold their texture so well.
Fun Variations to Try
If you love playing around with holiday cookies, these thumbprints are an easy canvas for a few fun twists. These variations also work for any Christmas thumbprint cookie, so feel free to mix and match depending on your cookie plate.
- Roll them in green or red sugar or Christmas sprinkles: For a more playful look, roll the dough balls in coloured sugar or Christmas sprinkles before baking. You get a little crunch on the outside and a pop of colour around the edges.
- Use candy melts for the center: If you’re not a jam person, melt a few green candy melts and spoon a tiny amount into each indentation. It sets smooth and glossy and gives you a totally different texture.
- Swap the jam flavour: Raspberry and strawberry both give that perfect red heart, but you can use anything seedless and bright. Cherry jam adds a deeper red and a little tartness.
- Add a candy heart: Instead of relying only on jam, press a small red candy heart or sprinkle into the center while the cookies are still warm. It holds its shape and stays vibrant.
- Make them extra Grinchy: Go a shade darker or lighter with the green food colouring to match the Grinch vibe you like. Pale minty green or bold neon both work — they just give you different moods.


Frequently Asked Questions
Most thumbprints are filled with jam, and this recipe uses raspberry or strawberry for that bright red center. You can use any smooth, seedless jam you like, or even a small candy heart if you want a firmer center.
Thumbprint cookies can go either way, but for these, it works best to fill them after baking. The warm cookie helps the jam settle into a smooth, glossy heart, and you never have to worry about it bubbling or losing its colour in the oven.
Yes, they’ll just taste a little more classic sugar-cookie and less bakery-style.
Tender thumbprints come from a light hand. Cream the butter and sugar well, mix the flour in gently, and let the dough chill so it bakes up soft instead of spreading. The less you fuss with the dough, the softer the cookie.
A little cracking is totally normal with thumbprints, but big splits usually mean the dough was either too cold or pressed too quickly. Let the dough warm up for a minute or two after chilling, then make the indentation with slow, gentle pressure. If the dough feels stiff, give it one or two light kneads to loosen it, just enough to smooth it out without warming it too much.

More Christmas Cookie Recipes
If you’re already in the kitchen making these Grinch thumbprint cookies, you might as well keep the holiday baking energy going. Here are a few more festive cookies that bring the same cozy, cookie-plate joy.
- Grinch Crinkle Cookies – Soft, puffy, and powdered-sugar coated with a little red heart in the center. A perfect match for your thumbprints.
- Hot Cocoa Cookies with Marshmallows – Rich, chocolatey cookies with melty marshmallows right on top. Basically a mug of hot cocoa in cookie form.
- Reindeer Chocolate Cookies – Cute, chocolate-forward cookies decorated like Rudolph. Kids love them and they look great in a holiday tin.
- Gingerbread Kiss Cookies – Spiced gingerbread cookies topped with a chocolate kiss. Classic, fragrant, and made for December afternoons.
- Chocolate Chip Pecan Cookies – Soft, chewy, and loaded with toasted pecans for that perfect sweet-nutty crunch. The kind of cookie you end up making all year long.
And if you’re putting together edible gifts this season, try my Christmas cookies in a jar—a cute, minimal-effort idea that layers all the cookie magic into one festive jar. Or head to my best Christmas cookies round-up for a hand-picked collection of the coziest, most crowd-pleasing treats to bake all season long.
LOVE THIS RECIPE? PIN IT FOR LATER!

Grinch Thumbprint Cookies
Video
Ingredients
FOR THE COOKIES
- 1 cup unsalted butter (softened)
- ⅔ cup granulated sugar
- 1 large egg
- 1 tsp vanilla extract
- ¼ tsp almond extract ((optional, but it makes them taste like bakery cookies))
- 2 ¼ cup all-purpose flour
- ¼ tsp salt
- green gel food colouring (10–15 drops, or until you get that bright “Who-ville” shade)
FOR THE FILLING
- 1 cup seedless raspberry jam or strawberry jam
- 1-2 drops red food colouring ((optional, helps the heart look extra vibrant))
Instructions
- Beat butter and sugar together until light and creamy — about 2 minutes. Add egg, vanilla, and almond extract. Mix until smooth.

- Add flour and salt. Mix until a soft dough forms.

- Add green gel food colouring and knead/mix until you’ve reached your perfect Grinch green.

- Cover and chill the dough for 30 minutes. (Helps them hold their shape.)

- Preheat oven to 350°F (175°C). Line a baking sheet with parchment.
- Roll dough into 1-inch balls and place 2 inches apart. Use your thumb, a ½-teaspoon measuring spoon, or the back of a rounded icing tip to press an indent in the center.

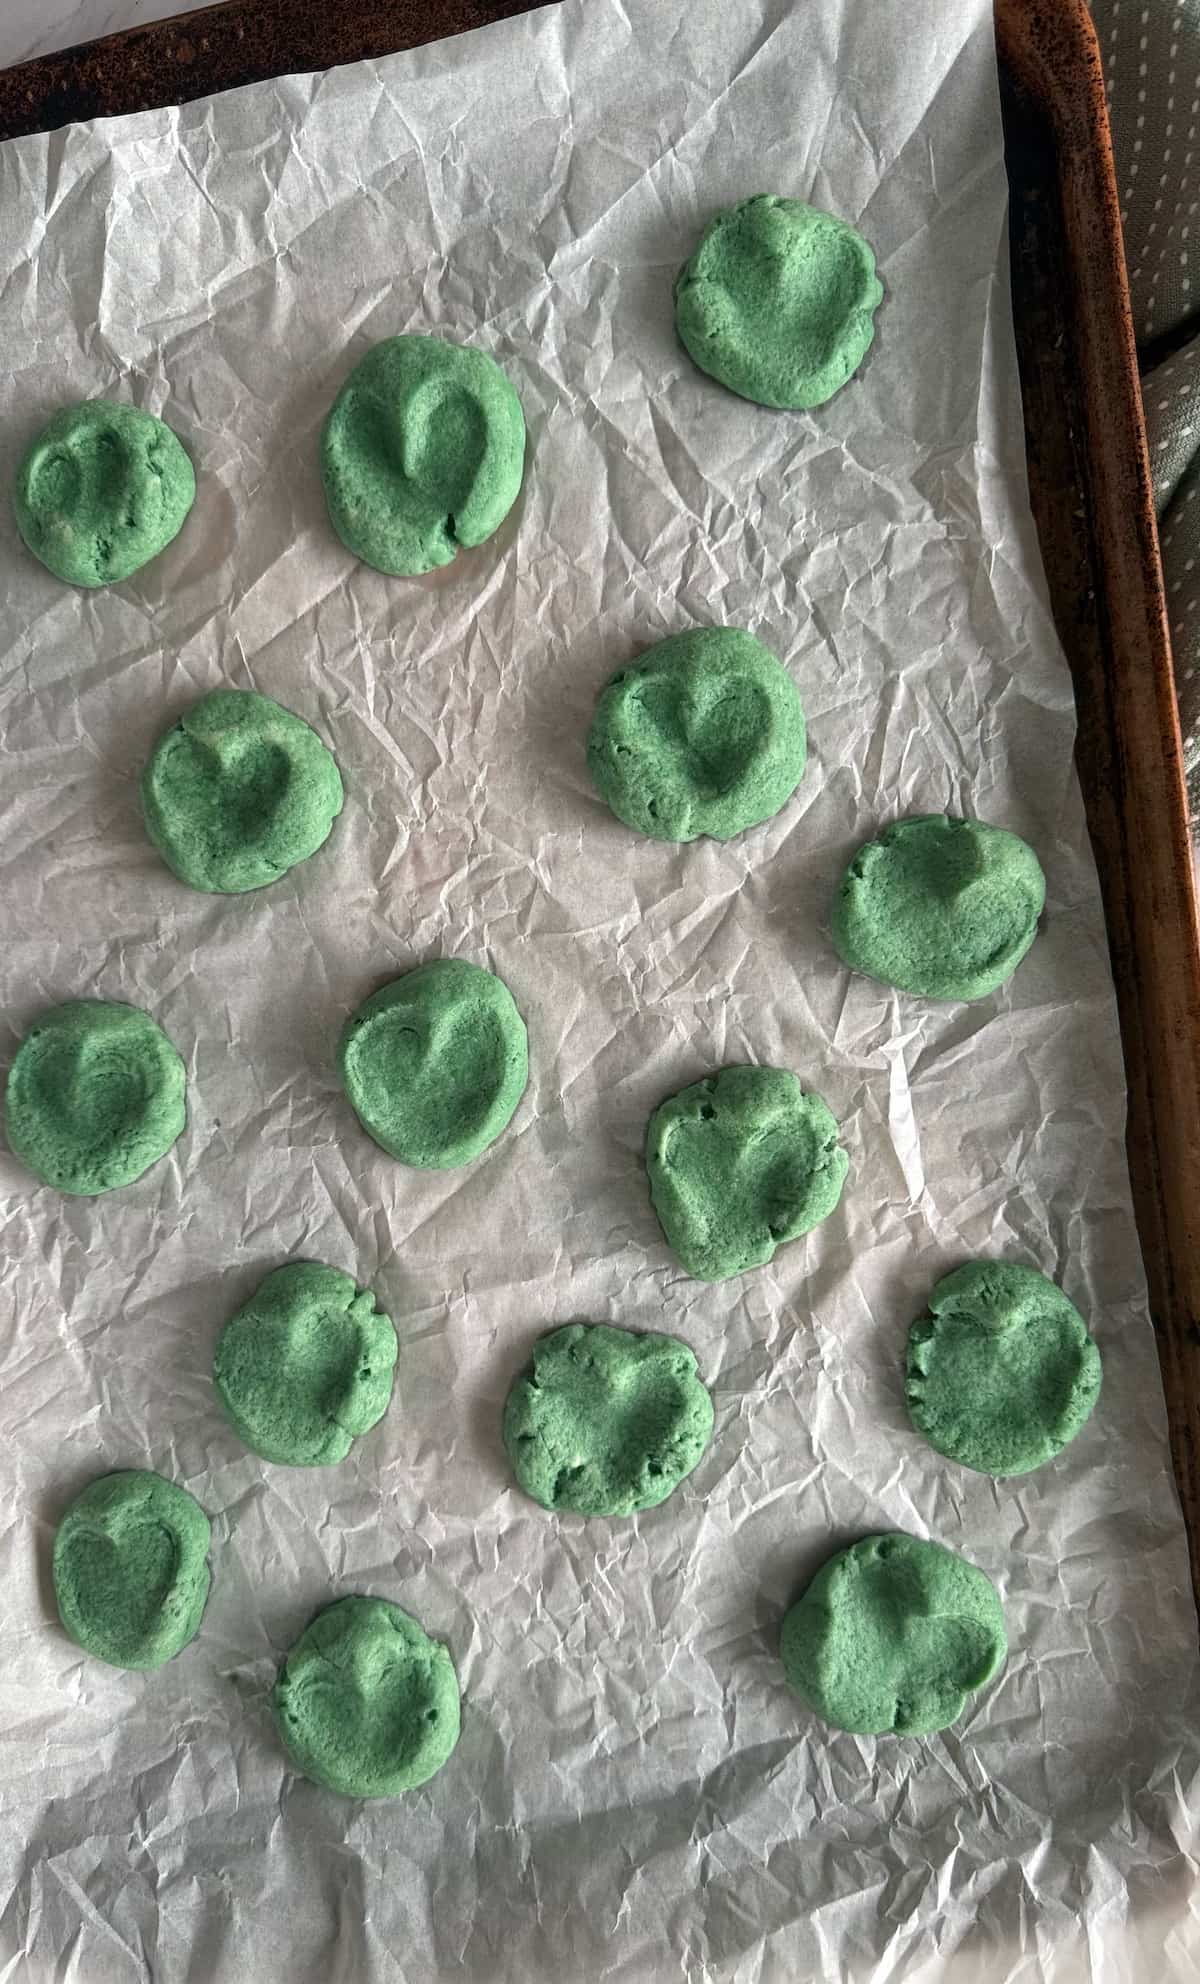
- Bake 8–10 minutes, just until the edges look set but not browned.

- Warm jam in a small bowl for 10–15 seconds so it loosens slightly. Spoon a small amount into each indentation — about ½-1 teaspoon. If adding a heart sprinkle or gummy heart, gently press it into the warm jam now. Let cookies cool completely so the jam can set.


Notes
Nutrition
Don’t skip the good stuff —
scroll up above the recipe card for ingredient notes, tips & tricks, and easy swaps/variations.Made it? Tell me everything.
I LOVE seeing what you made! Tag @hiphipgourmet on Instagram (or use #hiphipgourmet) so I can see it — then rate it + upload your photo below. 💖
The links in this post are affiliate links. Thanks for supporting HipHipGourmet!
Hey, if you tried these heart jam cookies, don’t be shy — tell me how it turned out! Click the stars in the recipe card to rate it and leave a quick note below. I always love hearing from you!
If you share your creation on social, tag @HipHipGourmet — I’d love to see it and share your version!