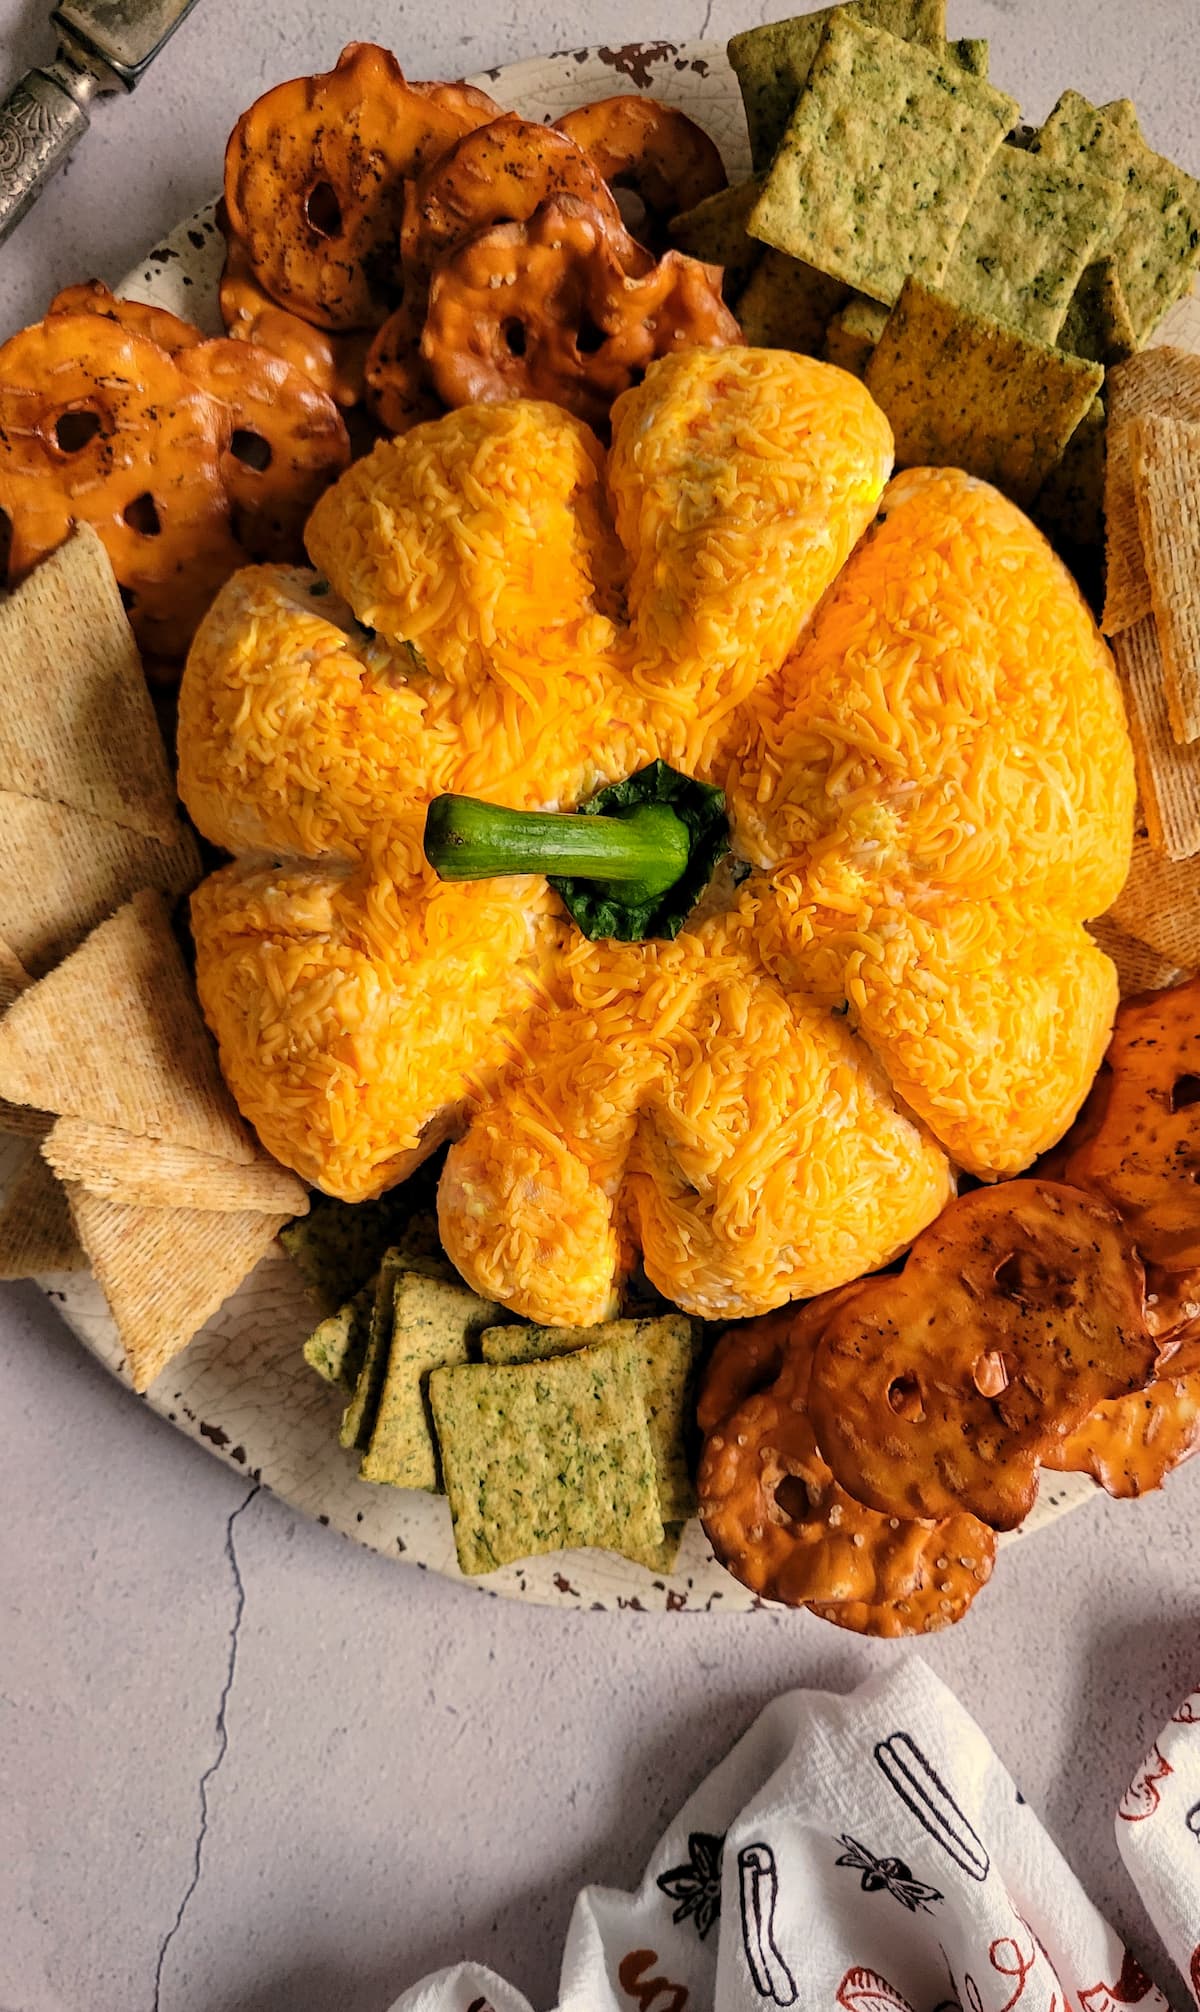
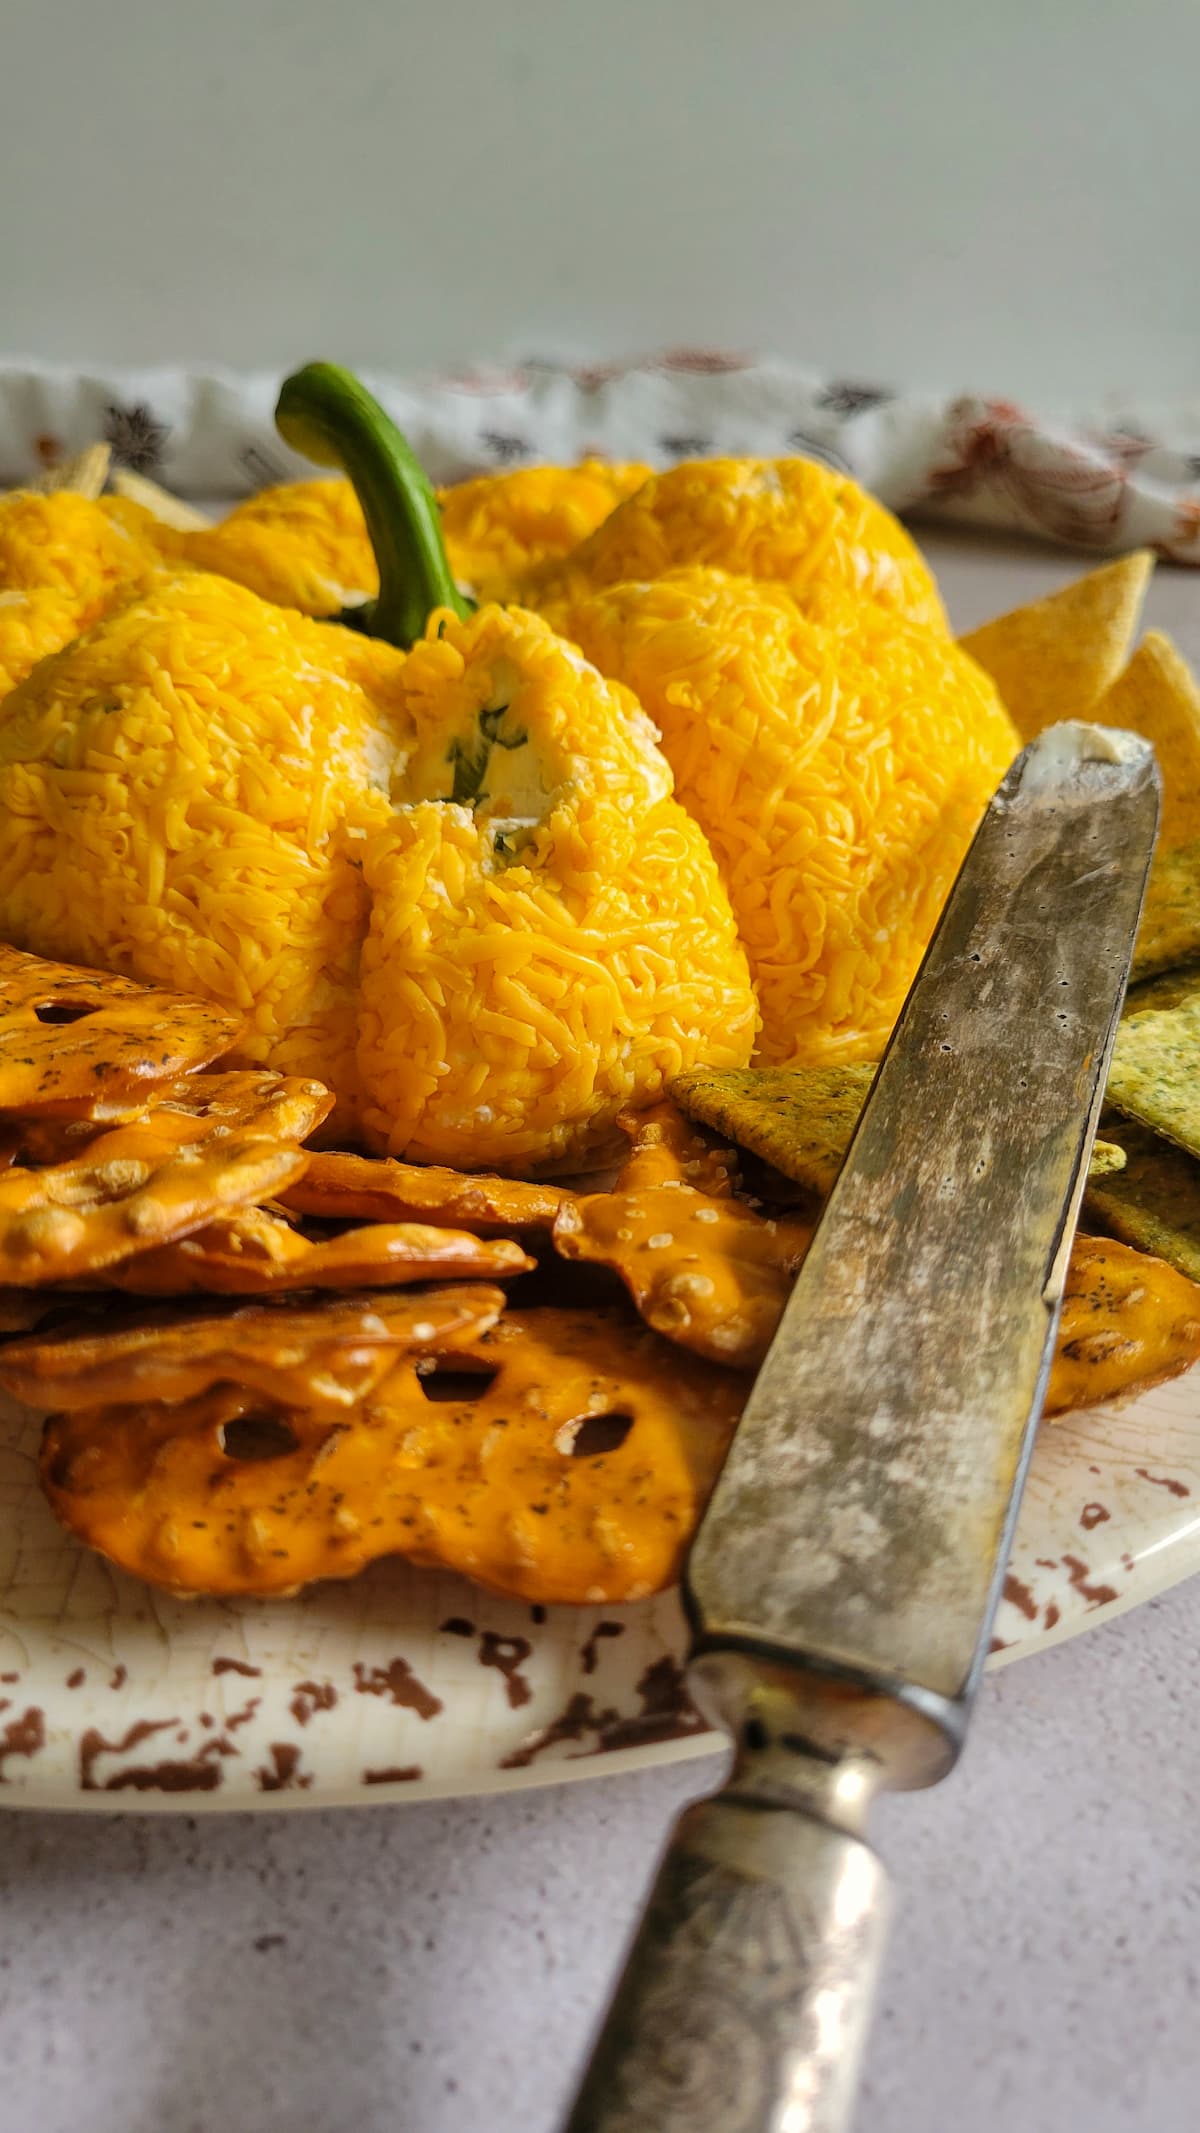
Festive, fun to make and incredibly delicious, this Pumpkin Cheeseball is a must have as part of any Thanksgiving or Halloween party spread. It’s made with few and simple ingredients and is sure to WOW all of your guests!
Look no further. The perfect Halloween or Thanksgiving appetizer is here. I mean, who doesn’t love a good cheese ball?! AND, let’s get down to the facts and be reaaaal honest here. WHO DOESN’T LOVE A GOOD FESTIVE CHEESE BALL?! Especially one that’s shaped like a pumpkin, has the perfect outer orange cheesy coating and claims a bell pepper stem as its own?!
I don’t know about you, but I can’t think of a single person who wouldn’t swoon over this pumpkin shaped cheese ball. As a matter of fact, everyone I serve it to can’t stop raving not only about how dang cute it is (I mean, seriously?!) but also how downright delicious it tastes. So go on impressing all of your guests, you badass you.
My God. This may sound like a weird thing to be nostalgic about. But I’m telling you that cheese balls, particularly this cheese ball, takes me right back to my childhood. Every time my mama would host a large gathering amongst family or friends, she’d whip up an award winning cheeseball that I clearly haven’t stopped salivating over until this day.
Man, it’s been literal years since I had last had it. I distinctly remember how addicting it was with any kind of cracker and how it was always amongst one of the first things to get gobbled down.
So, naturally, when the food blogger in me found herself hosting a little Thanksgiving get together this year, my mind shifted to that one great appetizer my mama always turned to when she was the host of the party. Cheese ball. And so I called her up immediately and got her tried and true recipe. The one I grew up eating. The one she couldn’t host a party without.
And, just like at mama’s parties, this pumpkin shaped cheese ball was amongst the first things to go at mine, too. And although hers were never pumpkin shaped, I can confirm that it is definitely still as delicious as I remember!
INGREDIENTS YOU’LL NEED TO MAKE PUMPKIN CHEESEBALL
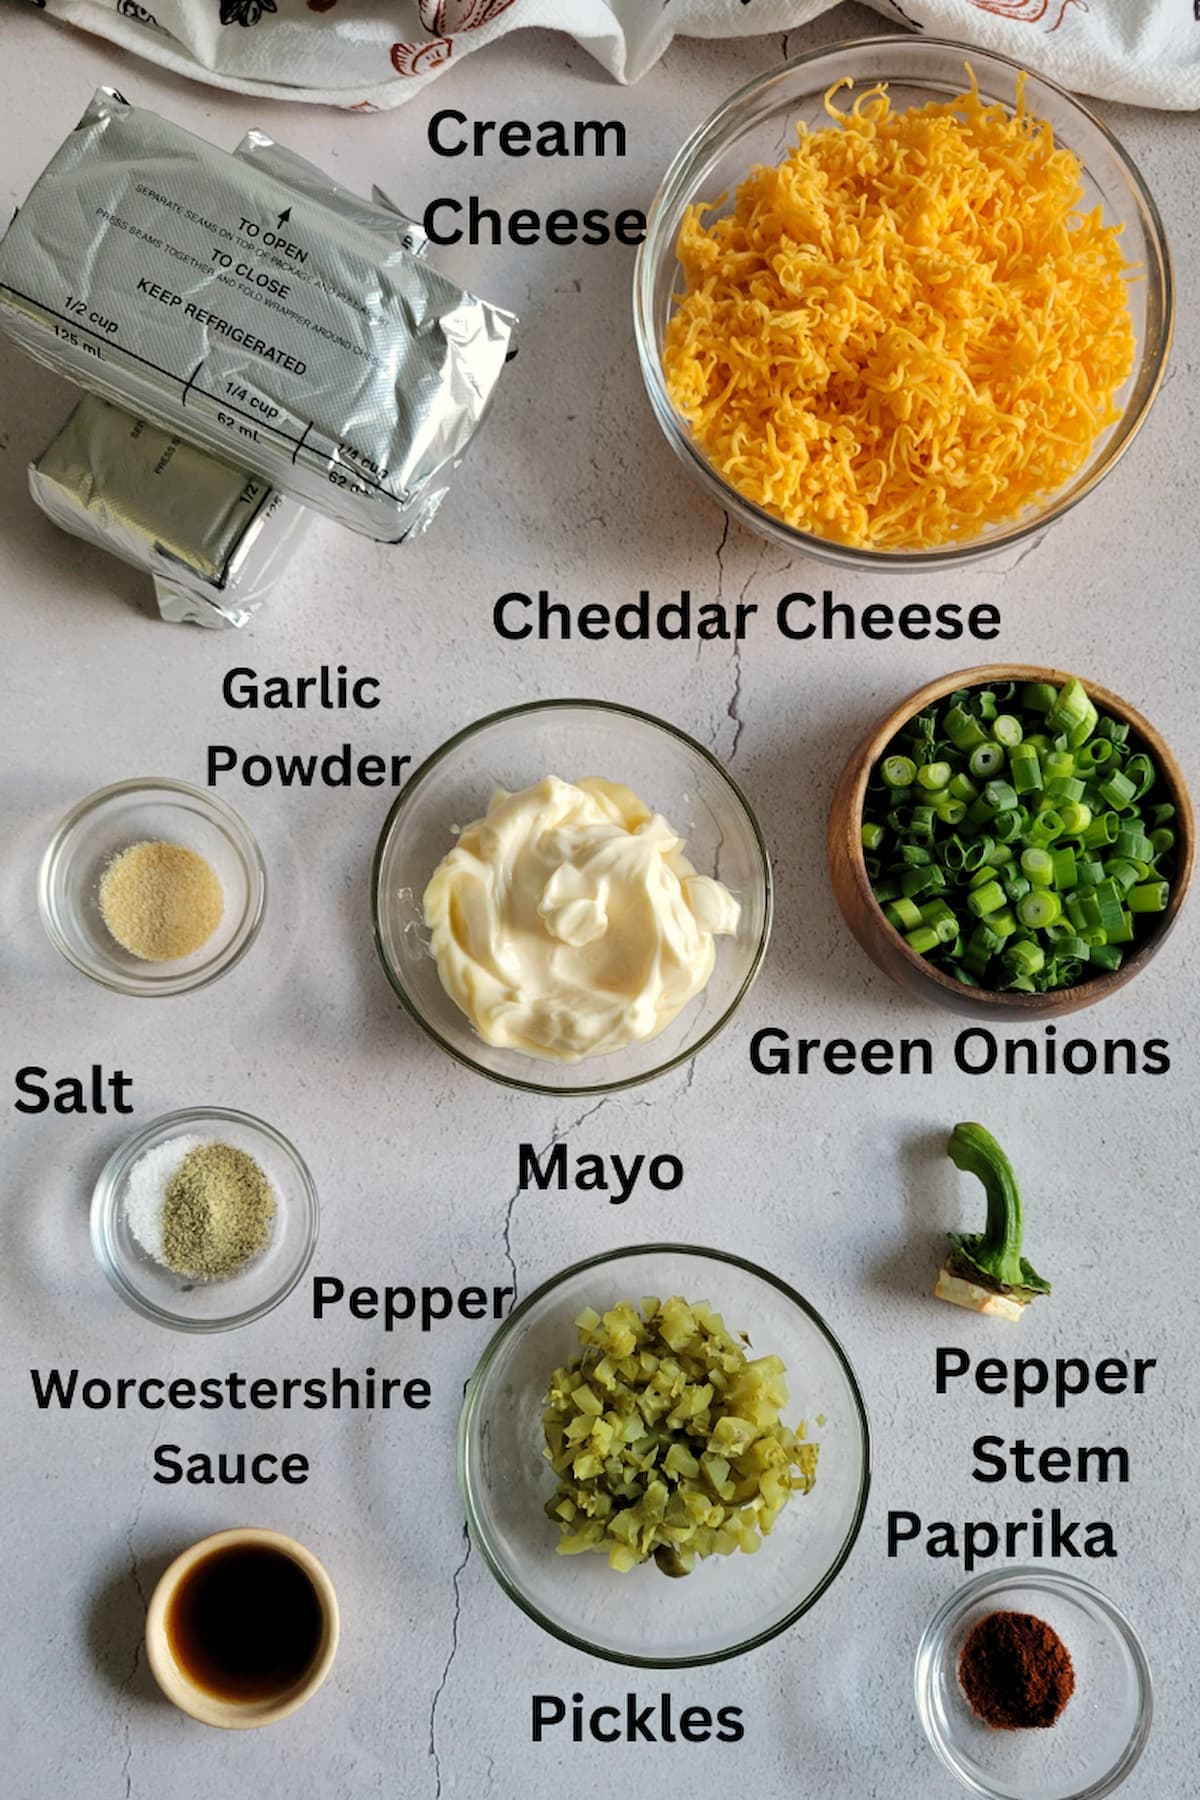
Just one look at the ingredients and I’m sure you can agree that this cheese ball recipe really can’t get any simpler than this. Trust me, though. It’s like something magical happens when they all come together. Let’s discuss each one in a little bit more detail down below:
- Cream Cheese: The base and bulk of our cheese ball recipe. It adds richness, creaminess and is the perfect texture for shaping this cheese ball into a pumpkin. I use full fat and plain cream cheese that comes in a block for this recipe as I find that is what works best.
- Cheddar Cheese: Cause the more cheese, the better. Am I right? Cheddar cheese adds texture, flavour and provides that vibrant outer orange layer to make the perfect pumpkin cheese ball.
- Mayo: Adds creaminess and a tangy flavour to the cheese ball. Also helps bind the ingredients together and provides a smooth texture. Store bought or homemade mayonnaise work well in this recipe. For a real different kick, try using chipotle mayo or spicy mayo instead.
- Pickles: I like to call this one mama’s secret ingredient. It adds a tangy and zesty flavour to the cheese ball as well as the perfect texture and crunch. Dill pickles work best in this recipe.
- Green Onion: Adds texture, flavour and pairs perfectly well with the other ingredients. It also adds a nice pop of colour and some vibrancy to this cheese ball recipe.
- Worcestershire Sauce: Adds a savoury and umami flavour and compliments the creaminess of the cheese and other ingredients.
- Paprika: Adds flavour and a bit of colour to this pumpkin cheese ball recipe. I like using smoked paprika as it gives it a nice bold but subtle flavour. However, you can use regular paprika instead, if that’s all you have on hand.
- Garlic Powder: Adds flavour and balance to the cheese ball recipe. Garlic powder works best here as fresh garlic might overpower the rest of the ingredients (and give your guests garlic breath!)
- Salt/Pepper: Adds flavour, balance and makes the rest of the ingredients in this pumpkin cheeseball pop!
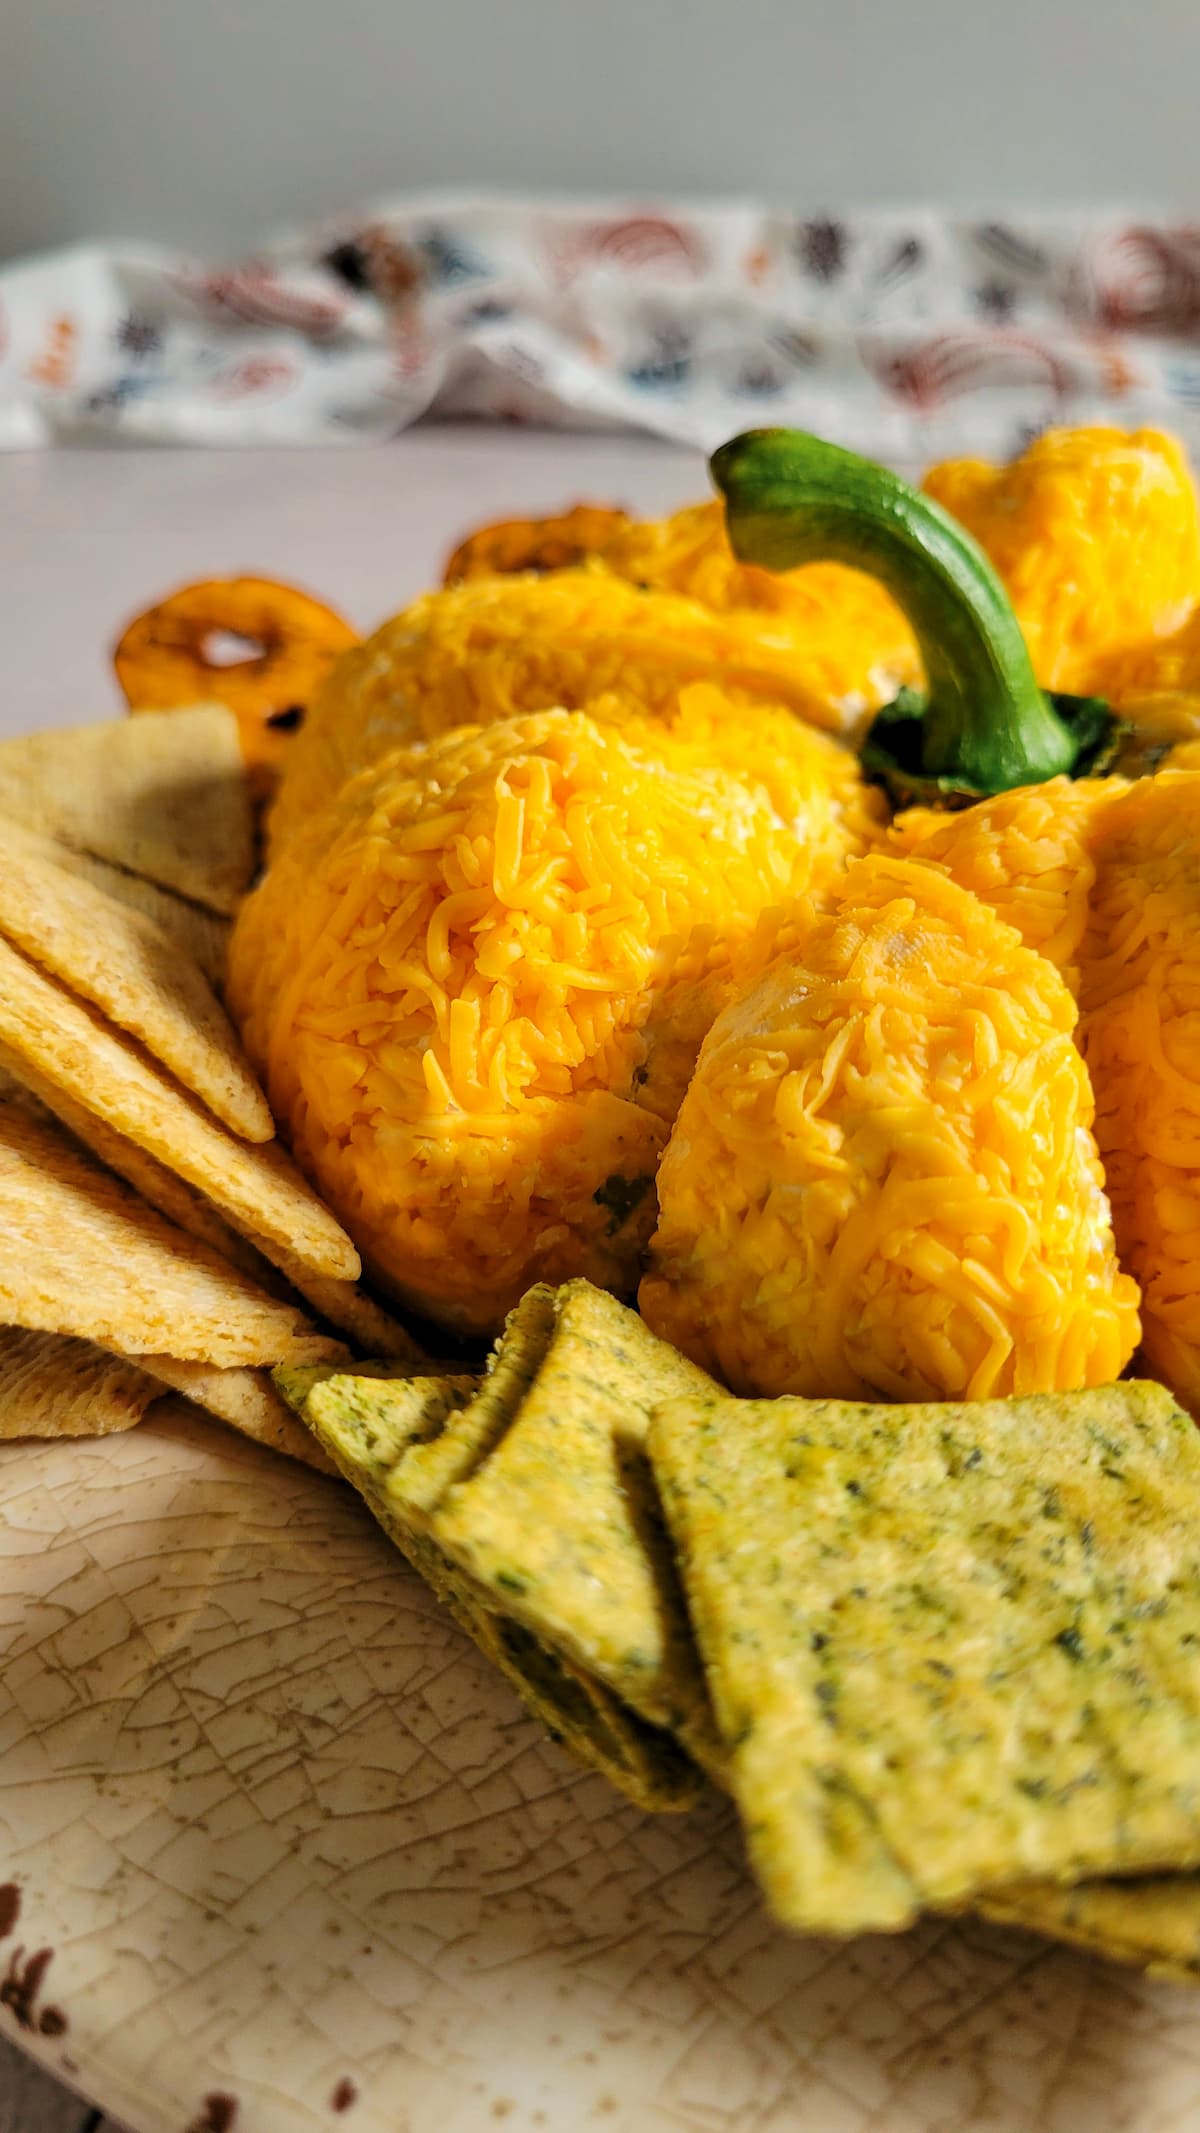
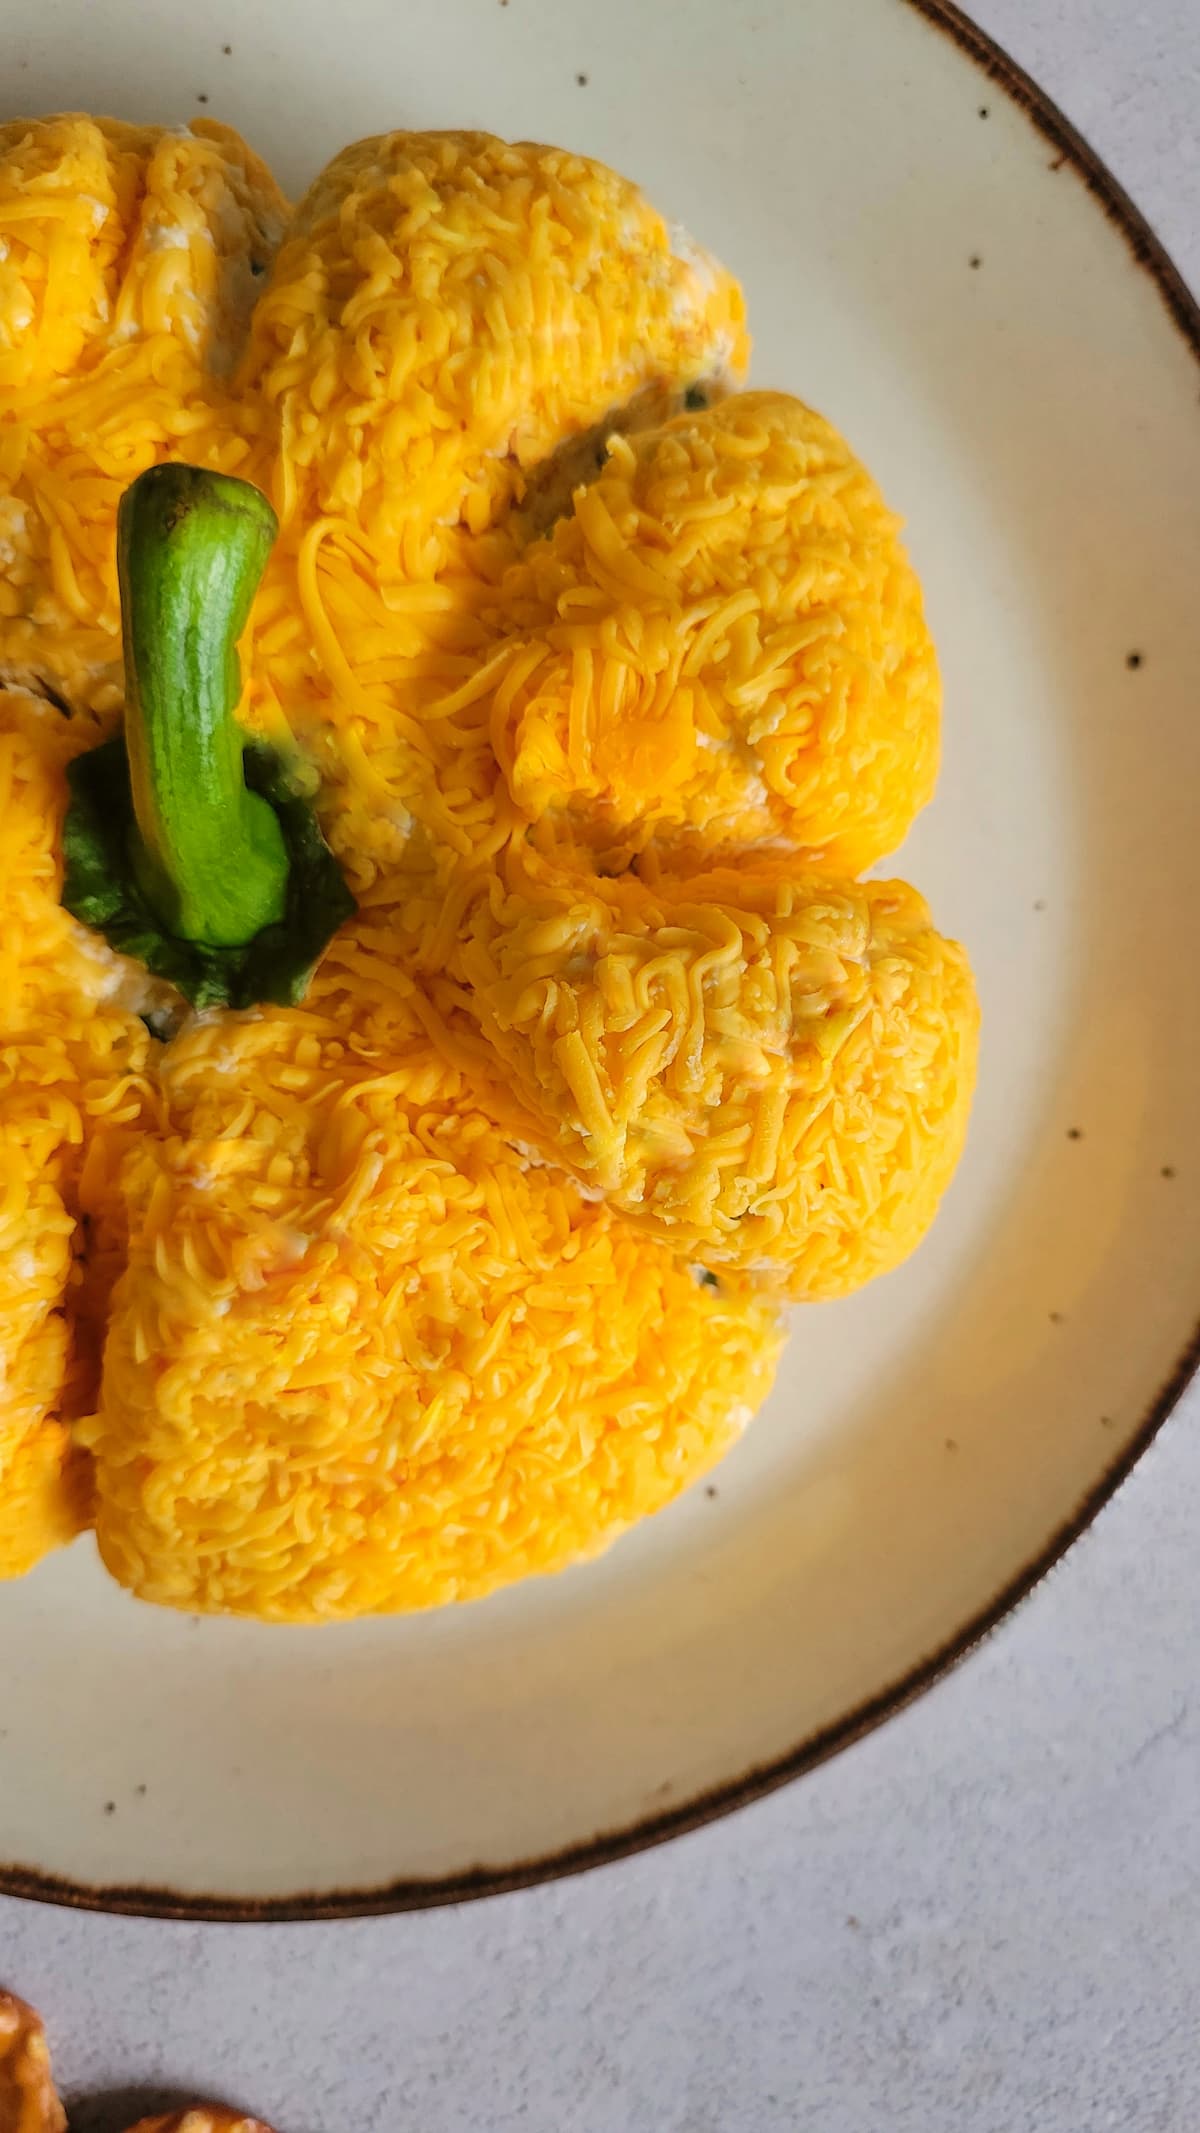
- Pepper Stem: Of course! You can’t have a pumpkin shaped cheeseball without giving it it’s own stem. I love using a bell pepper for this as it’s literally the perfect shape and size. But, since there’s no bell pepper in the actual recipe (feel free to add it in, if you wish), you can use anything green or brown you have on hand. A rosemary stem, a pretzel stick, a piece of celery, or something along those lines would be a great alternative.
HOW TO MAKE A PUMPKIN SHAPED CHEESE BALL (KEY TIPS)
You can find full instructions for how to make this cheese ball shaped like a pumpkin in the recipe card down below, but here are a few quick tips to keep in mind:
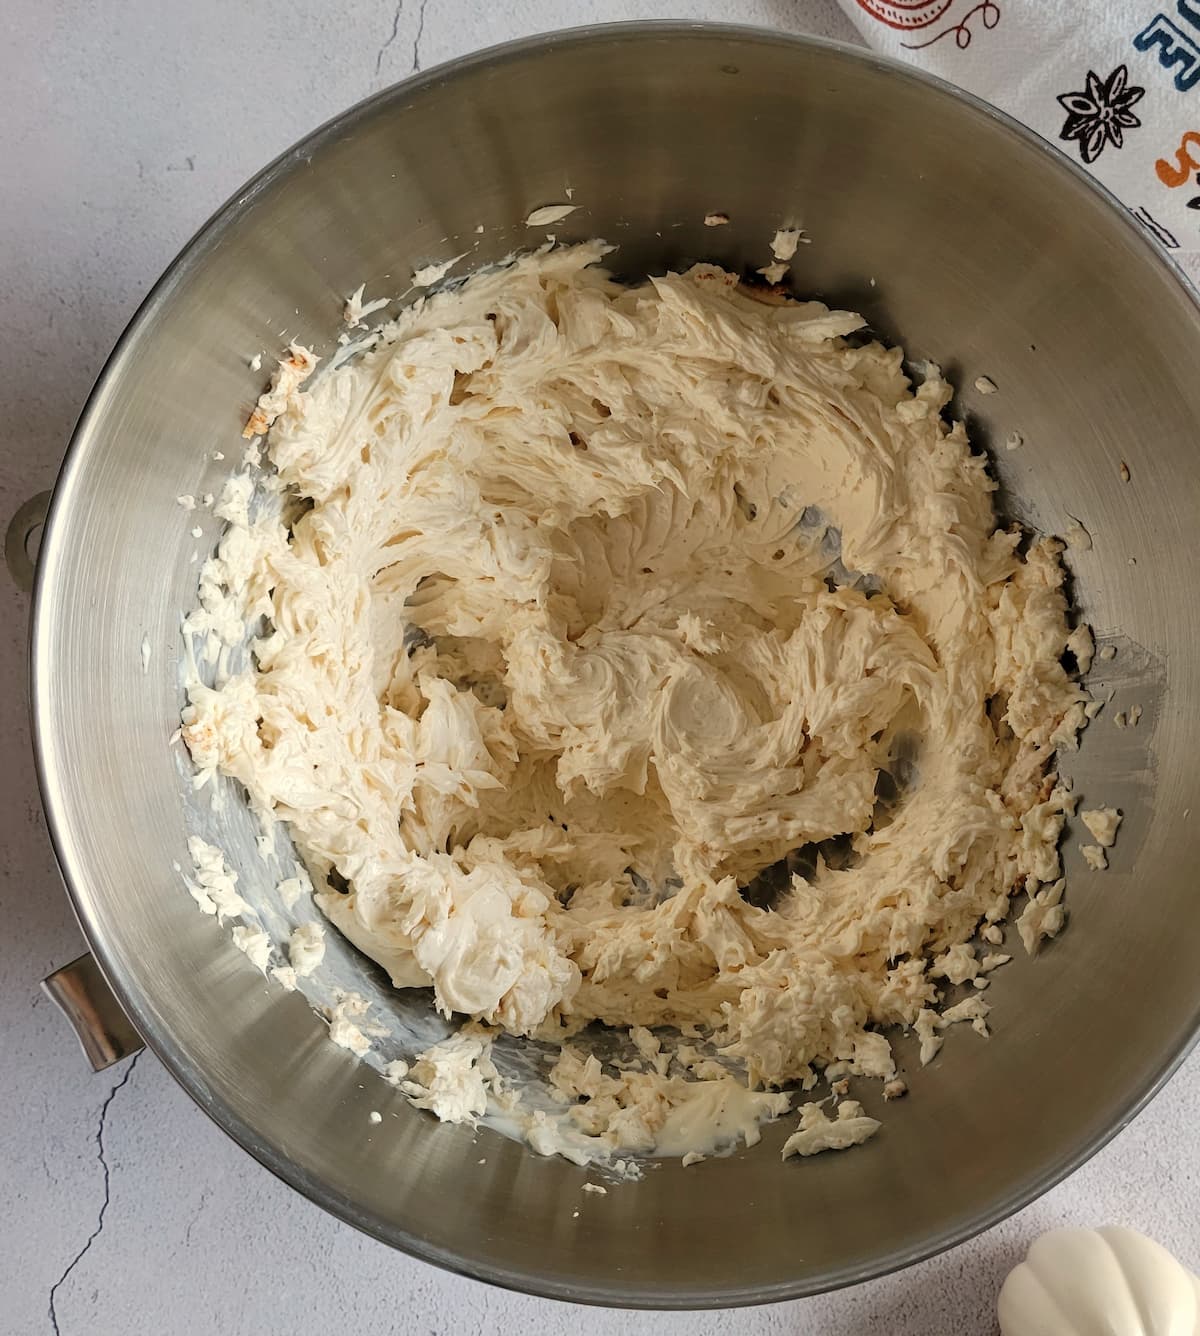
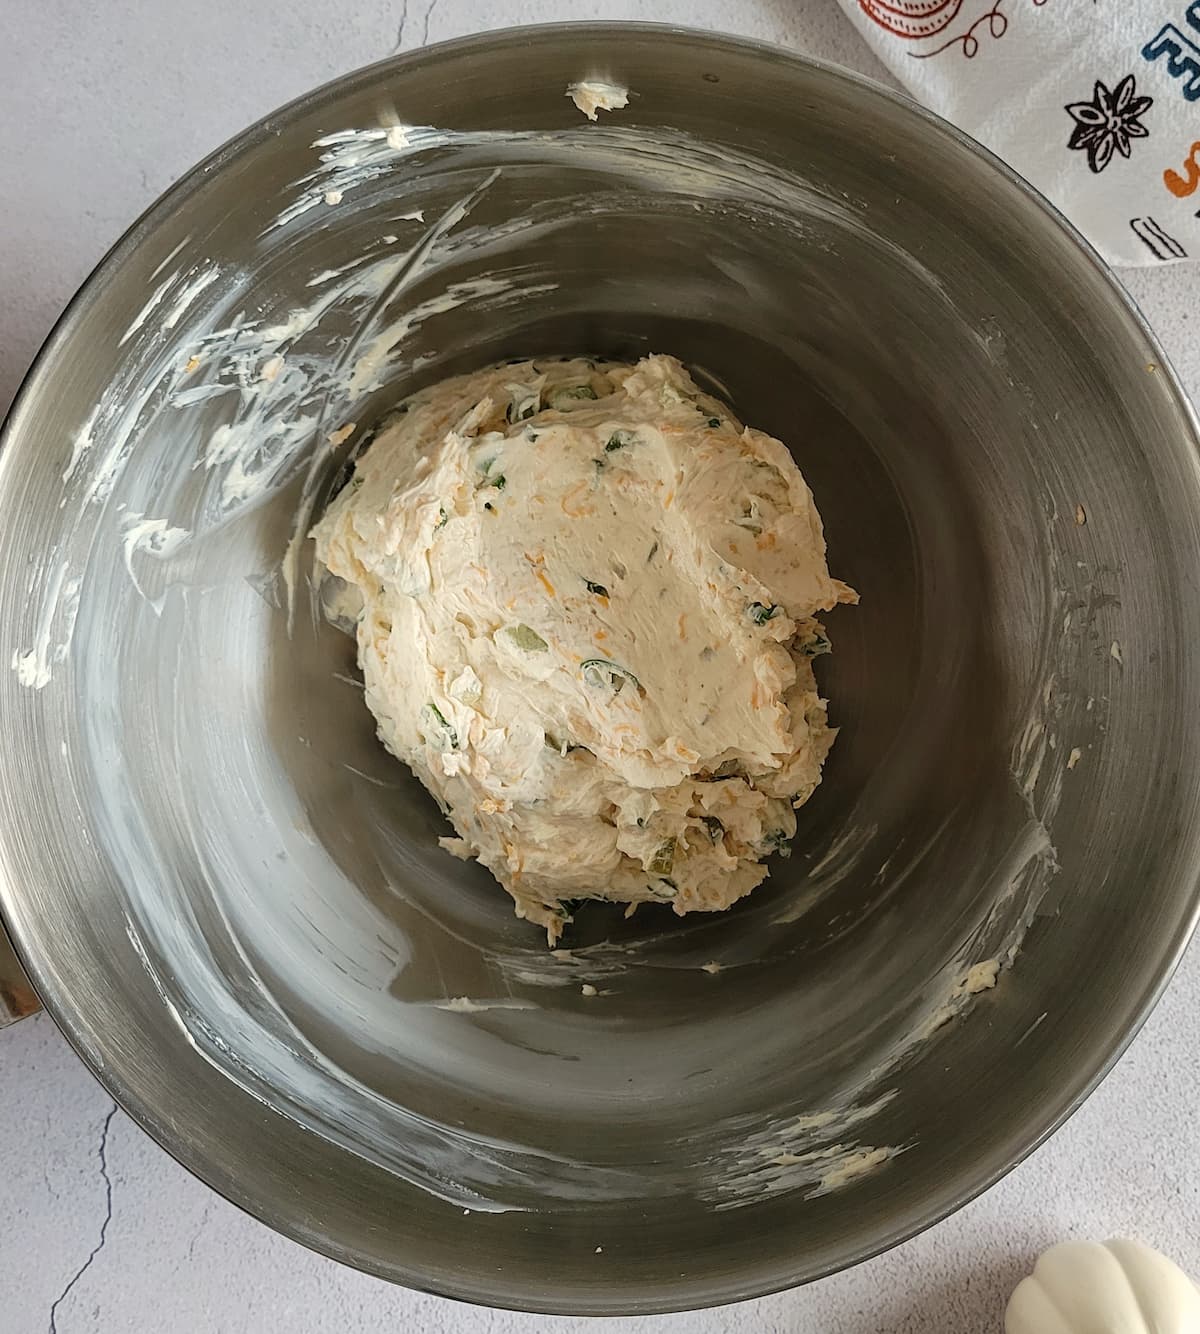
- Soften the cream cheese by allowing it to sit at room temperature for a few hours before you want to use it. This will make the ingredients way easier to mix and give you a creamier cheese ball with a smoother texture. EXTRA TIP: Using an electric hand mixer makes mixing the ingredients suppper easy! However, I like to stir in the pickles and green onions by hand to keep their size, crunch, and texture.
- Finely grate the cheddar cheese. And yes, for best and freshest results, grate the cheese yourself. This will give you the perfect texture to cover the entire outer layer of the cheese ball with the most real pumpkin look. A regular grate, while still do-able, won’t give you the same look as it will be harder to cover the entire surface without the cheese popping or sticking out from all over.
- Make sure all of the ingredients are well, well, WELL combined before shaping and coating your cheese ball. Once it’s shaped and coated, there is no going back. You definitely want the ingredients to be evenly and well distributed throughout for best results.
- Use a double layer of saran wrap to wrap the cheese ball before shaping. You don’t want any of the cheese oozing out of the sides of the wrap. It should be as tight as you can get it and a double layer will ensure you can safely apply pressure to it (to make those perfect indents) without losing half the mixture. EXTRA TIP: As long as your cheese ball is tightly wrapped in the saran wrap, you don’t have to worry about how much pressure you apply to make the indents. You can be fairly aggressive here as you want the lines of the pumpkin to be very distinct.
- Use kitchen twine to help you make the indents in the pumpkin. If you don’t have any on hand, you can also use a rubber band or two. I like to keep the strings in place as the pumpkin cheeseball hardens in the fridge and remove them just before serving.
- Allow the cheese ball to harden in shape in the fridge for at least 4 hours in order for it to hold it’s pumpkin shape. The cream cheese is the perfect base for this pumpkin cheeseball as it’s easy to work with and has the perfect texture at different temperatures. It’ll soften up as it sits out while serving.


FREQUENTLY ASKED QUESTIONS
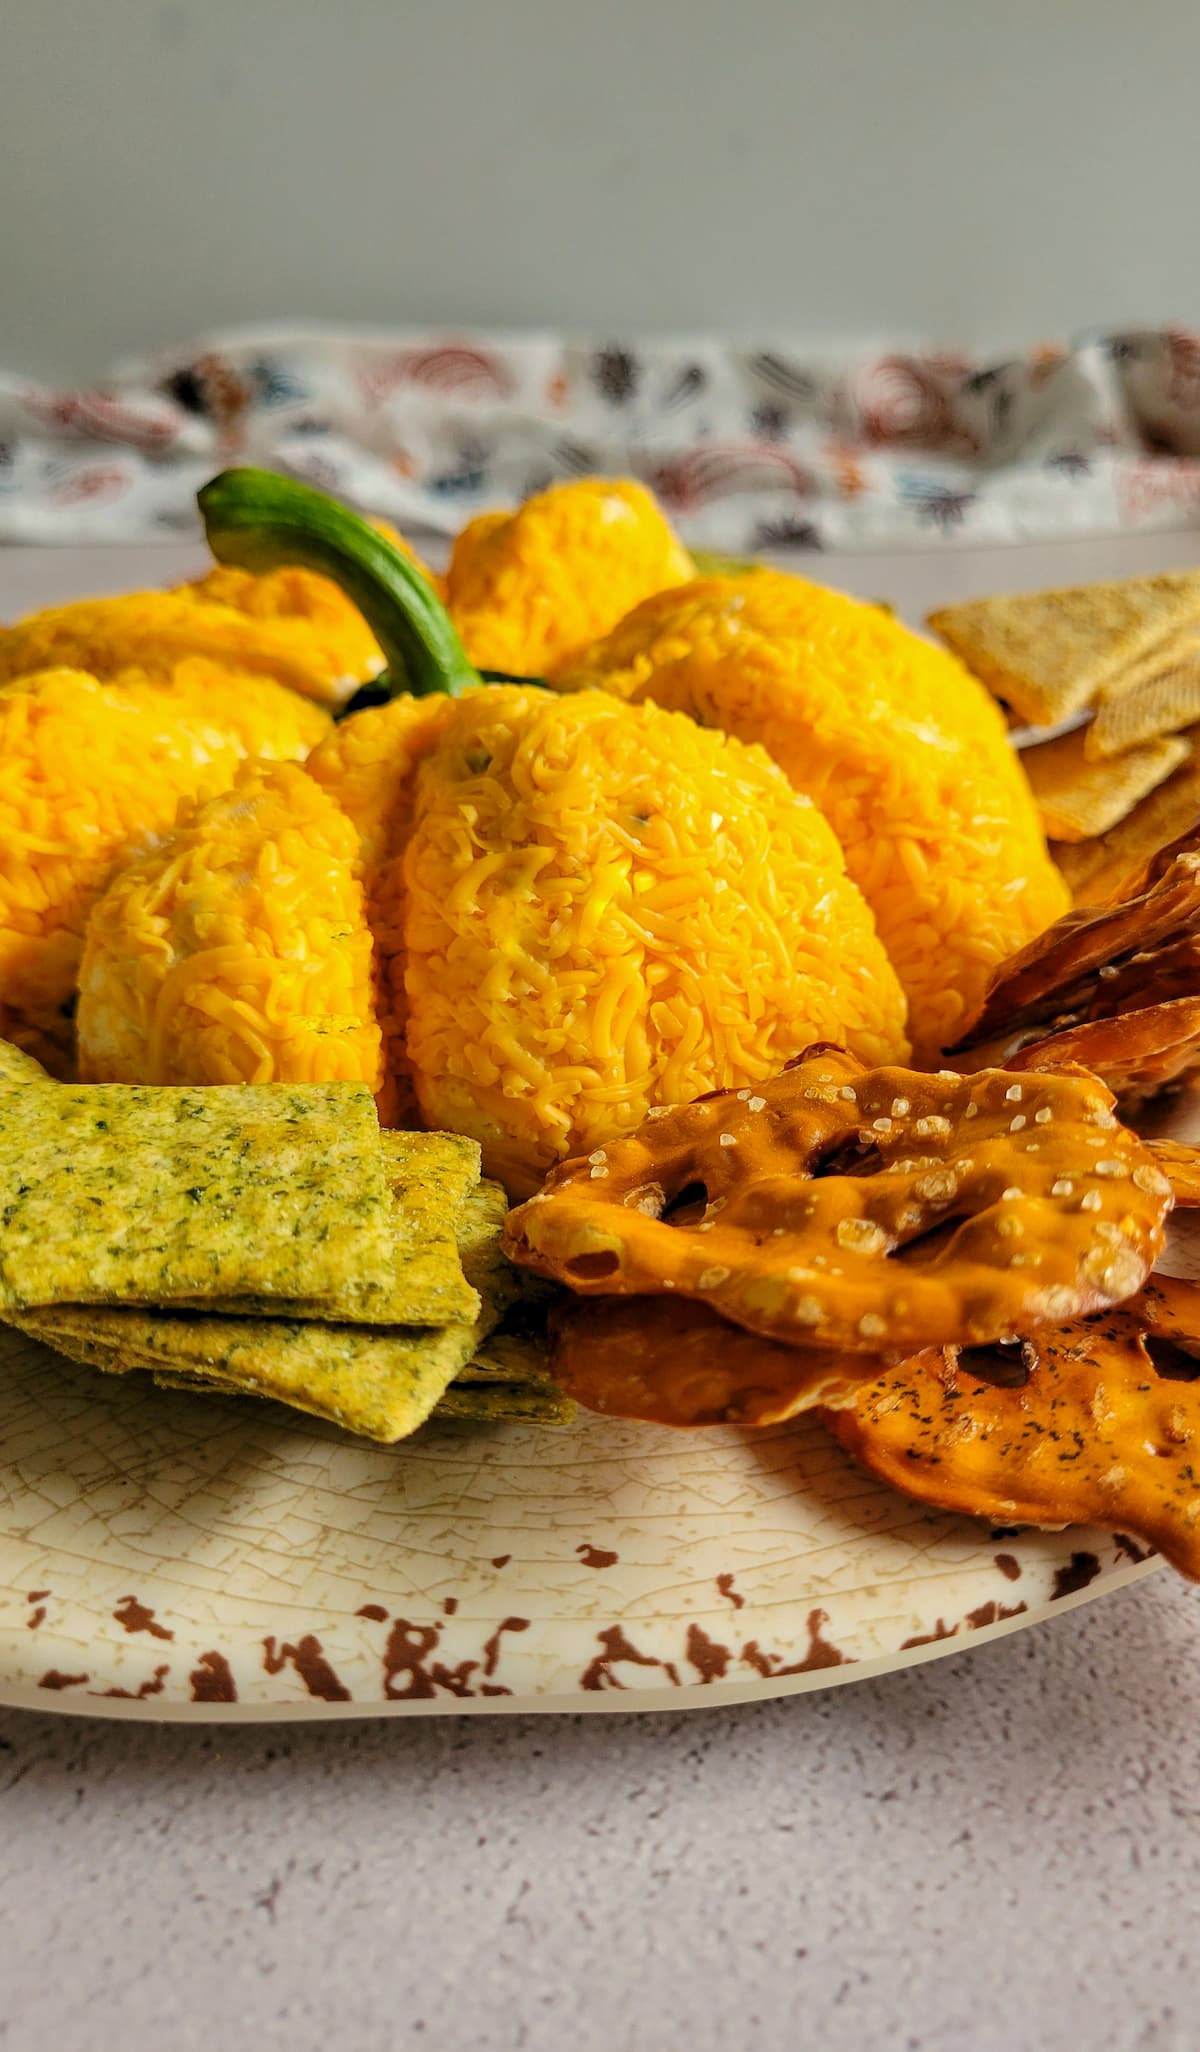
I love serving up cheese balls at any party I’m hosting because they go good with so many things. From crackers and pretzels, to homemade bread and tortilla chips and even fruit and veggie sticks. On the table next to my famous cheese ball, I love having things like nuts, dried fruits, pickles and olives, honey, mustard, jams and chutneys, or a variety of cured meats.
Yes! Cheese balls are the perfect party snack or appetizer because you can prepare them well in advance. If I know I’m going to be serving up a cheese ball at my next get together, it’s usually one of the first things I get to making since it has quite a long shelf life. I like to prepare this pumpkin cheese ball a day or two in advance. However, I like unwrapping it and topping it with the bell pepper stem just before I’m about to serve it.
The shelf life of a cheese ball depends on its ingredients and how it’s stored. Always keep it tightly covered in the fridge for best results. Although the texture and flavour may slightly change over time, it can typically last for about 1-2 weeks.
If you want to extend the shelf life, you can freeze a cheese ball. Wrap it tightly in plastic wrap and place it in an air tight container or freezer bag. It’ll be good for up to 2 months. Thaw it in the fridge when you’re ready to use it and be aware that the texture may slightly be affected.
PUMPKIN CHEESEBALL
Video
Ingredients
- 2 8 oz. (227g) bars Cream Cheese (softened)
- 3 cups Cheddar Cheese (finely grated)
- ¼ cup Mayonnaise
- 3 Green Onions (finely chopped)
- 2 Dill Pickles (finely chopped)
- 1 tsp Worcestershire Sauce
- ½ tsp Garlic Powder
- ½ tsp Smoked Paprika
- Salt and Pepper (to taste)
- 1 Bell Pepper Stem*
Instructions
- In a mixing bowl, blend the cream cheese, mayonnaise, worcestershire sauce, garlic powder, smoked paprika, and salt and pepper until well combined.

- Using a rubber spatula, stir in the chopped green onions, dill pickles, and half the cheddar cheese making sure they are evenly distributed and fully incorporated.

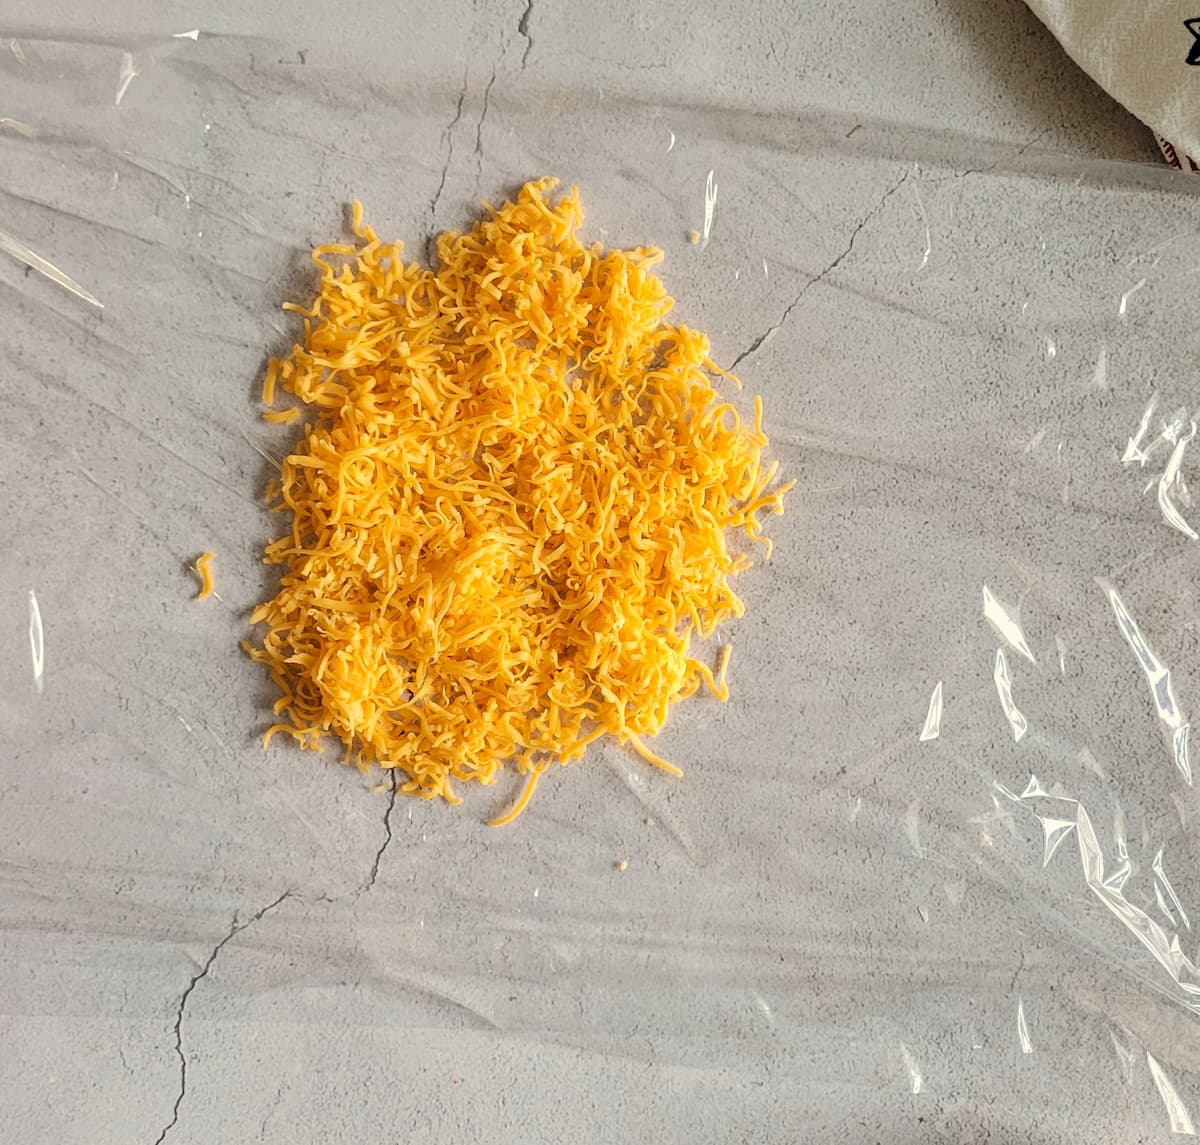
- Spread out a large double layer of cling wrap on a flat surface. Sprinkle about a 1/4 cup of the remaining cheddar cheese on top.

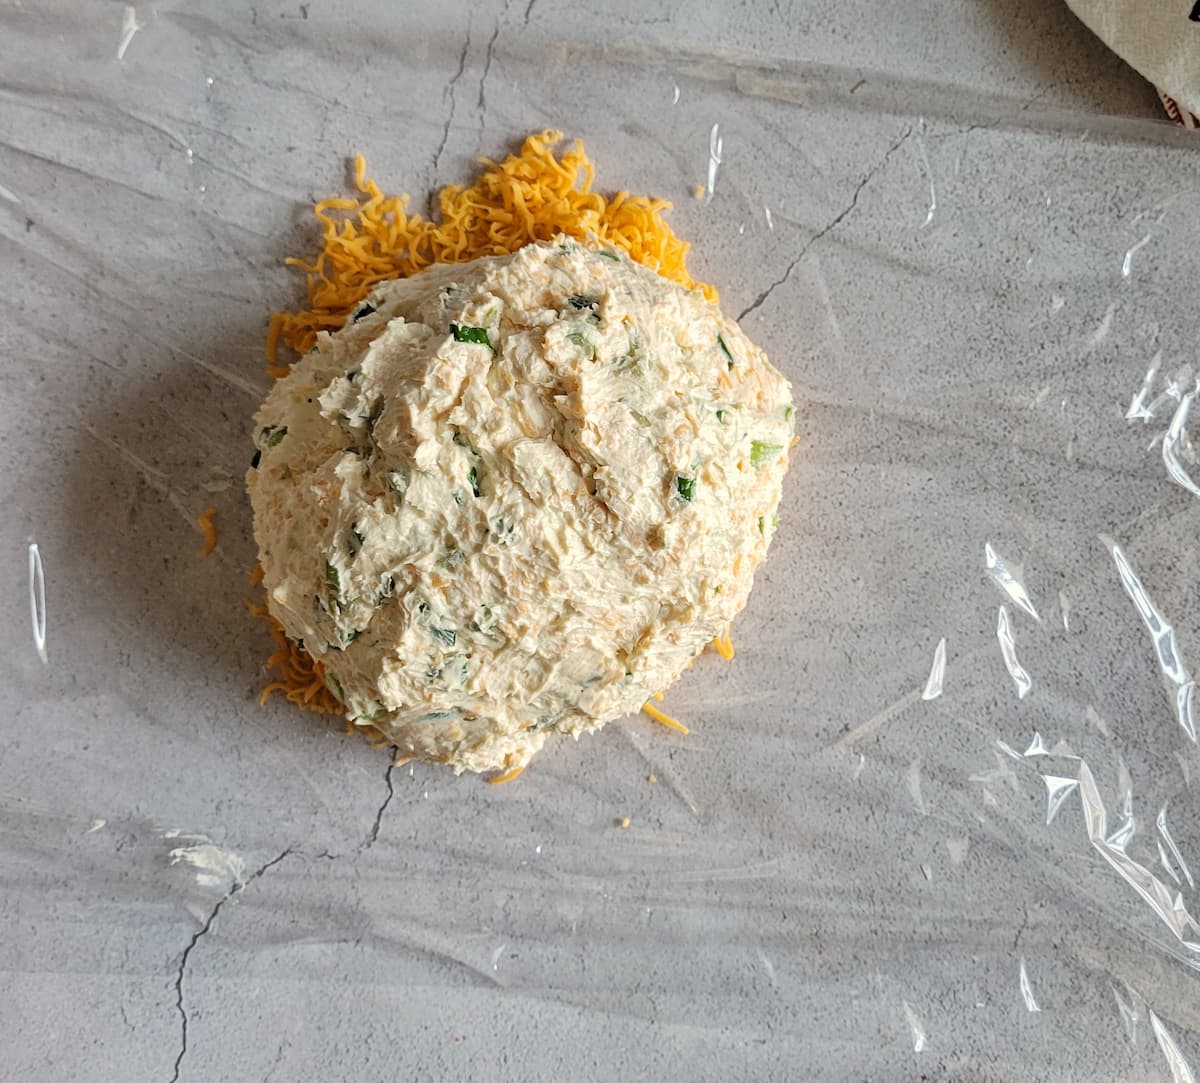
- Top it with the cheese ball mixture, doing your best to form it into a ball.

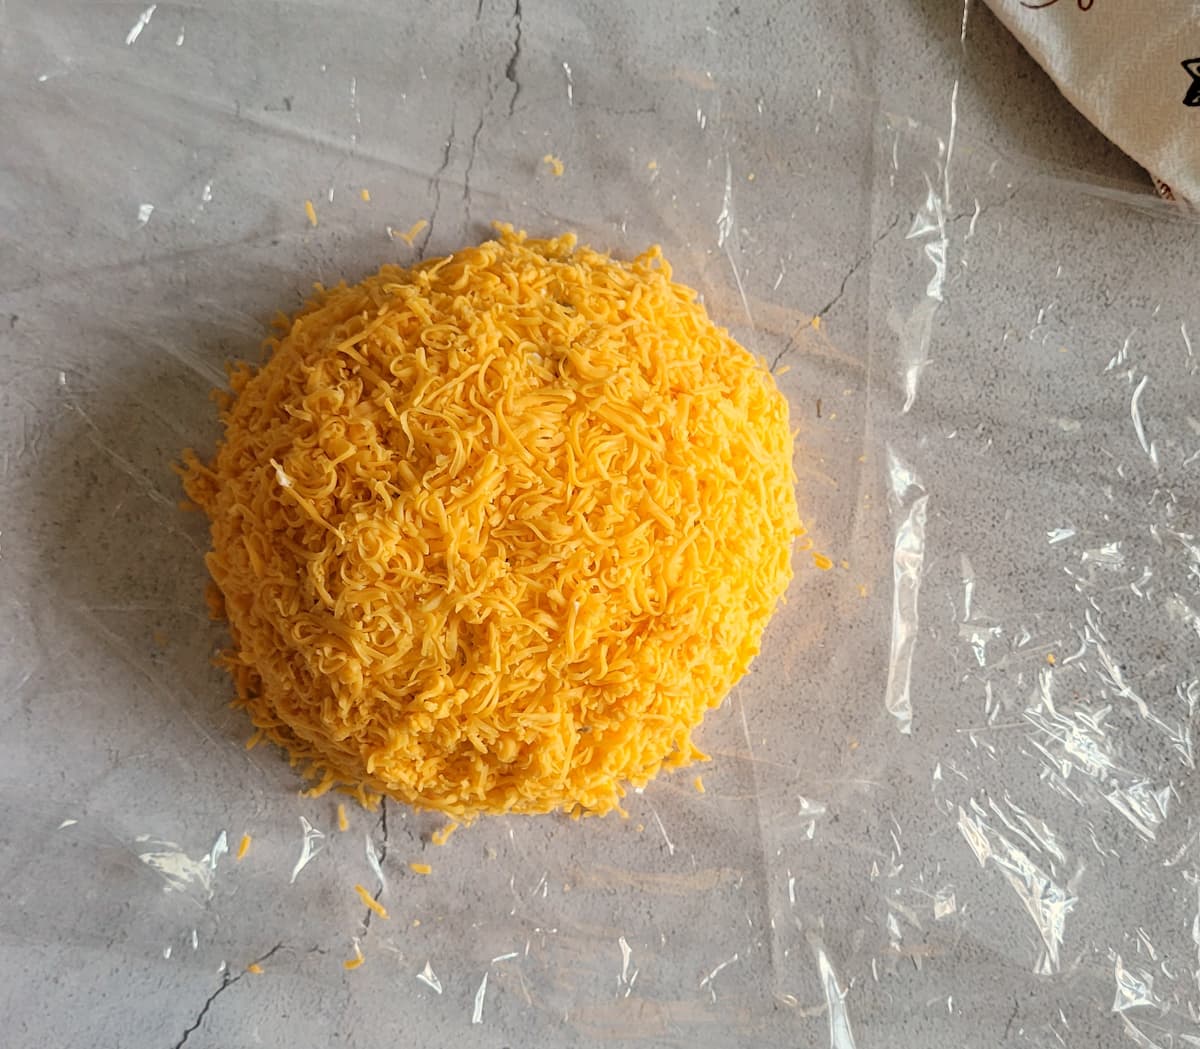
- Take the rest of the cheddar cheese and use your hands to press it into the tops and sides of the cheese ball, covering the entire surface.

- Wrap it up tightly with the cling wrap (use an elastic band to tie the top in place, if desired).

- Cut 4 equal pieces of string and place them in a star shape underneath the cheese ball. Use your hands to pull the strings, one at a time, to create indents to form a pumpkin shape.

- I like to leave the strings in place then pop the wrapped cheese ball in the fridge for at least 4 hours to harden.

- Just before serving, remove the strings and take the cheese ball out of the plastic wrap. Make an indent in the top center for the bell pepper stem. Serve with crackers, tortilla chips, pretzels, bread, fruit or veggie sticks.


Notes
Nutrition
Don’t skip the good stuff —
scroll up above the recipe card for ingredient notes, tips & tricks, and easy swaps/variations.Made it? Tell me everything.
I LOVE seeing what you made! Tag @hiphipgourmet on Instagram (or use #hiphipgourmet) so I can see it — then rate it + upload your photo below. 💖
MORE FESTIVE FAVOURITES
PUMPKIN CHOCOLATE CHIP MUFFINS
CREAM CHEESE PUMPKIN SPICE COOKIES
PUMPKIN SPICE ESPRESSO MARTINI
LOVE THIS RECIPE? PIN IT FOR LATER!

PUMPKIN CHEESEBALL
Video
Ingredients
- 2 8 oz. (227g) bars Cream Cheese (softened)
- 3 cups Cheddar Cheese (finely grated)
- ¼ cup Mayonnaise
- 3 Green Onions (finely chopped)
- 2 Dill Pickles (finely chopped)
- 1 tsp Worcestershire Sauce
- ½ tsp Garlic Powder
- ½ tsp Smoked Paprika
- Salt and Pepper (to taste)
- 1 Bell Pepper Stem*
Instructions
- In a mixing bowl, blend the cream cheese, mayonnaise, worcestershire sauce, garlic powder, smoked paprika, and salt and pepper until well combined.
- Using a rubber spatula, stir in the chopped green onions, dill pickles, and half the cheddar cheese making sure they are evenly distributed and fully incorporated.
- Spread out a large double layer of cling wrap on a flat surface. Sprinkle about a 1/4 cup of the remaining cheddar cheese on top.
- Top it with the cheese ball mixture, doing your best to form it into a ball.
- Take the rest of the cheddar cheese and use your hands to press it into the tops and sides of the cheese ball, covering the entire surface.
- Wrap it up tightly with the cling wrap (use an elastic band to tie the top in place, if desired).
- Cut 4 equal pieces of string and place them in a star shape underneath the cheese ball. Use your hands to pull the strings, one at a time, to create indents to form a pumpkin shape.
- I like to leave the strings in place then pop the wrapped cheese ball in the fridge for at least 4 hours to harden.
- Just before serving, remove the strings and take the cheese ball out of the plastic wrap. Make an indent in the top center for the bell pepper stem. Serve with crackers, tortilla chips, pretzels, bread, fruit or veggie sticks.
Notes
Nutrition
Don’t skip the good stuff —
scroll up above the recipe card for ingredient notes, tips & tricks, and easy swaps/variations.Made it? Tell me everything.
I LOVE seeing what you made! Tag @hiphipgourmet on Instagram (or use #hiphipgourmet) so I can see it — then rate it + upload your photo below. 💖
The links in this post are affiliate links. Thanks for supporting HipHipGourmet!