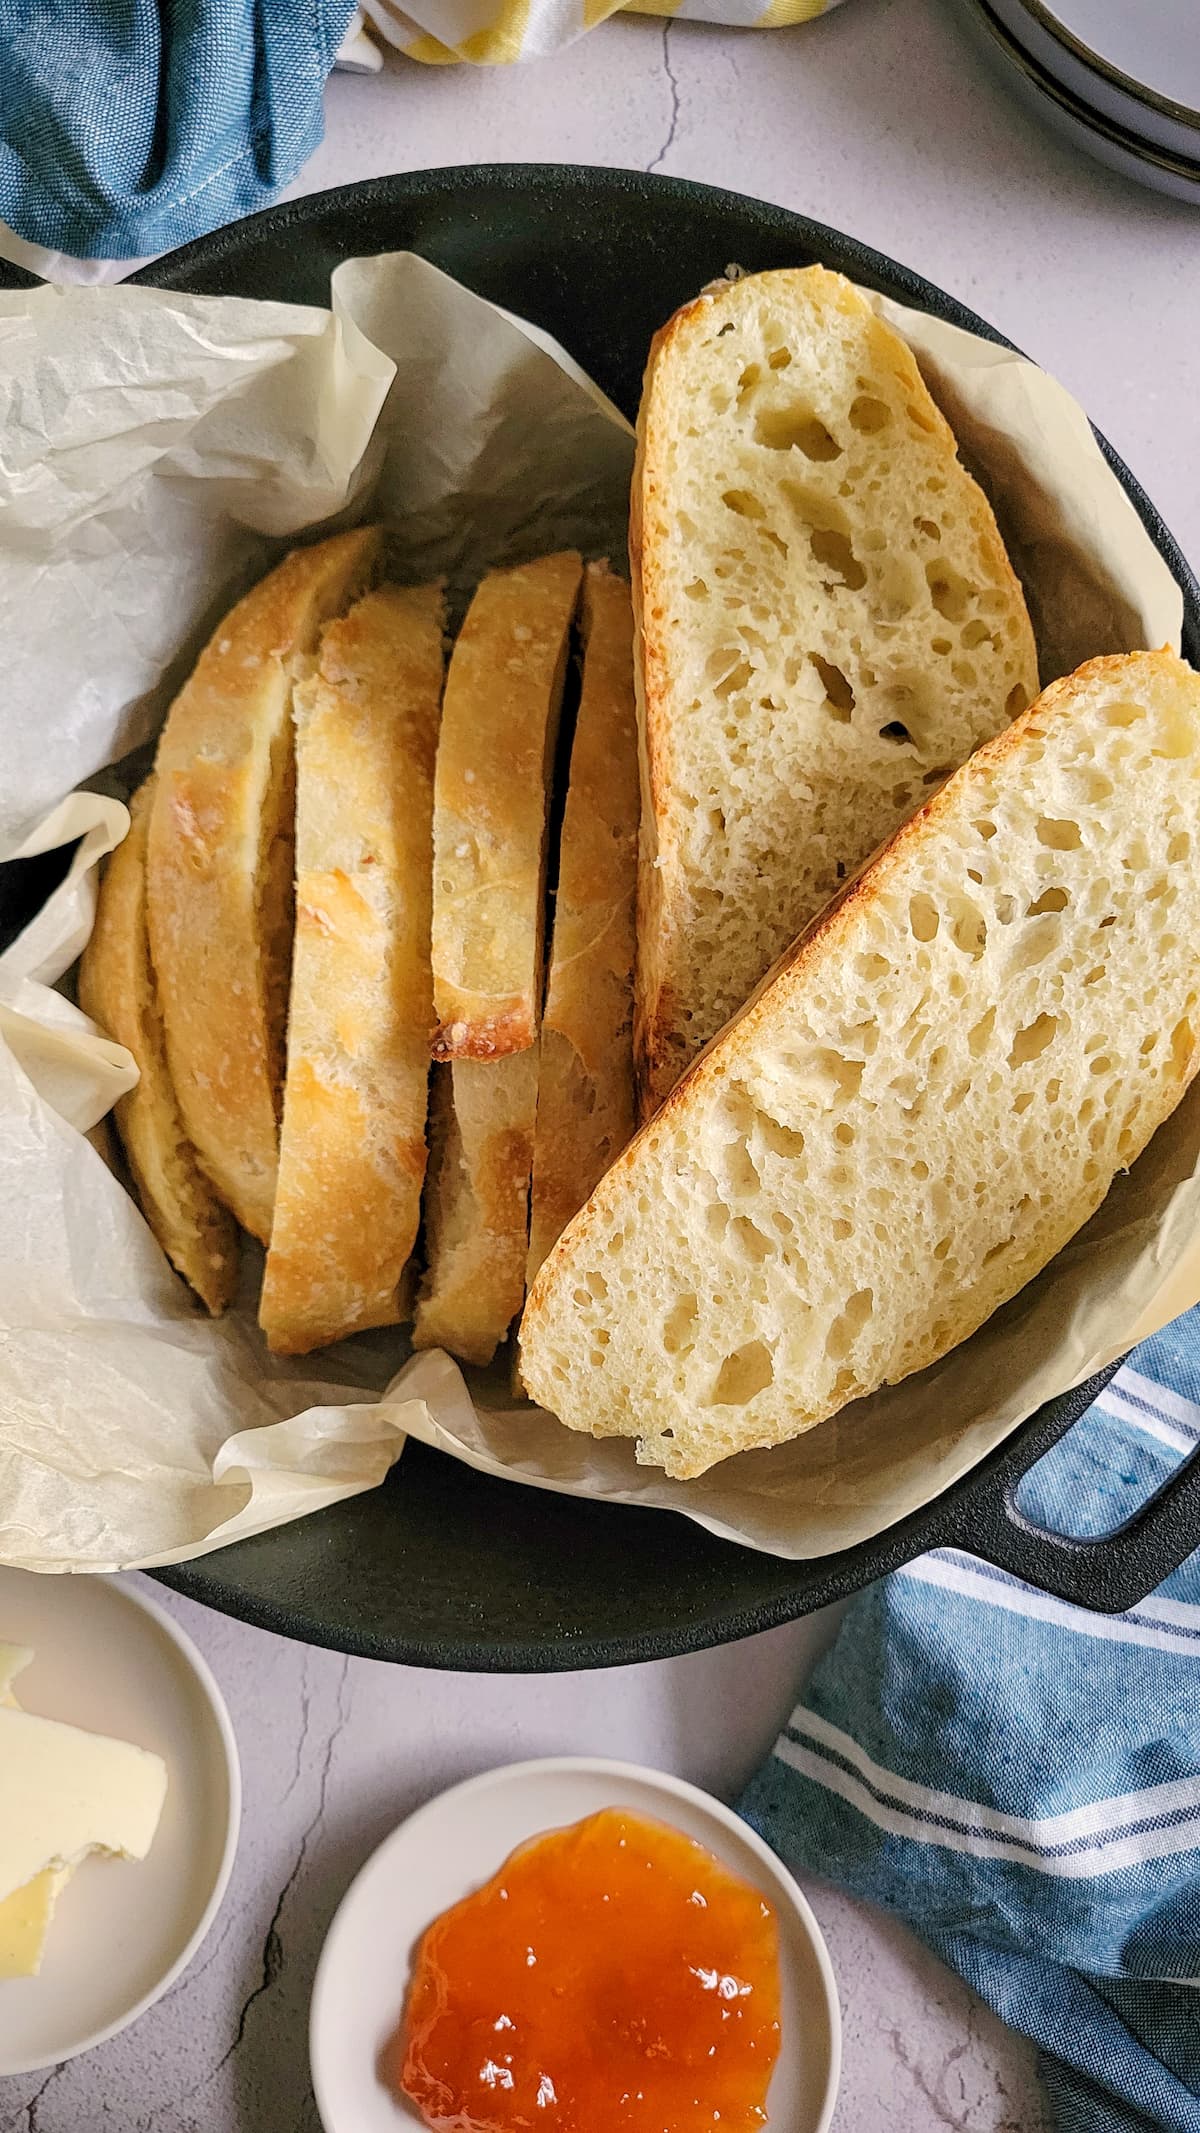
Say goodbye to the laborious kneading process and hello to the simplicity of No Knead Bread. This recipe is so easy to make and produces perfect artisanal loaves that’ll have even novice bakers looking like professionals.
Years ago (and yes before Covid hit, for the record) I tried to get into the whole sourdough gig. I mean, what’s not appealing about the idea of having freshly baked bread on the daily (if not for the aroma alone?!) It was intriguing to think about being able to bake those bakery style loaves all on my own with the perfect crusty exterior (my fav part!) and bubbly and chewy insides.
I especially loved the idea of being able to play around with the types of sourdough bread I could make – whether it be adding an array of seeds or olives or scoring different patterns and shapes on the thing (I’m not exactly sure what made me think I’d suddenly become an artist if I started baking bread but that’s a question for another day).
So, you notice that in the first sentence I said “tried” right? And that I’m speaking solely in the past tense? Yeah. That’s cause my whole sourdough gig wasn’t ever actually a gig at all. I mean, I could go on blaming the temperature of my very cold kitchen. Or maybe I can get away with saying it was the unfiltered tap water I was using.
But if you know anything at all about making sourdough bread from scratch… and if you know anything at all about me… you probably know that the real reason I haven’t made it (yet?!) in the sourdough world is the dang time it to make a single loaf from start to finish. And sometimes, even as a food blogger for dang sake, AIN’T NOBODY GOT THE TIME (or the patience) FOR THAT.

*No knead bread has entered the chat*
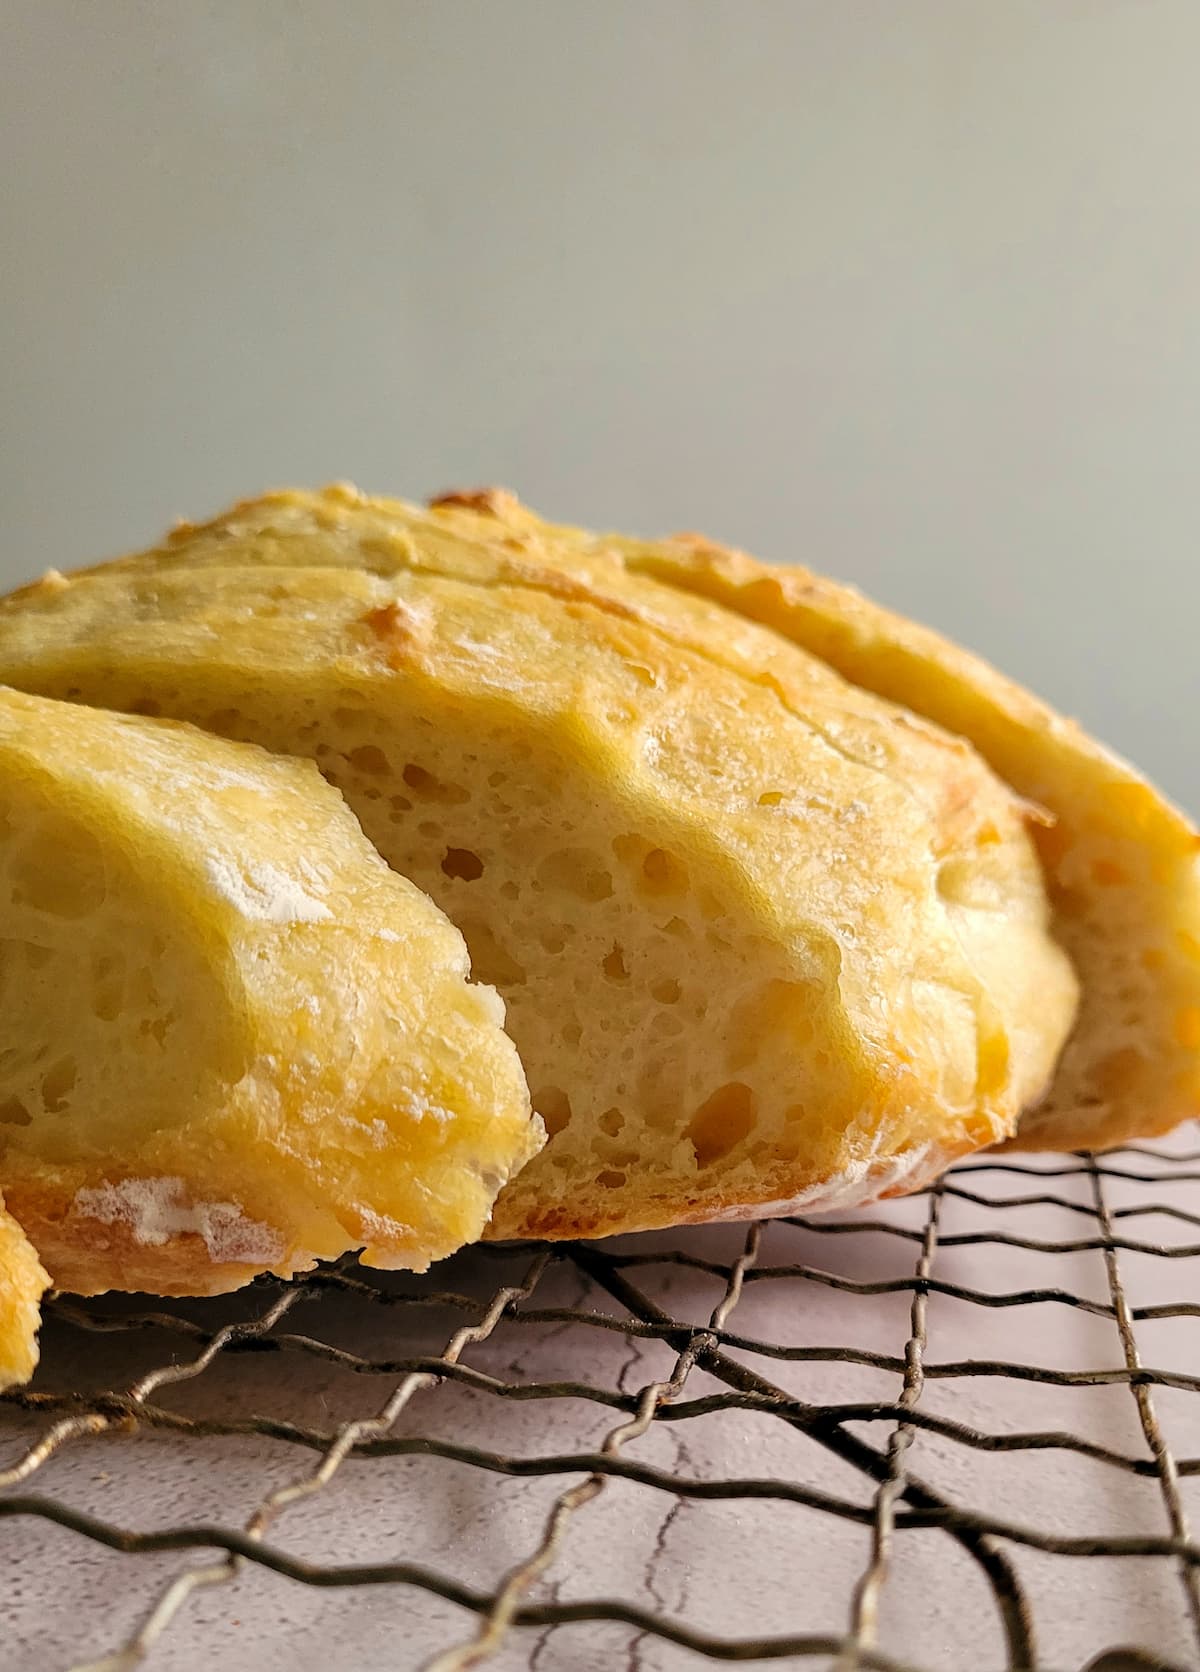
Say what?! This bakey style, *chef’s kiss*, ARTISANAL LOAF is as close to perfecting sourdough bread as I’m gonna get anytime soon. It’s kinda laughable knowing how easy and hands off this no knead bread recipe is compared to making sourdough but how similar the results are. I like to call this bread “sourdough but without all the work” because seriously, did you make this bread or did it come from the bakery down the street?!?
One of the best parts about this no knead bread recipe is that along with not needing any pre-existing knowledge or skills to make it, you also don’t need any fancy ingredients, equipment or techniques. Hmmm. Now that I think of it, maybe the real real reason I haven’t yet succeeded on my sourdough journey is the very fact that I discovered this easy AF no knead bread recipe. And with all of that effort that does not exist, it seriously can not be beat!

WHAT YOU’LL NEED TO MAKE NO KNEAD BREAD
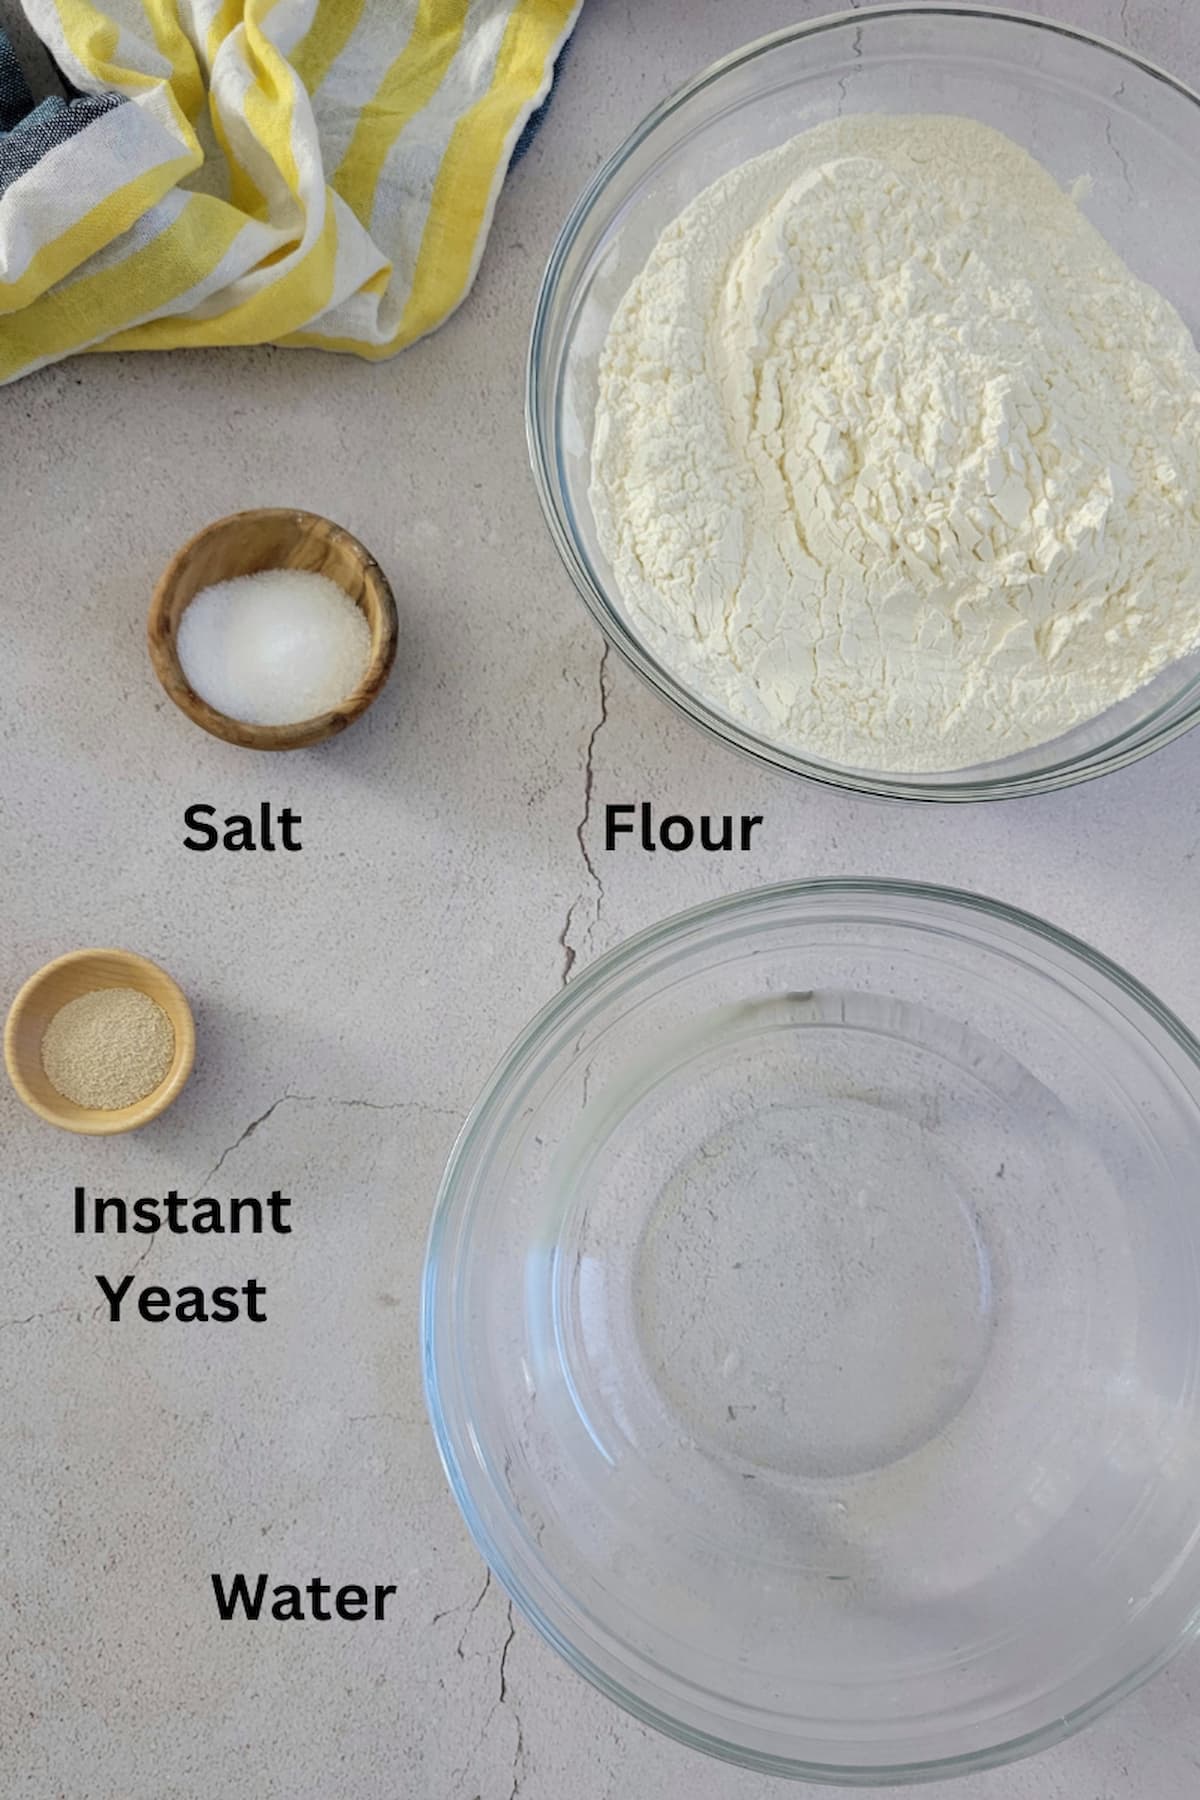
All you need (or should I say “knead”) to make a basic No Knead Bread are four fundamental ingredients. However, you can also enhance your bread with various additions like herbs, seeds, or other flavourings to customize it to your liking. Let’s get into the basics in a little bit more detail down below:
- Flour: Serves as the primary structure of the bread and provides the necessary gluten for proper texture. I love the bread that comes from using a simple all purpose flour here. But you can feel free to experiment with different types of flour. I’ve had success making this No Knead Bread recipe in the past also using whole wheat flour, bread flour and gluten free flour.
- Yeast: Used to leaven the bread, creating those delightful bakery style air pockets. Also helps both the dough and the bread rise. Instant yeast works best in this recipe.
- Salt: Adds flavour to the bread and helps regulate the fermentation process.
- Water: The key liquid ingredient that hydrates the dough and activates the yeast. Normally, the perfect temperature warm water is required to activate yeast in most recipes. However, in this recipe, since the yeast is activating over an 12-18 hour time period, room temperature water is sufficient.

HOW TO MAKE BREAD LIKE A BOSS (KEY TIPS)
You can find full instructions for how to make this bakery style no knead bread in the recipe card down below, but here are a few quick tips to keep in mind:
- Use fresh ingredients for best results. There is nothing worse than waiting 12-18 hours only to find that your dough didn’t rise because you used old flour or expired yeast. For freshest and best results, always make sure that the ingredients you’re using are of good quality and at peak freshness.
- DON’T KNEAD! I know, I know. That is literally going against every single thing you’ve ever learned about making homemade bread. But seriously. While it may be tempting, don’t knead the dough at any stage throughout the process. As a matter of fact, try your verrrry best not to even use your hands at all. Instead, use a wooden spoon or rubber spatula to stir the dough in the beginning. Then, when you’re ready to pour it out and gently shape it, use a dough scraper or a rubber spatula. A homemade bread that doesn’t get your hands regrettably sticky in the process? Hallelujah.
- Give yourself enough time (but thank your lucky stars that that time is not spent waiting for the dough to rise 4 different times with 7 different shaping periods in between…. lol). This may be the easiest bread you’ve ever made, especially when you compare it to what’s involved with making sourdough. However, it needs time to rise for best results. Like 12-18 hours of time. I like to start my bread the night before, let it rise overnight in a warm draft-free place and then bake it the following day. I’ve always had good results, even when I let it go a touch longer than the recommended rise period.
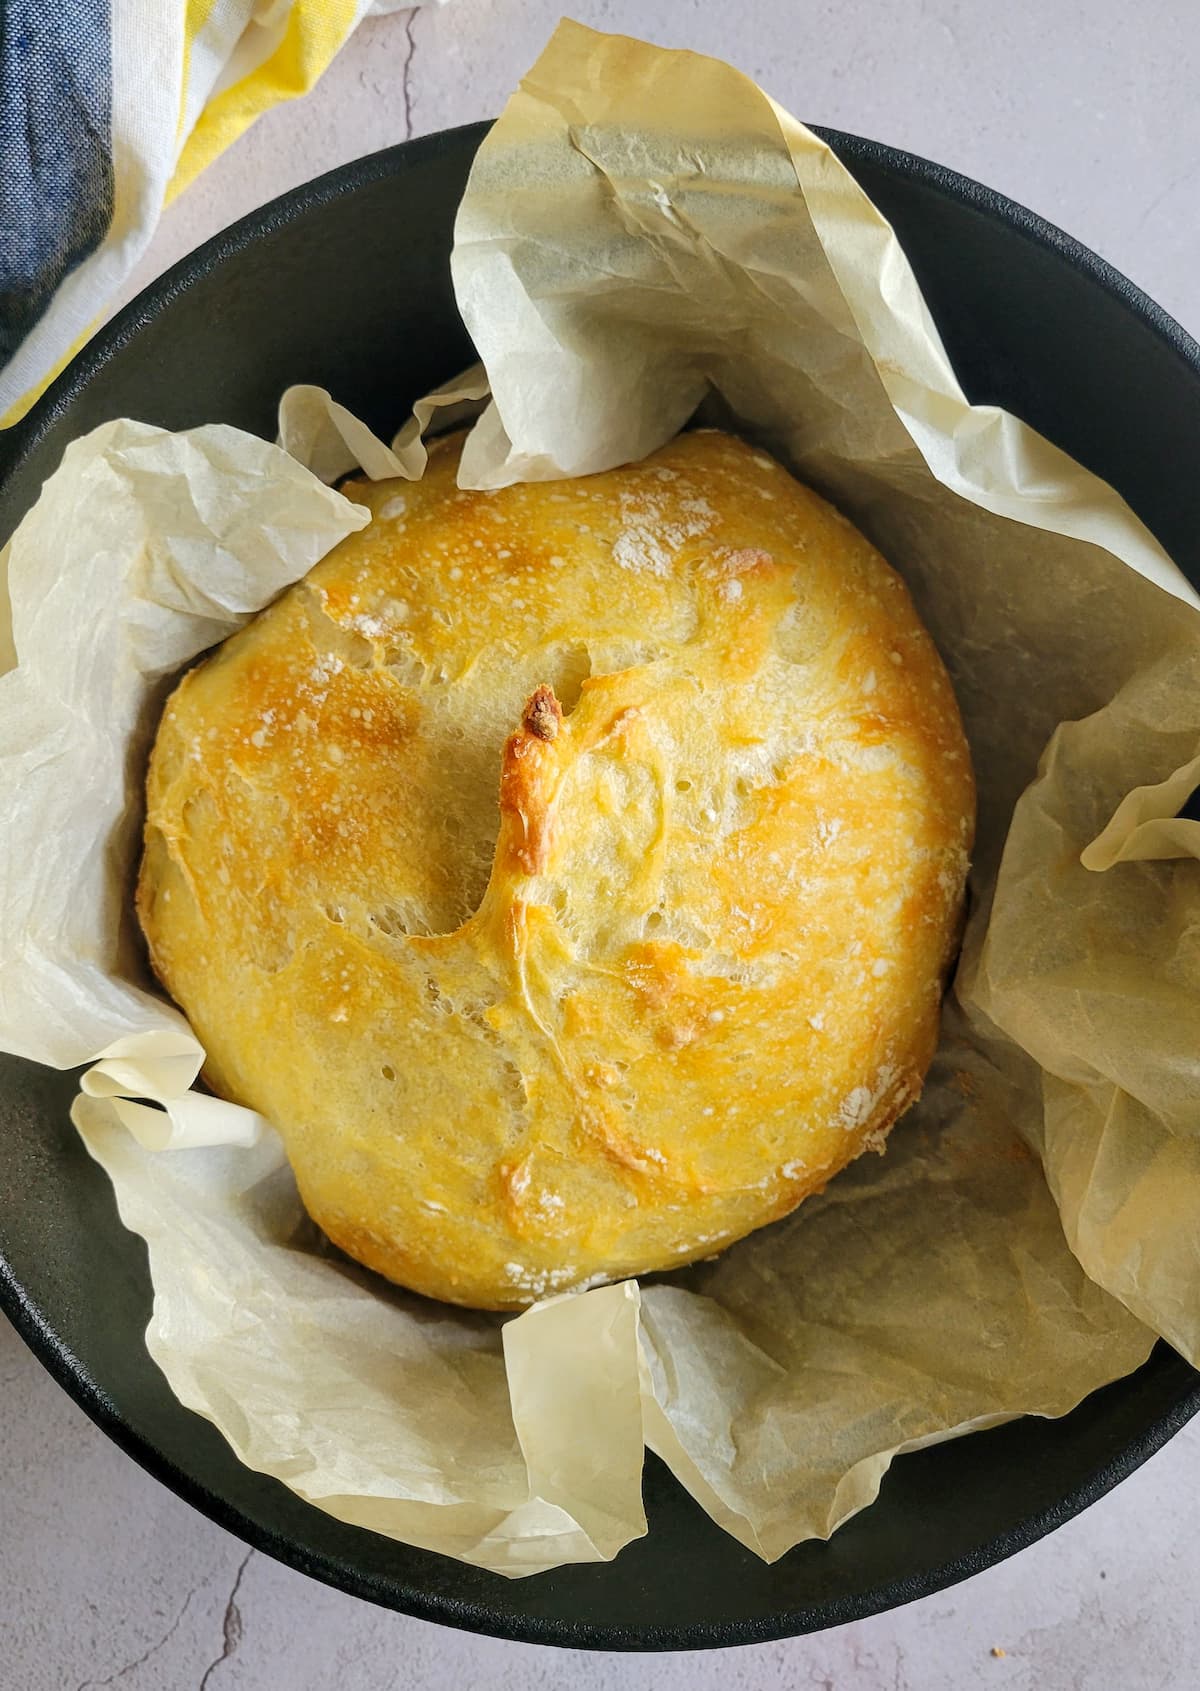
- Use a heavy oven safe pot or a Dutch oven with a lid for best results. I mean, you could try it in a loaf pan or a different pan if you wish (I never have, fyi). However, a cast iron Dutch oven or an enamel-coated cast iron pot with a lid creates the perfect steamy environment, which helps develop a crisp crust and a soft and airy interior in your bread.
- Preheat the Dutch oven or pot for at least 30 minutes before baking your No Knead Bread. This ensures that the entire pot is uniformly hot when you place the bread inside which promotes consistent baking and helps achieve a golden-brown crust. It also generates steam which is crucial for the bread’s rapid rise during baking leading to a lighter and airier crumb. EXTRA TIP: Be extra careful when handling the hot pot from the oven. These things heat up to the millionth degree, especially if you’re using something cast or heavy bottomed (like you should be).
- Remove the lid from the Dutch oven or pot in the last 10-15 minutes of baking. Most of the baking will be done with the lid on to trap in the steam created by the dough as it bakes, resulting in a professional-quality crust. However, exposing the bread to the heat and allowing some of that steam to escape in the final stages of baking will allow you to achieve that nice golden brown colour we look for in a good crusty loaf.


FREQUENTLY ASKED QUESTIONS
The point of making no-knead bread is to simplify the bread baking process while still achieving artisan quality results. Sometimes life gets tough and busy and ain’t nobody got hours and days to spend making perfect loaves of sourdough. With no-knead bread, you don’t have to! Even if you’ve never baked a loaf of bread in your entire life, no-knead bread is beginner-friendly and requires minimal effort to prepare.
NO! Not in this No Knead Bread recipe. As a matter of fact, this recipe is so hands off, you might question me on whether or not it will even work. But it will. And as a matter of fact, works best with minimal touching. No stretching. No folding. And no sticky fingers. It really is like the homemade bread of dreams!
If your no knead bread didn’t rise in the oven, several factors could be at play. Using old flour or expired yeast are typical culprits. Inadequate proofing or not allowing the dough to rise properly during the initial fermentation period can lead to dough that doesn’t rise. On the other hand, over proofing the dough or allowing it to rise for too long might cause it to lose its structure and not rise well in the oven. And finally, insufficient moisture. If your dough was too dry or you didn’t create enough steam in the oven, it could affect the dough’s ability to expand properly.
If your no-knead bread turned out dense and heavy, it could be due to several factors. Over-flouring or using too much flour can result in a heavy dough. Make sure to measure your flour accurately and consider using a kitchen scale for precision.
Insufficient rising time can lead to a dense crumb. Ensure you allow the dough to ferment for the recommended duration (12-18 hours… or overnight).
Using expired or inactive yeast. If your yeast is old or not activated properly, it won’t provide the necessary leavening. Always use fresh and good quality ingredients for best results.
To keep your no knead bread fresh, store it at room temperature in a paper bag or wrapped loosely in a clean kitchen towel. This helps maintain its crispy crust while preventing it from drying out too quickly. Avoid storing it in plastic, as this can trap moisture and make the crust soggy.
If you need to keep it fresh for more than a couple of days, you can wrap it tightly in foil and freeze it for up to three months. When ready to eat, simply thaw at room temperature and reheat in the oven for a few minutes to restore its crusty texture.

LOVE THIS RECIPE? Try my no knead focaccia recipe next!
THINGS TO MAKE THAT GO GOOD WITH THIS BREAD
HOMEMADE SUN-DRIED TOMATOES OR SUN-DRIED TOMATO PESTO
LOVE THIS RECIPE? PIN IT FOR LATER!

NO KNEAD BREAD
Video
Ingredients
- 3 cups All Purpose Flour
- 1.5 tsp Salt
- ½ tsp Instant Yeast
- 1.5 cups Room Temperature Water
Instructions
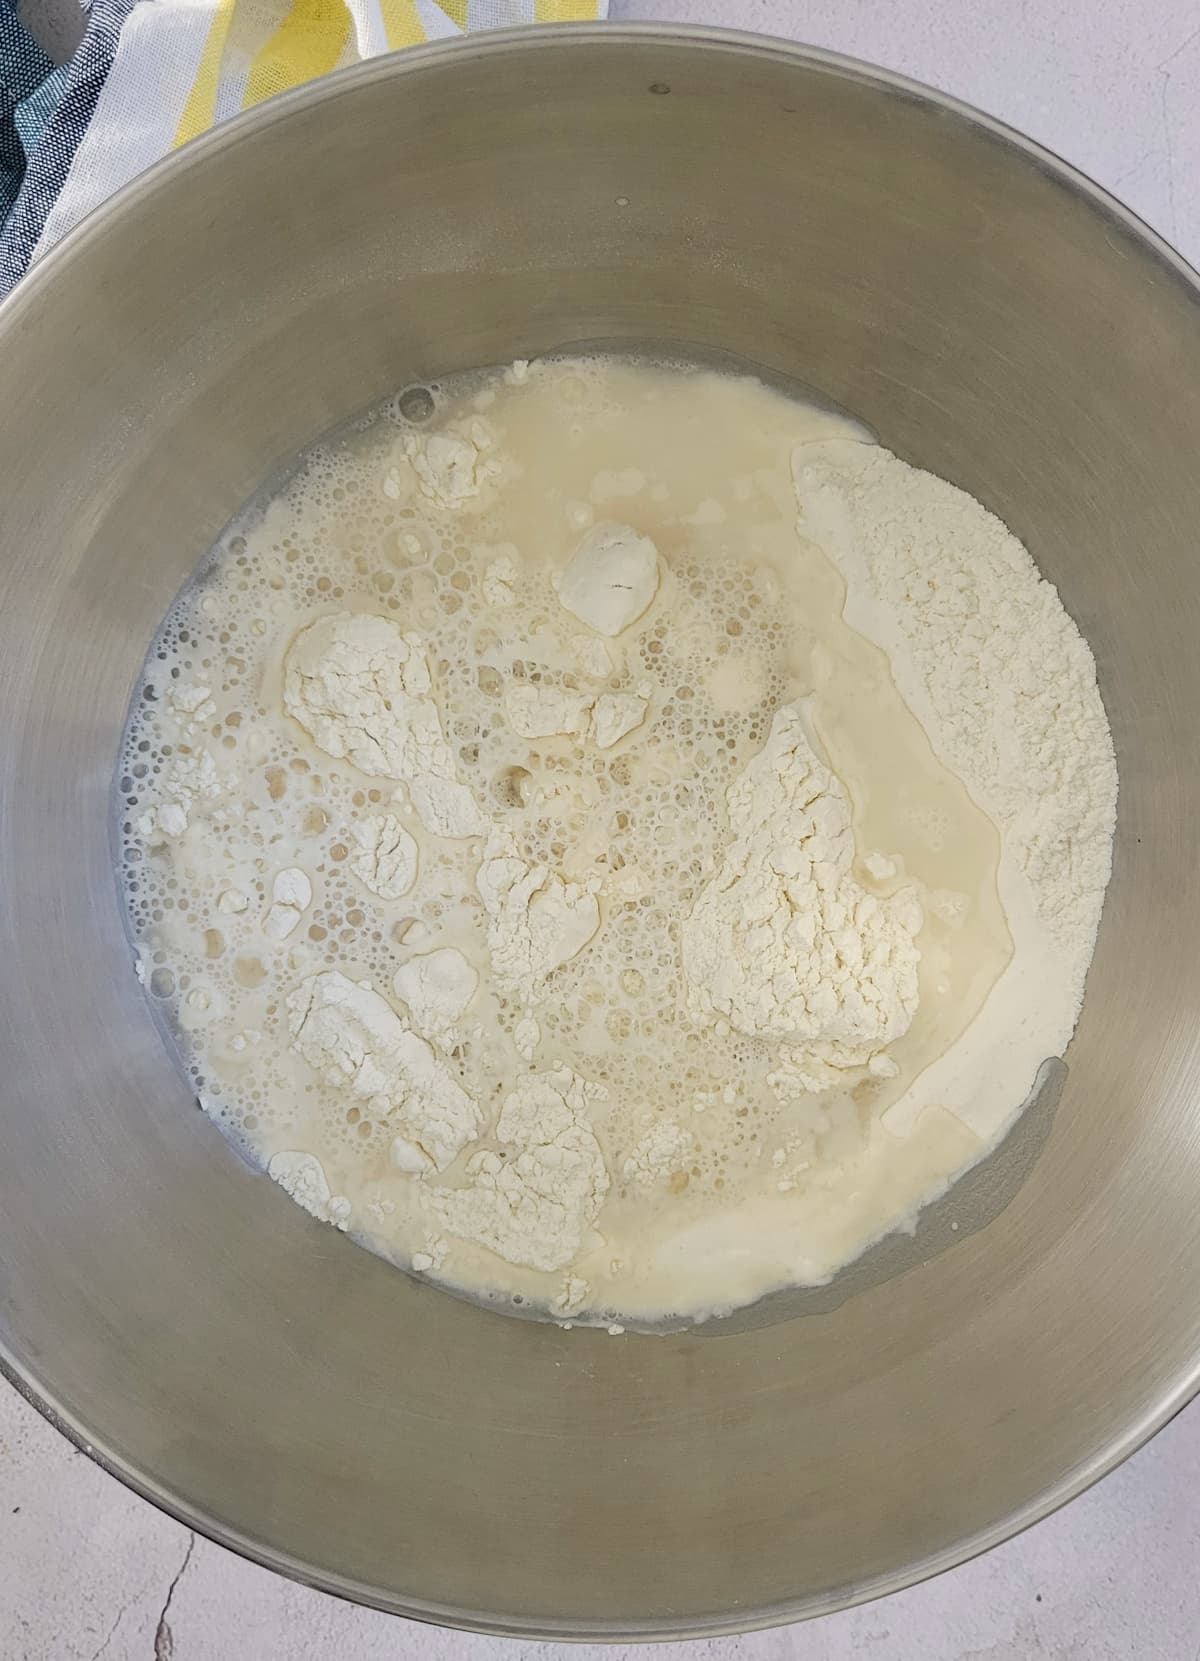
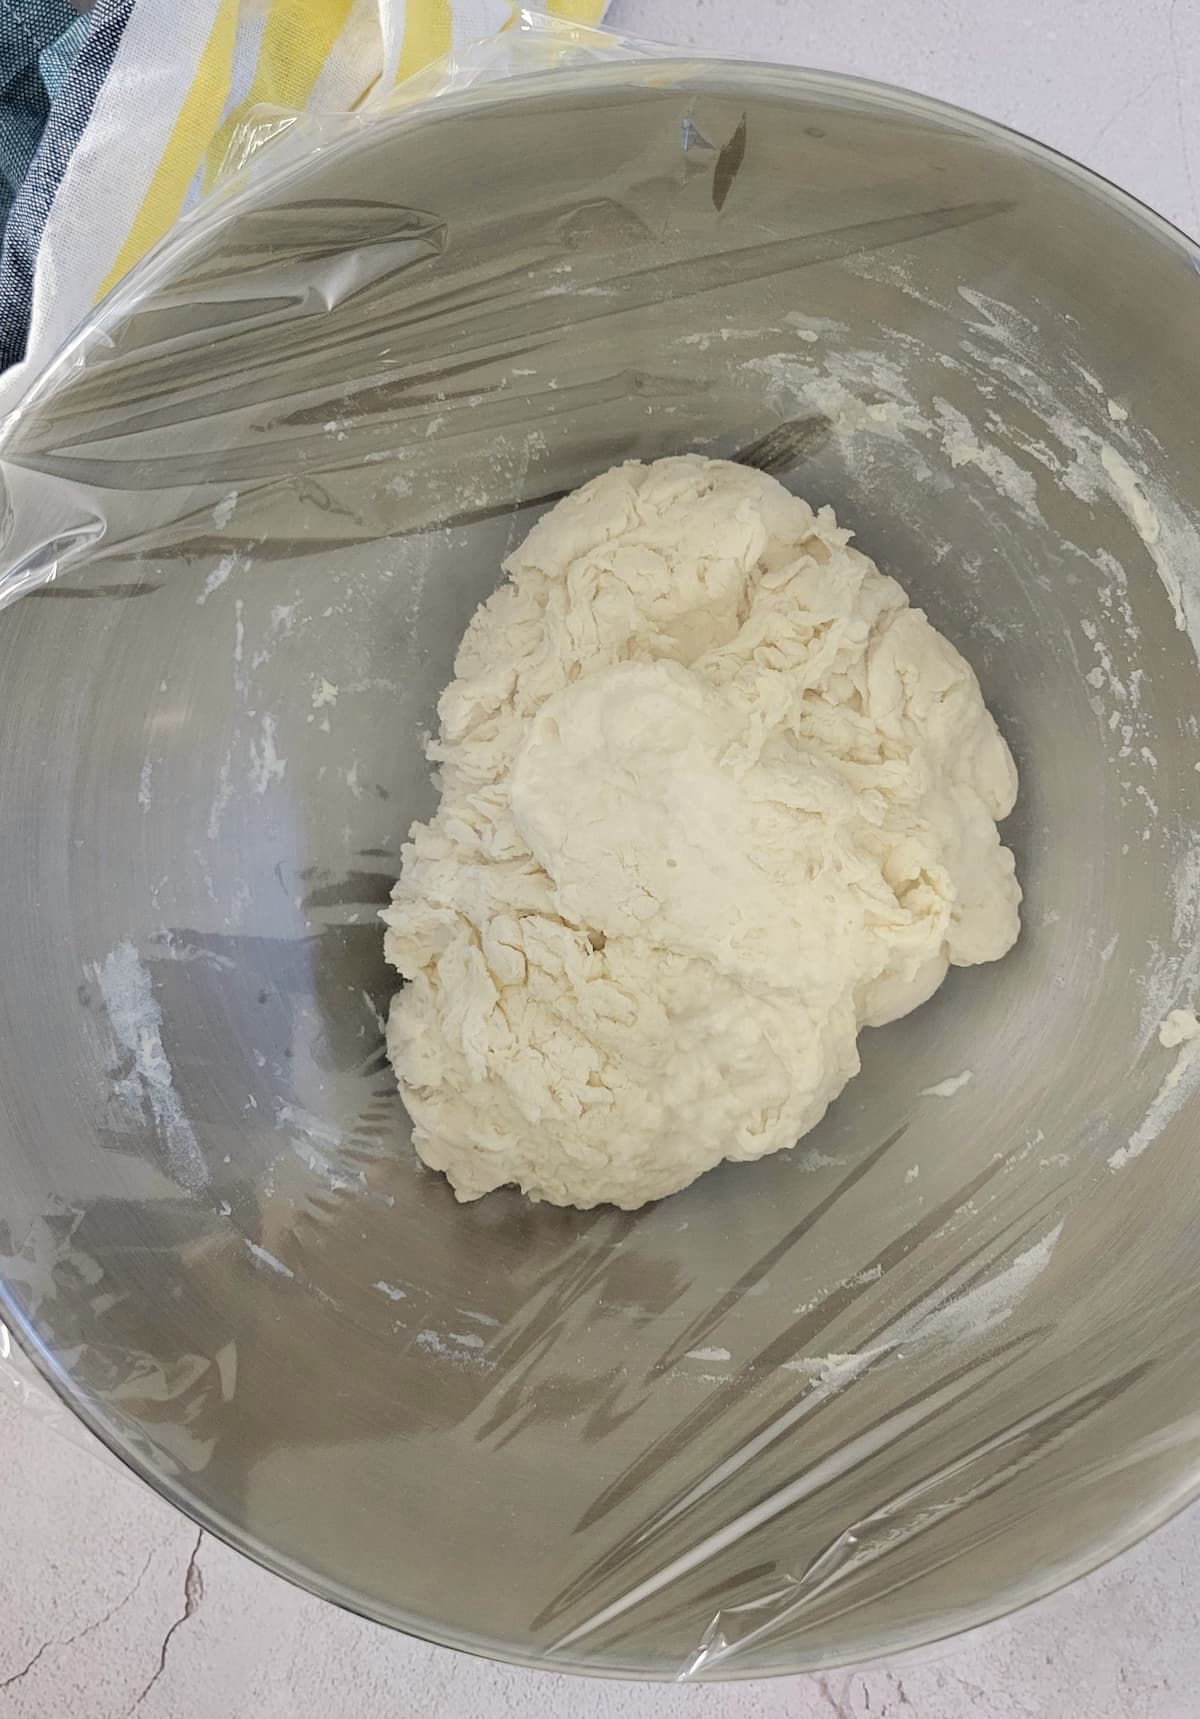
- In a large bowl, combine the flour, yeast, and salt.

- Using a wooden spoon or a rubber spatula, stir in the water until fully incorporated.

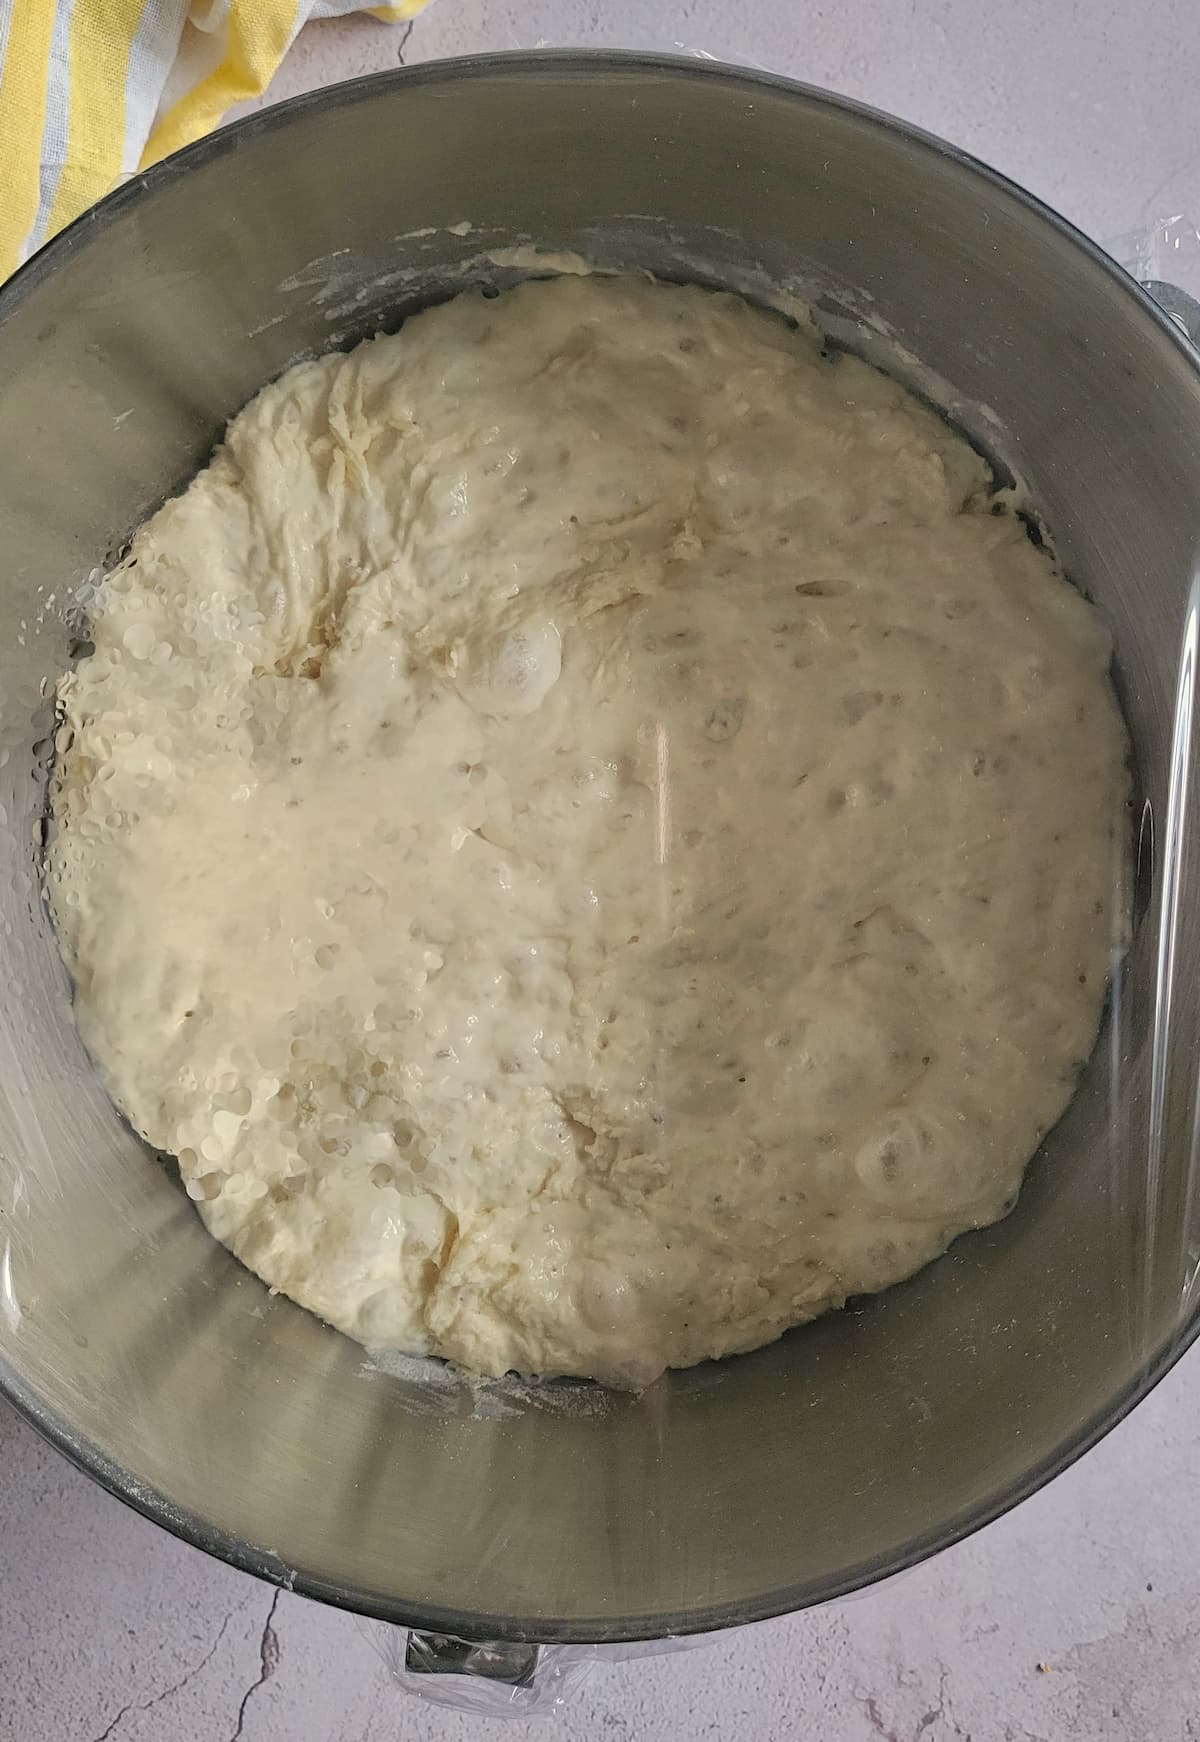
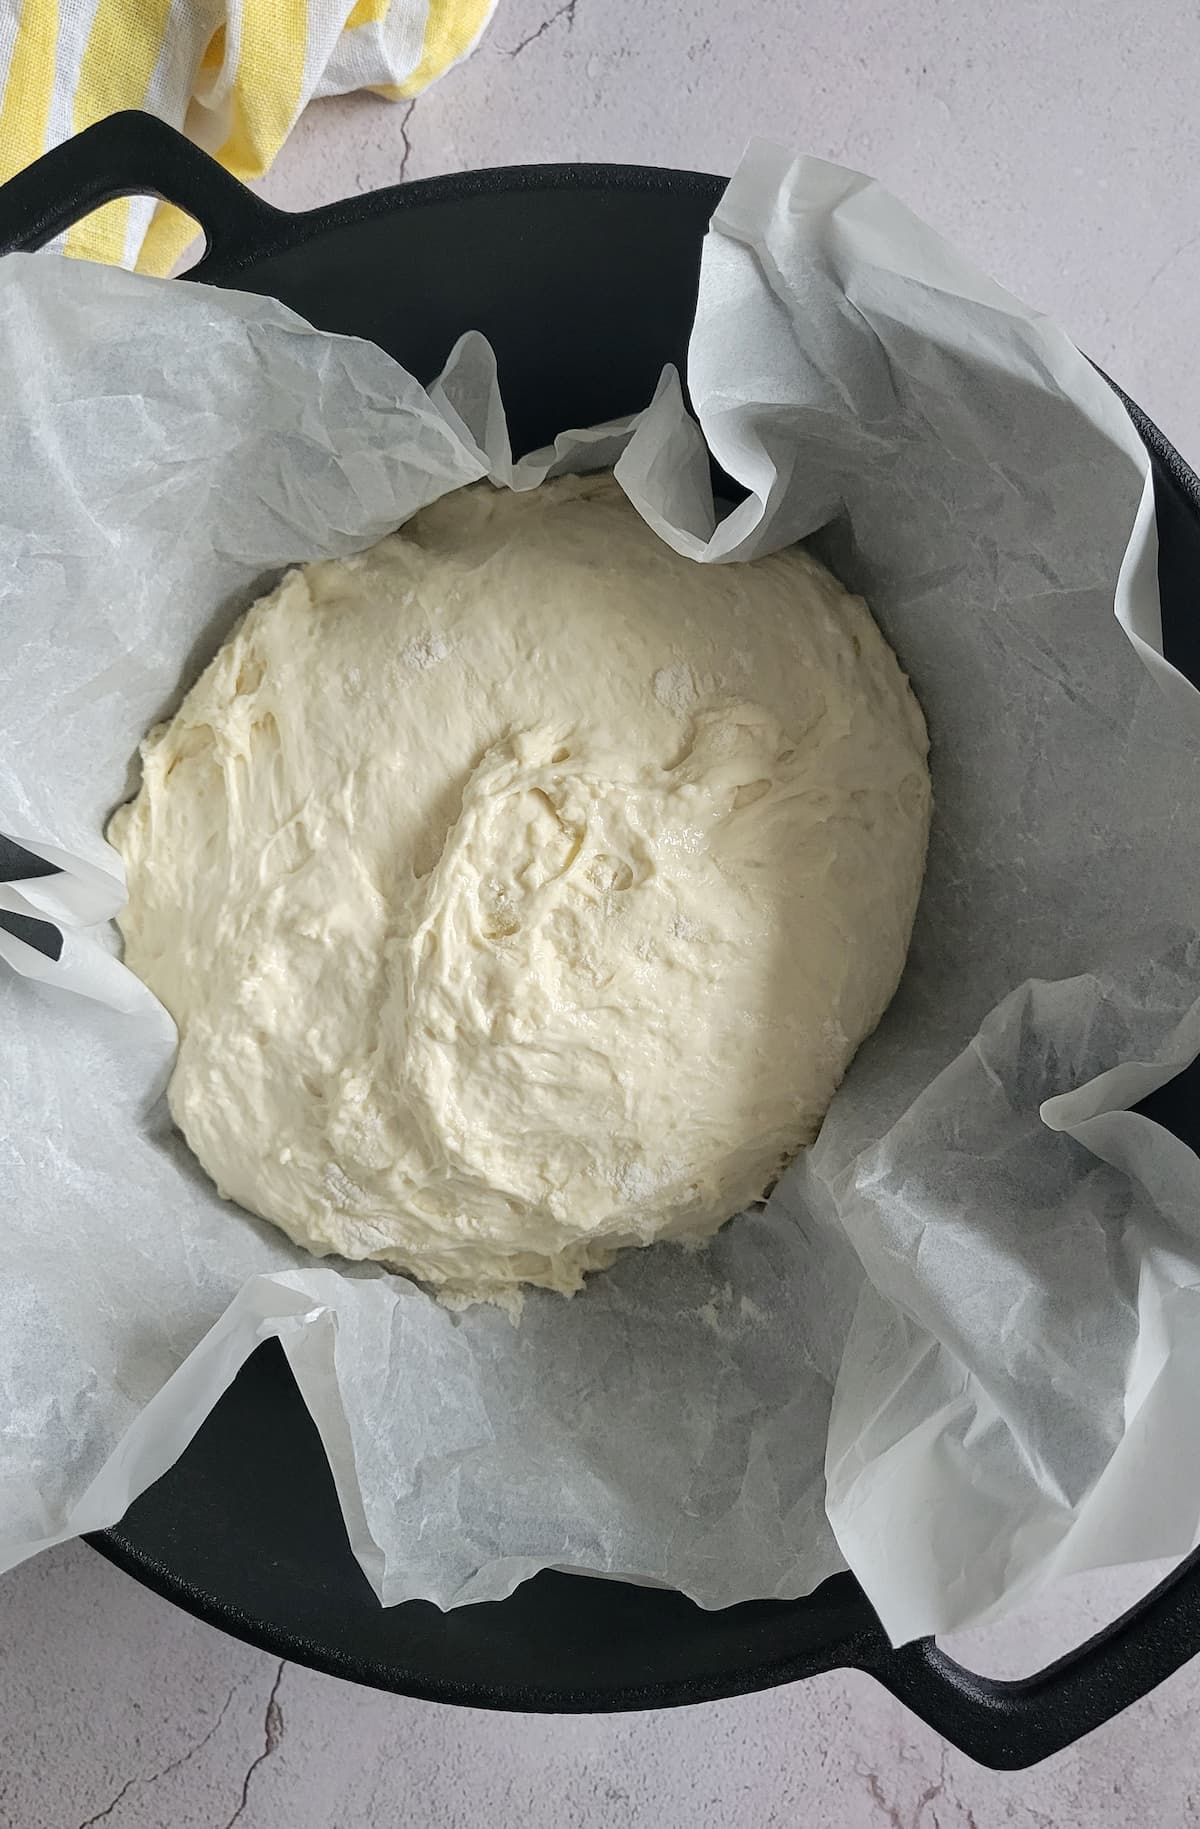
- The dough should be chunky, thick and little scrappy looking. Cover it with plastic wrap and let it rest for 12-18 hours (ideally overnight) in a warm, draft free place.

- When you're ready to bake, preheat the oven to 450°F. Stick a 5 or 6 quart cast iron dutch oven with a lid (or similar heavy bottomed pan) in the oven for 30 minutes to heat. At this point, the dough should have risen significantly, be light and airy and have a ton of bubbles on the surface.

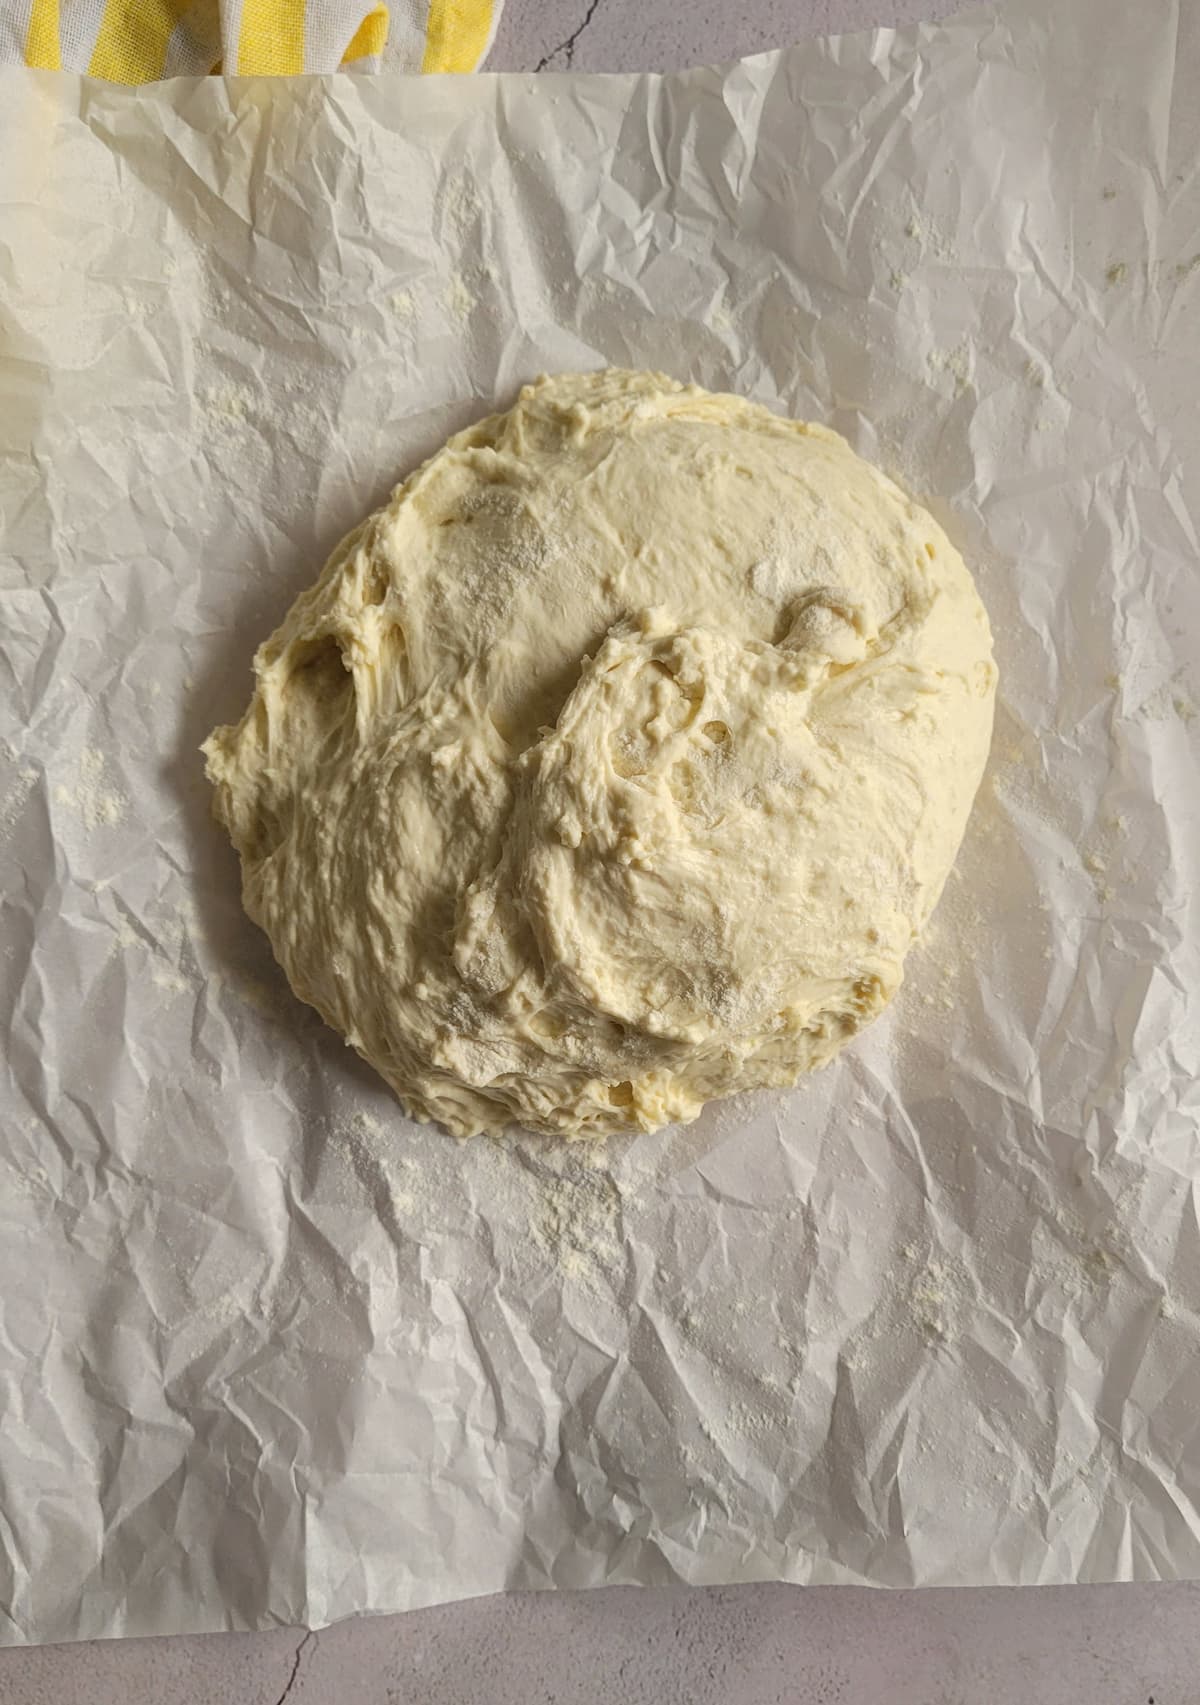
- Lay a piece of parchment paper down on a flat surface and lightly coat it (and your hands) in some flour. Gently scrape the dough out onto it and using either your hands, a spatula or a dough scraper, shape it into a loose ball. Be very minimal with your actions here – remember, no knead.

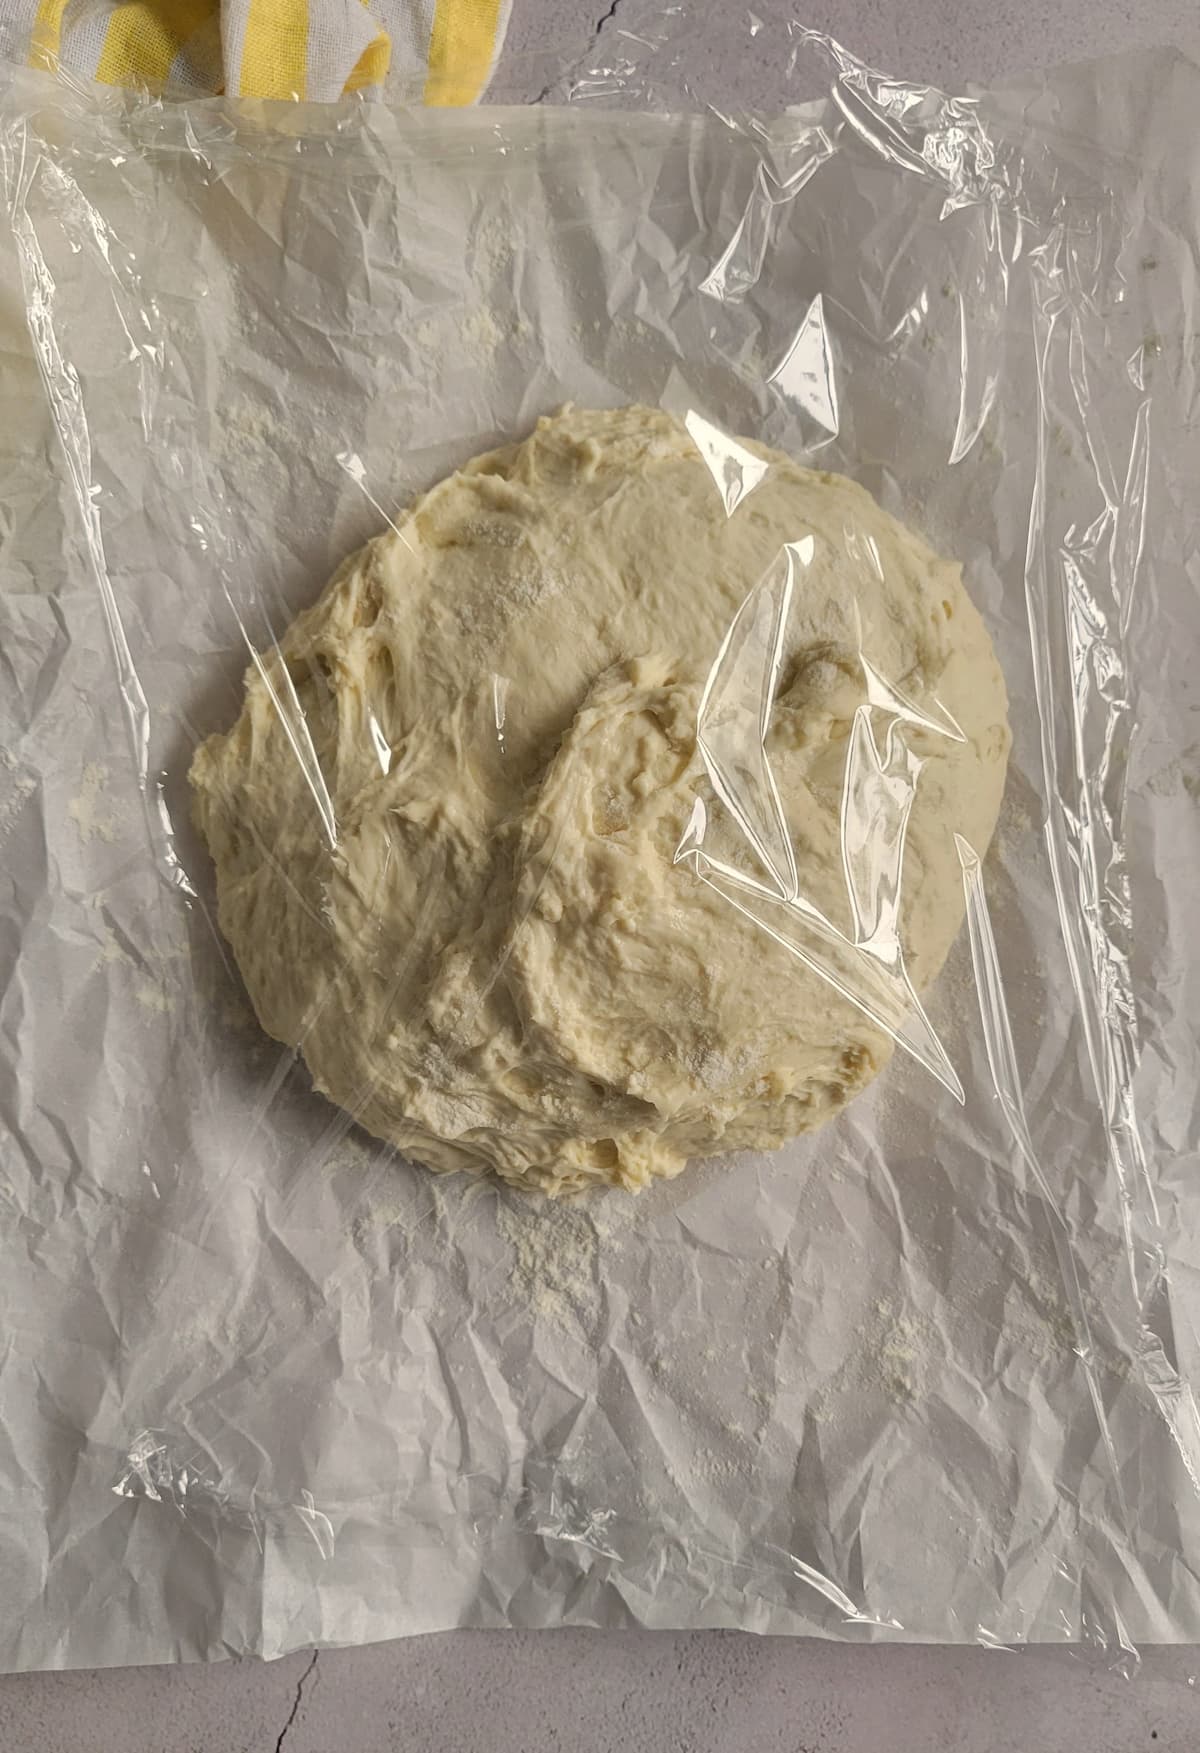
- Flour the outside and cover it with a piece of cling wrap while the pan heats up in the oven.

- Remove the cling wrap from the dough and carefully remove the hot pan from the oven. Lift the dough and parchment together into the pan.

- Bake, with the lid on, for 30 minutes. Remove the lid and bake another 10-15 minutes to get the exterior nicely golden brown and crispy.


Nutrition
Don’t skip the good stuff —
scroll up above the recipe card for ingredient notes, tips & tricks, and easy swaps/variations.Made it? Tell me everything.
I LOVE seeing what you made! Tag @hiphipgourmet on Instagram (or use #hiphipgourmet) so I can see it — then rate it + upload your photo below. 💖
The links in this post are affiliate links. Thanks for supporting HipHipGourmet!