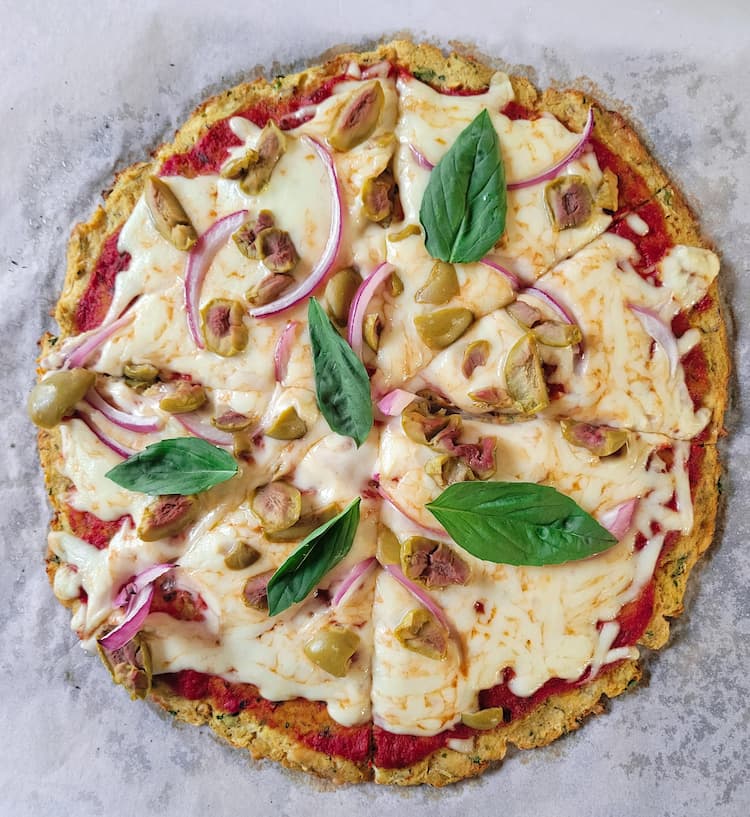
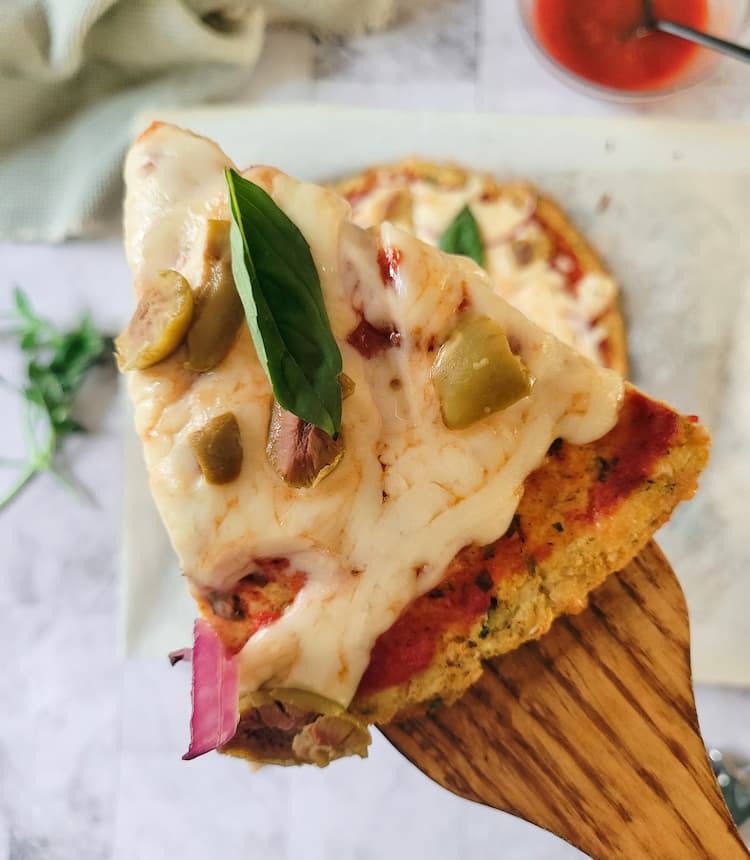
This Recipe for Cauliflower Crust Pizza makes a great low carb/keto friendly pizza option! It’s grain and gluten free, sturdy enough to hold all your favourite pizza toppings, and a fun way to sneak in some extra veggies. You won’t even miss the dough!
Round up the family and get ready to feel badass because this cauliflower crust pizza will have everyone fooled. I mean, if it looks like a pizza and tastes like a pizza…then it must be a pizza, right?
We’re talkin’ low carb and keto friendly pizza where the crust is made entirely of cauliflower! Yup, that’s right! There is no flour in this recipe for cauliflower crust pizza but it’s just as tasty and sturdy as good ol’ regular pizza crust you know and love. Blend a little cheese and some herbs and spices in there and of course, load it up with all your favourite toppings, and voila, cauliflower (and pizza!) do it again!
It’s no secret. If there’s any food that said “F it…I do what I want!” that food is definitely cauliflower. I mean, you can turn it into wings, into rice, use it as a base for mac and cheese, and even turn it into a deliciously creamy homemade pasta sauce. Is there anything cauliflower can’t do? Judging by this recipe for cauliflower crust pizza, I’m gonna go ahead and say no, sista, there is in fact nothing this versatile veggie can’t do!
Making and serving this recipe just makes me want to let out a big “mwahahahaha.” I ain’t ever met a kid (or person, for that matter) who says no to pizza. And there’s just something that makes me super happy about being able to relish in my sneaky ways as I serve them a slice of what I know to be mostly veggies.
But, everyone loves pizza…am I right? And when you clean up their empty dishes, you can happily pat yourself on the back because this is our little secret and no one, especially the little ones, have to know about it 😉
WHAT YOU’LL NEED TO MAKE THIS KETO FRIENDLY CAULIFLOWER CRUST PIZZA

Other than the two classic pizza ingredients, tomato sauce, and cheese, you only need a few other ingredients to turn cauliflower into pizza! Let’s discuss them in a little bit more detail down below:
- Cauliflower: Well, duh. You can’t have cauliflower crust pizza without it! I like starting off with as large a head as I can find. You’re going to have to pulse the florets in a food processor to make rice like pieces. Or, to save time and for convenience, you can purchase pre-riced cauliflower from the produce section of the grocery store. I wouldn’t recommend going for the frozen riced cauliflower because although great for other cauliflower rice recipes, moisture is not going to be our friend in this one. With that being said, though, I’ve seen some other recipes that do in fact use frozen cauliflower. If you do choose to go with frozen, thaw it completely before use and let me know how it turns out in the comment section down below.
- Tomato Sauce: The classic base of our cauliflower crust pizza. You can use homemade tomato sauce or store bought. Looking to change things up a bit? Try it with pesto, alfredo sauce, or just plain extra virgin olive oil instead.
- Mozzarella Cheese: Shredded or grated for best results. Cause what’s a pizza without that ooey, gooey cheesy layer? As if that’s not delicious as it is, I also added some directly into the crust for extra cheesy goodness and flavour. I went with the classic mozzarella but feel free to change things up a bit! Cheddar, goat cheese, or feta are always good options.
- Parmesan Cheese: Cause can you ever really have enough cheese? The parmesan adds loads of flavour since it’s mixed directly into the crust before baking. Feel free to add some extra on top with the mozzarella if you like things a little extra cheesy.
- Garlic: Adds flavour to the crust and gives this pizza that Italian vibe! I like using fresh garlic for this recipe because it’s deliciously potent and flavourful when blended with the rest of the ingredients. But, if all you have on hand is garlic powder, use 2 teaspoons instead of the 2 fresh cloves.
- Spices: Adds flavour and ensures we don’t end up with a bland or boring pizza crust. I used a mixture of chili flakes, Italian seasoning, and salt and pepper which I found to be perfect for this cauliflower crust pizza. This basic spice combo should work for most classic pizzas but feel free to change up the spices if you’re going for a specific vibe. For example, a BBQ chicken style pizza would taste great with smoked paprika or a Mexican style pizza would be great with cumin baked into the crust instead.
- Eggs: Adds structure, flavour, and acts as a binder for the ingredients in order for the crust to form easily.
- Parsley: For extra flavour and is baked right into the crust. Sticking with that Italian vibe, I went with some chopped fresh parsley here. However, feel free to switch it up with other fresh herbs. Oregano, basil, thyme, and cilantro are all good options for this recipe for cauliflower crust pizza.
- Toppings of Choice: As always, you can chose to keep things pretty simple with just the mozzarella cheese and tomato sauce. Or, you can let your creative juices flow and top this bad boy however you would a pizza! PRO TIP: Yes, this crust is pretty sturdy. However, it still ain’t no pizza dough (lol). I recommend loading it up with no more than three extra toppings (besides the cheese and sauce) for best results.
HOW TO MAKE CAULIFLOWER CRUST PIZZA (KEY TIPS)
You can find full instructions for how to make this low carb pizza crust in the recipe card down below, but here are a few quick tips to keep in mind:
- Use a food processor to help you rice the cauliflower. With just a few simple pulses, it’s easier than you think to break down the florets. Work in batches if the whole head doesn’t fit in your food processor at the same time. Although this is by far the easiest and quickest method, if you don’t have a food processor you can grate the cauliflower florets on a box grater or chop it up into rice like pieces yourself, using a sharp knife. One medium to large head of cauliflower will yield about 4-6 cups riced. However, you can always buy the pre-riced cauliflower from the produce section of your local grocery store for convenience and to save on time.
EXTRA TIP: Go for fresh cauliflower for this recipe (instead of frozen) as we want to work with the least amount of moisture as possible to avoid a soggy crust.
- Precook the riced cauliflower before mixing in the other ingredients and assembling the crust. There are three ways you can do this: 1) Transfer the processed cauliflower to a microwave-safe bowl and cover. Microwave until soft, 4 to 6 minutes. 2) Preheat the oven to 400ºF. Line a baking sheet with parchment paper, then spread the cauliflower rice out in a single layer. Bake for 15 minutes, or until the cauliflower is tender. 3) Sauté in a non-stick skillet over medium heat and cook until translucent, approximately 6-8 minutes. Either method will get the cauliflower soft, tender and ready to use!
- Let the cooked cauliflower cool before handling or trying to squeeze out the moisture. That stuff is HOT and you will burn yourself if you attempt to handle it too soon.
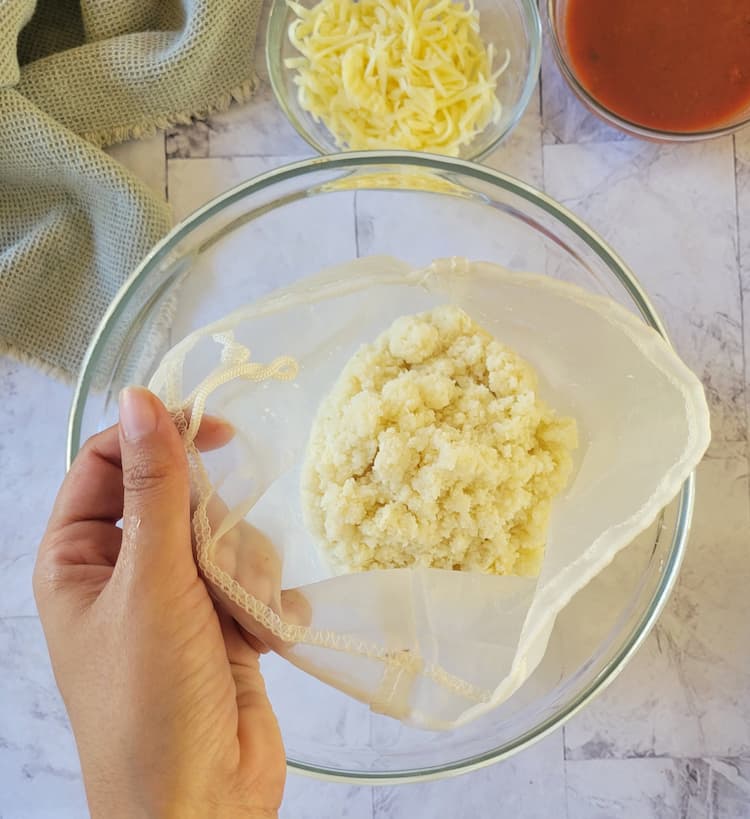
- Wring out all the excess moisture after cooking or steaming the cauliflower. Quite possibly THE most important step in this recipe for cauliflower crust pizza. Getting rid of all that excess water (and trust me, there will be A LOT) will ensure that the crust can bake up nice and crispy in the oven instead of turn out mushy and soggy. EXTRA TIP: A nut milk bag or a cheesecloth makes this process as easy as can be! If you don’t have either of these handy, a clean, dry dishcloth will get the job done just fine.
- When you think you’ve rung out all the excess water and moisture, keep wringing! Seriously! It might even feel neverending at times (ha). But trust me, getting every last bit of water out will truly make the difference between a crisp or soggy crust.
- To avoid sticking, line your baking sheet or pizza stone with parchment paper and grease it with oil. The cauliflower crust pizza will be a bit more delicate than your classic pizza crust and the last thing you want to do is have to scrape it off the pan.
- Use your hands/fingers to shape the pizza into the desired shape and thickness. For best results, keep it about a 1/4-inch thick all the way around.
- Prebake the crust before adding any toppings. This will stiffen it up a bit so it is stable enough to hold the toppings and it doesn’t turn into a soggy mess in the oven. Most of the crust gets baked on it’s own, until it’s dry and golden, and then we add the toppings. EXTRA TIP: For an extra crispy crust, and if you’re not too afraid it’ll break (aka me the first 84674 times I made this recipe), carefully flip it over 20 minutes into baking to crisp up the other side.
- Don’t get toooo crazy with the toppings. While the crust does hold up rather well and come out nice and sturdy, too many toppings (on any pizza, for that matter) will make it mush and soggy. Keep it under 3 extra toppings (besides the cheese and sauce) for best results.
- Don’t be afraid to double the recipe! I’m not going to sugar coat it…the process for making this cauliflower pizza crust is a bit time consuming and somewhat labour intensive IMHO. Doubling the batch will make it well worth your while as they freeze well so you can always save one for future use!

FREQUENTLY ASKED QUESTIONS
You, unfortunately, didn’t do the greatest job in wringing out the excess water/moisture. The cauliflower should be crumbly to the touch with absolutely 0 moisture or water left inside. Wring it out until it’s nice and dry. And then, wring it out some more!
Additionally, keep an eye on your crust while it’s in the pre-bake, pre-topping stage in the oven. Before adding any tomato sauce, cheese or toppings, the crust should be dry and golden. Baking the crust in the oven on it’s own first is an important step in getting out as much moisture as possible. The edges should be browned and golden while the middle cooked through and dry.
Any leftovers should be stored in an airtight container and kept in the fridge. The longer it sits, the more soggy it will become so eating it within 2 days is probably best. To reheat, simply pop on a baking sheet or pizza stone in a 400°F oven until warm and heated through.
Yes! You certainly can freeze cauliflower pizza crust. As a matter of fact, I actually recommend making a double batch to do exactly that. I’m gonna give it to you straight…this recipe for cauliflower crust pizza is a bit labour intensive. Making a double batch – one for now and one to freeze for a future delicious meal – will totally make it extra worth your while!
To freeze: Simply shape the cauliflower into desired size and thickness on a parchment lined baking sheet. Sometimes, when I double this recipe, I make two large crusts. Other times, I’ll make it into 4 smaller crusts for individual size pizzas instead. Either way, prebake the crust for 10-15 minutes in a 400°F oven. Cool. Then store in an airtight container in the freezer until ready to use. Alternatively, carefully wrap the cooled crust in plastic wrap and place in a freezer safe ziploc bag. They’ll be good in the freezer for up to 2 months.
When ready to make a pizza, pop the frozen crust on a parchment lined pizza stone or baking sheet. Stick it in a 400°F oven for 10-15 minutes, or until heated through. Add your toppings and cook an additional 10-15 minutes, or until the cheese is melted and bubbly.

LOVE PIZZA BUT HATE CAULIFLOWER? Try my zucchini pizza bites instead!
LOOKING FOR THE REAL DEAL? Try my quick and easy homemade pizza dough recipe!
MORE CAULIFLOWER RECIPES FOR YOU TO TRY
MEXICAN STYLE CAULIFLOWER “RICE”
SIMPLE OVEN ROASTED CAULIFLOWER
CREAMY CAULIFLOWER ‘POTATO’ SALAD
MOM’S FAMOUS PASTA WITH CAULIFLOWER AND BACON
CILANTRO LIME CAULIFLOWER “RICE”
LOVE THIS RECIPE? PIN IT FOR LATER!

RECIPE FOR CAULIFLOWER CRUST PIZZA
Video
Ingredients
FOR THE CAULIFLOWER PIZZA CRUST
- 1 large head Cauliflower (about 4 cups, riced)
- 2 Eggs
- 2 Cloves Garlic (minced)
- ¼ cup Parmesan Cheese
- ¼ cup Mozzarella Cheese
- ¼ cup Fresh Parsley (chopped)
- ½ tsp Italian Seasoning
- ¼ tsp Salt
- ¼ tsp Pepper
- Pinch of Chili Flakes (optional)
FOR THE TOPPINGS
- ¼ cup Tomato Sauce
- 1 cup Mozzarella Cheese (grated)
- Assorted Desired Toppings of Choice (optional)
- Fresh Chopped Herbs (such as basil, for garnish, optional)
Instructions
- Preheat the oven to 400°F. Line a large baking sheet with parchment paper and grease with oil. Set aside until ready to use.
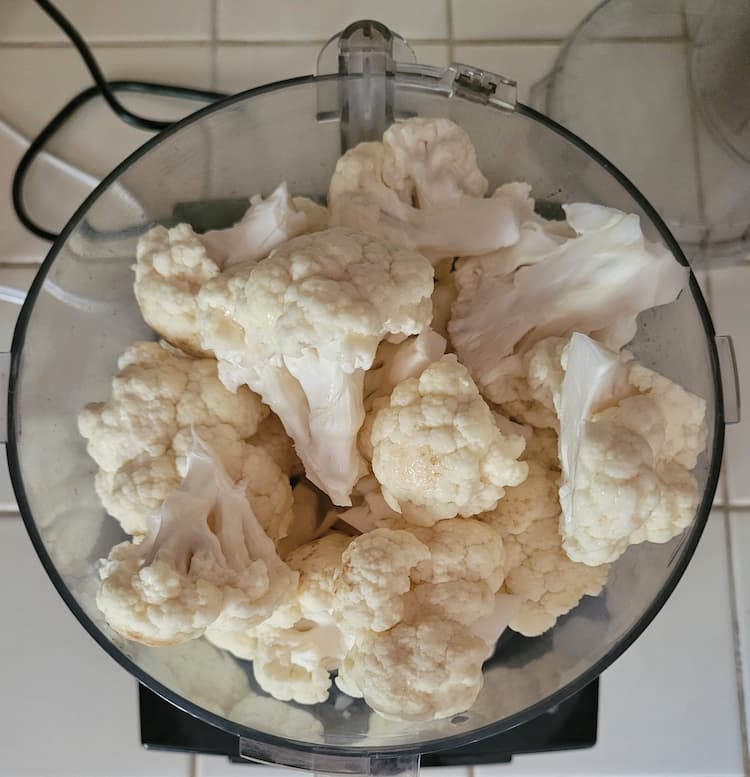
- If using fresh cauliflower, cut into florets. Add them to a food processor (working in batches if necessary).

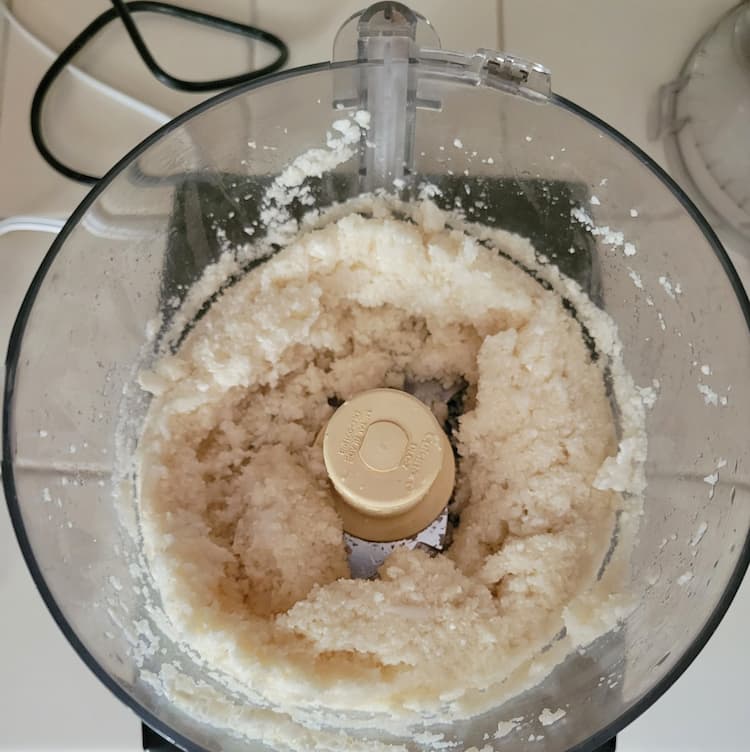
- Pulse until rice like pieces form. Alternatively, use a box grater or sharp knife if you don't have a food processor.

- Cook the cauliflower using one of these three methods: 1) Transfer the processed cauliflower to a microwave-safe bowl and cover. Microwave until soft, 4 to 6 minutes. 2) Preheat the oven to 400ºF. Line a baking sheet with parchment paper, then spread the cauliflower rice out in a single layer. Bake for 15 minutes, or until the cauliflower is tender. 3) Sauté in a non-stick skillet over medium heat and cook until translucent, approximately 6-8 minutes. Allow it to cool before handling.
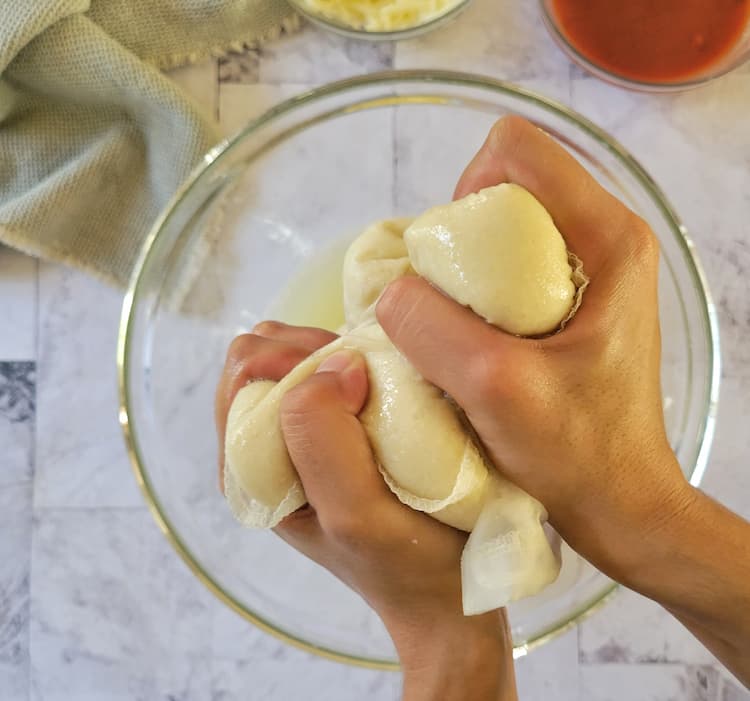
- Once cooled, transfer the cauliflower "rice" to a clean dish cloth, nut milk bag or cheesecloth.

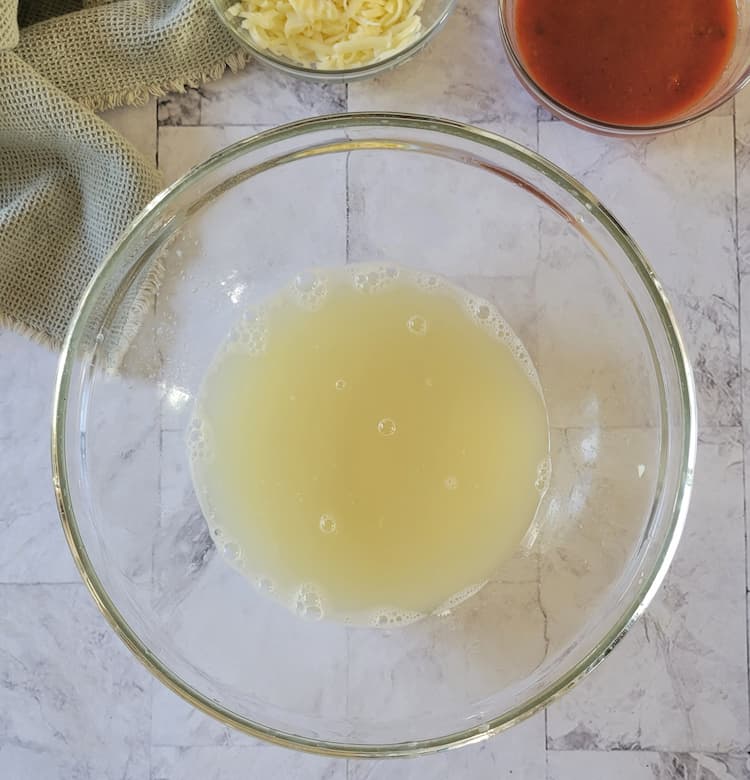
- Wrap the cauliflower up and with all your might, squeeze (and I mean SQUEEEEZE, people!!!) all the excess water and moisture out.

- And there will be A LOT! Once you think you've squeezed enough, keep squeezing! This makes the world of difference between a soggy or a crispy crust.

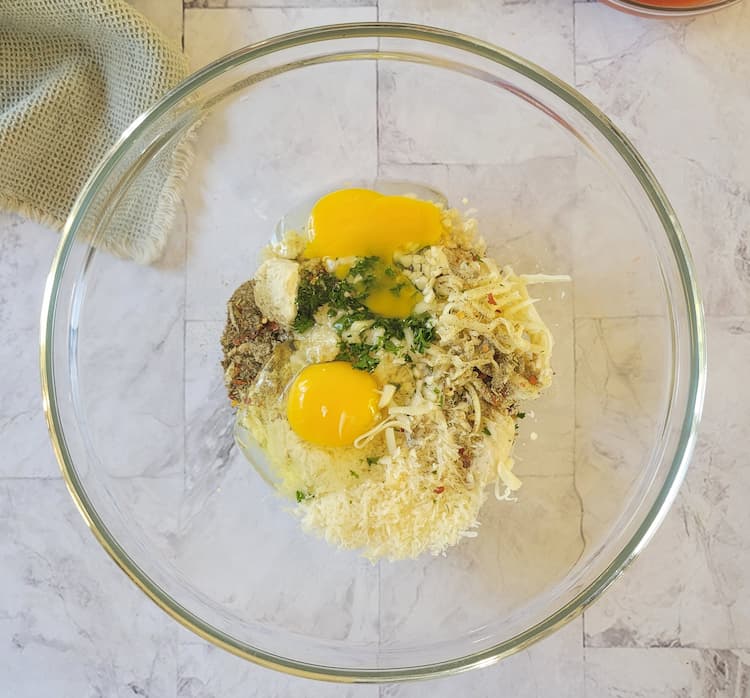
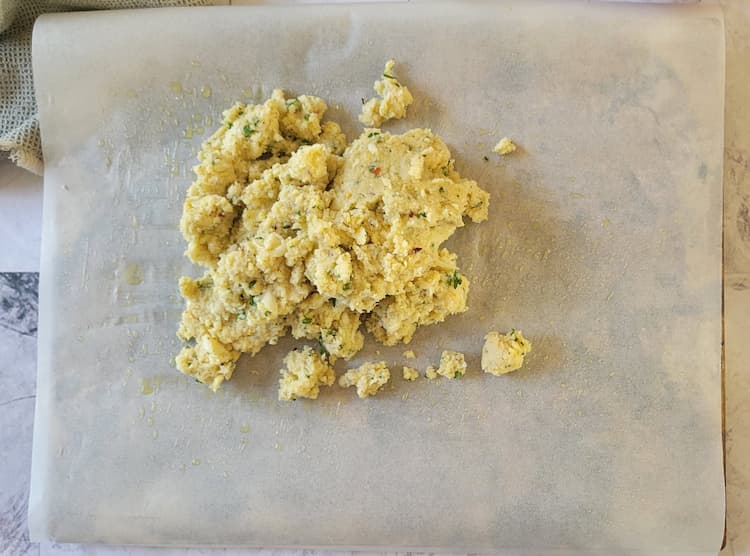
- In a large bowl, add the squeezed out cauliflower, eggs, parmesan cheese, mozzarella cheese, garlic, parsley, Italian seasoning, salt, pepper, and chili flakes, if using.

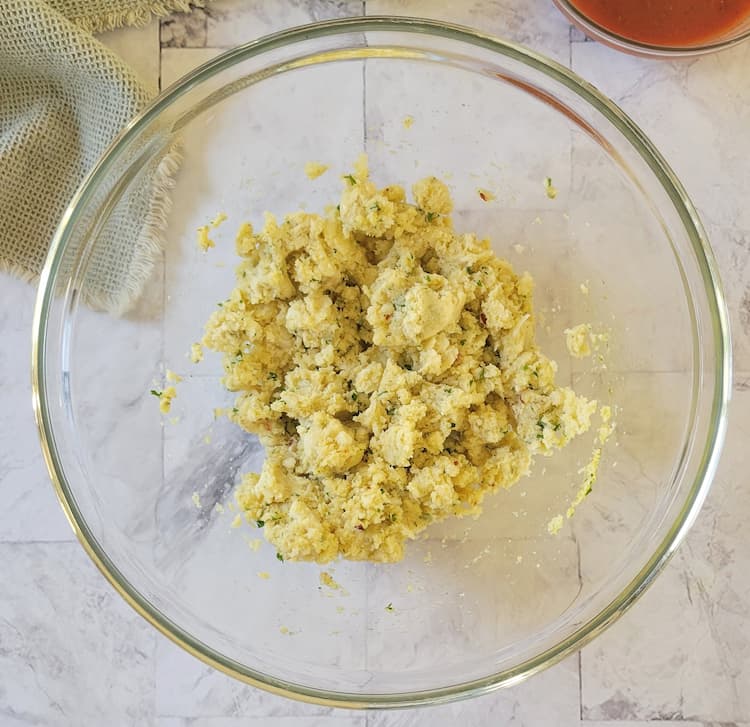
- Use your hands to mix it until well combined.

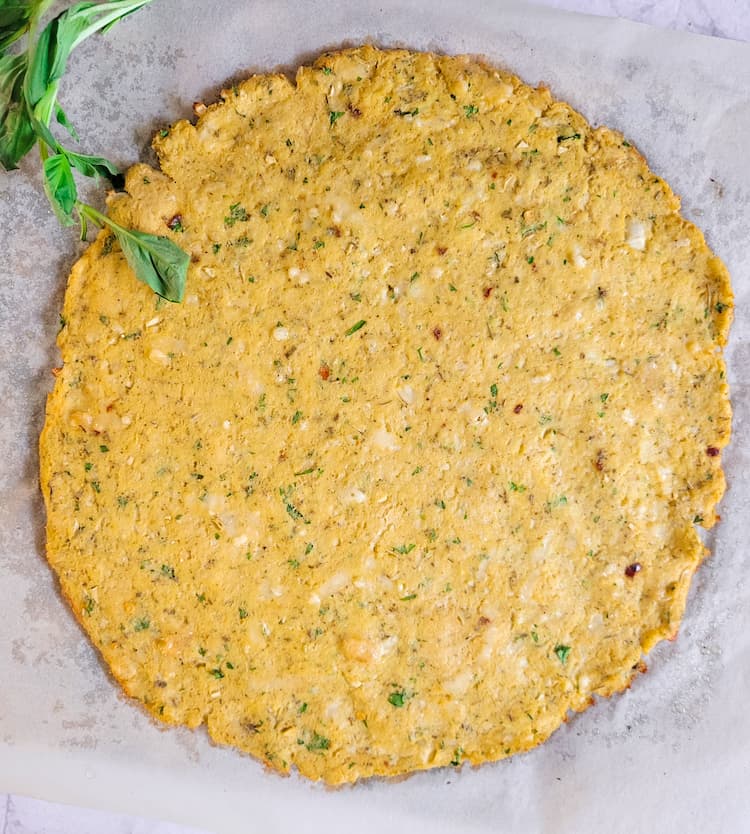
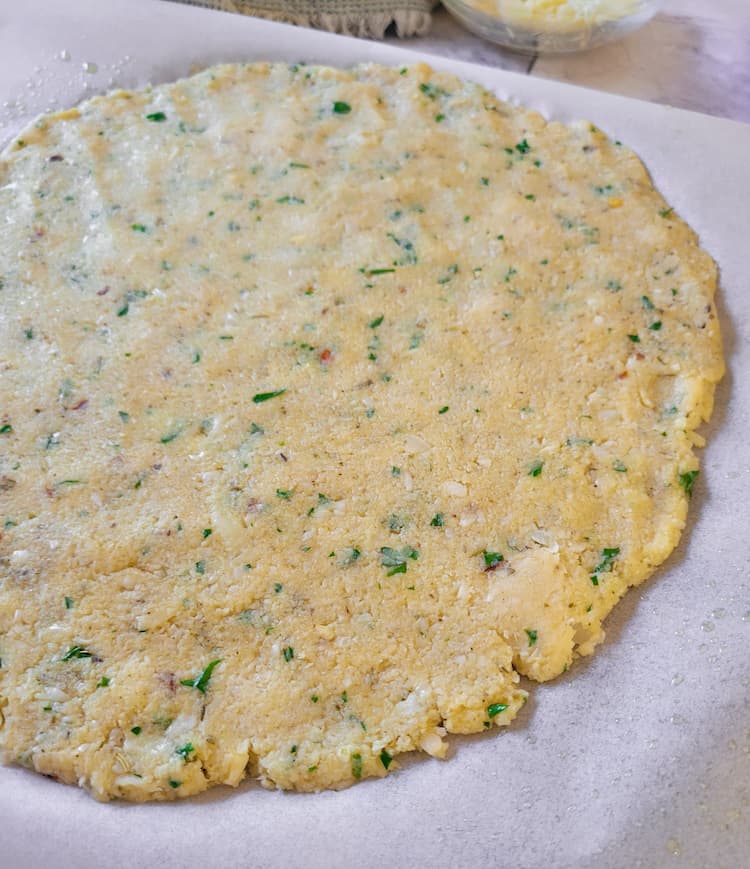
- Pour the dough out onto your parchment lined baking sheet or pizza stone. Use your fingers and hands to press it down and shape it into a 1/4-inch thickness.

- Bake for 25-35 minutes, until the edges are golden and the middle is dry and cooked through. There should be no wetness or moisture remaining when you go and add the toppings. Optional: Carefully flip the crust over after 20 minutes to cook and crisp up on the other side.

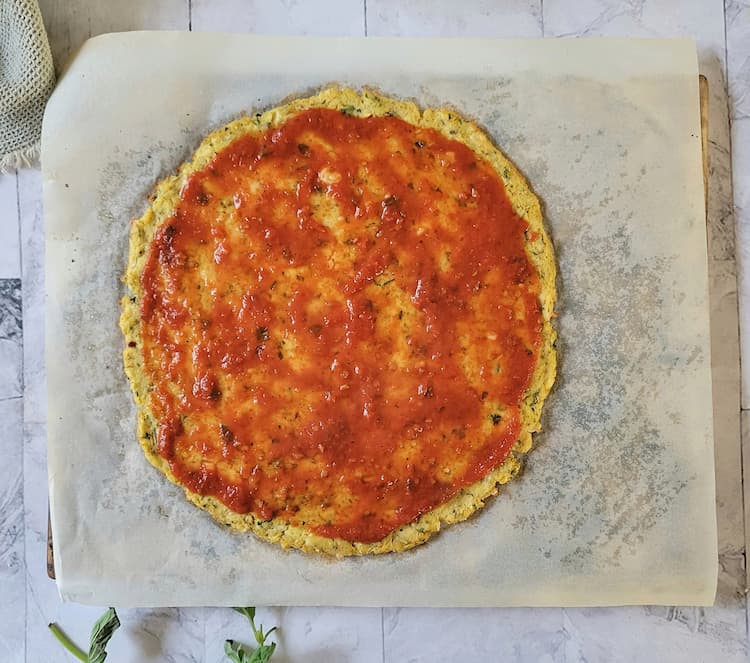
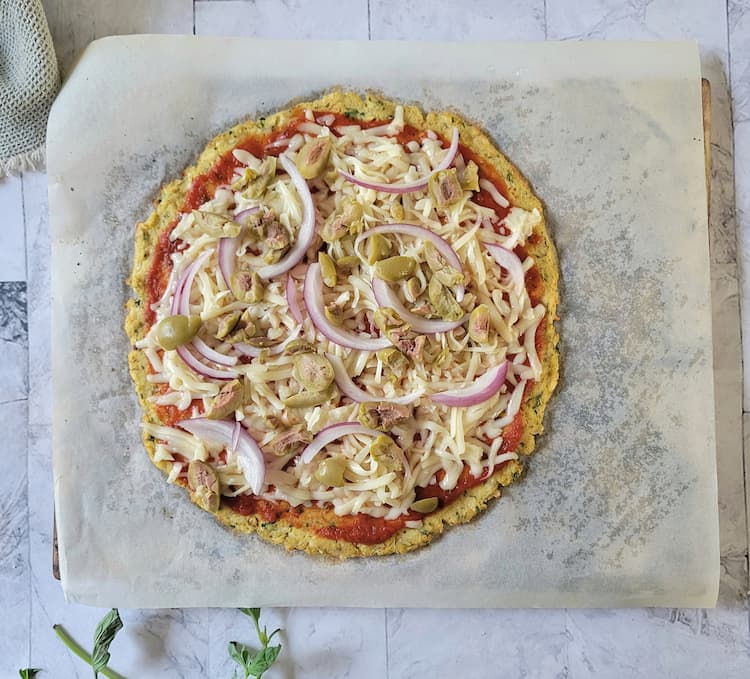
- Top! Start with a thin layer of tomato sauce…

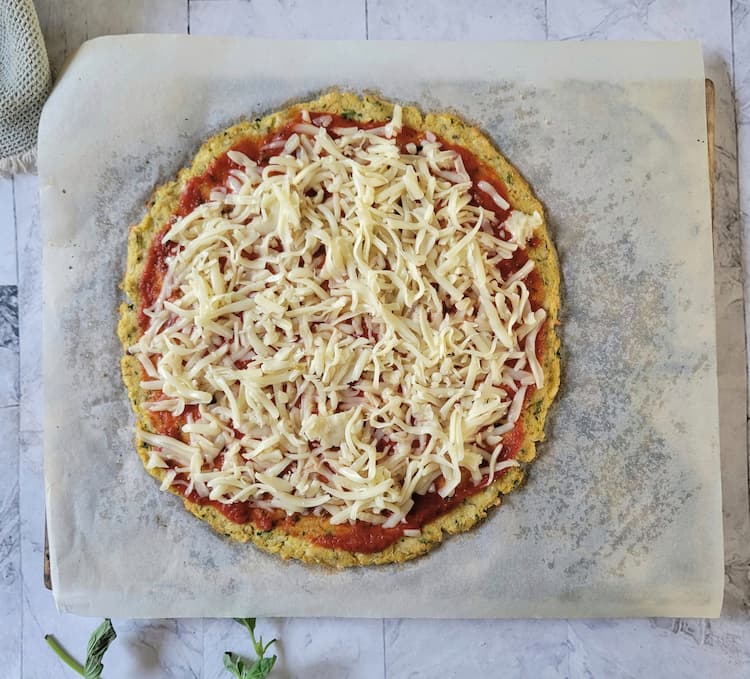
- Next add the cheese…

- And now, for your desired toppings, if any.

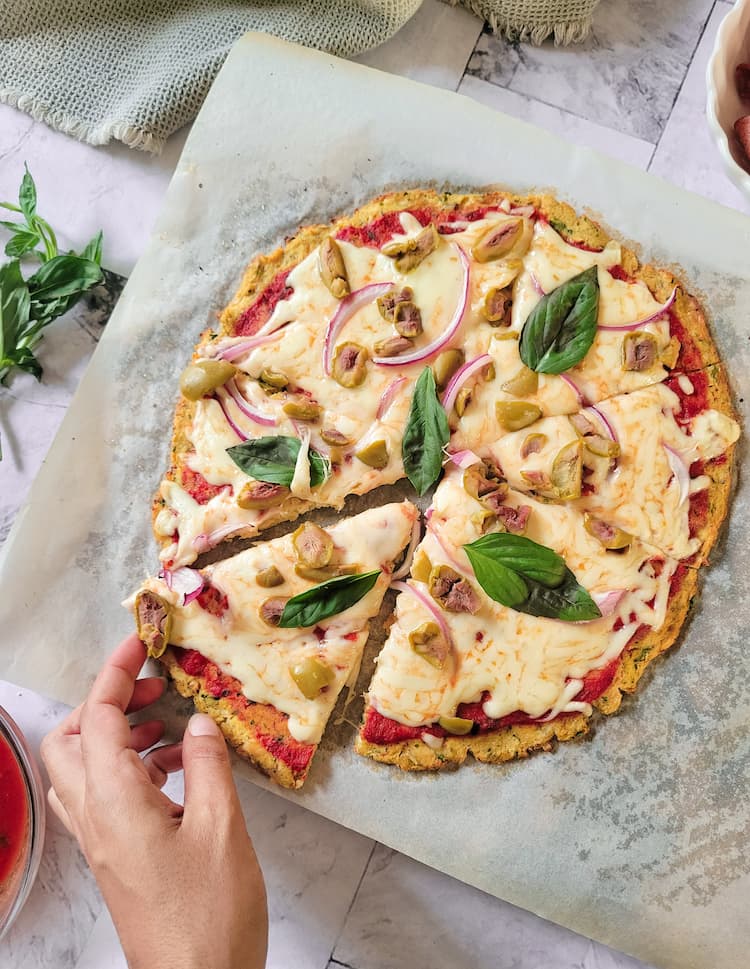
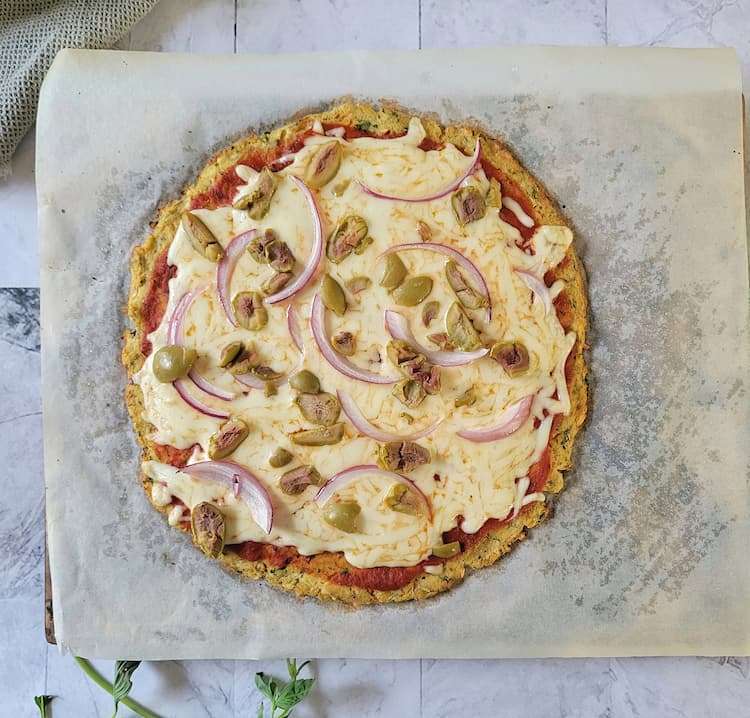
- Return the pizza to the hot oven and bake an additional 10-15 minutes, or until the cheese is melted and bubbly and the toppings crisp and cooked through.

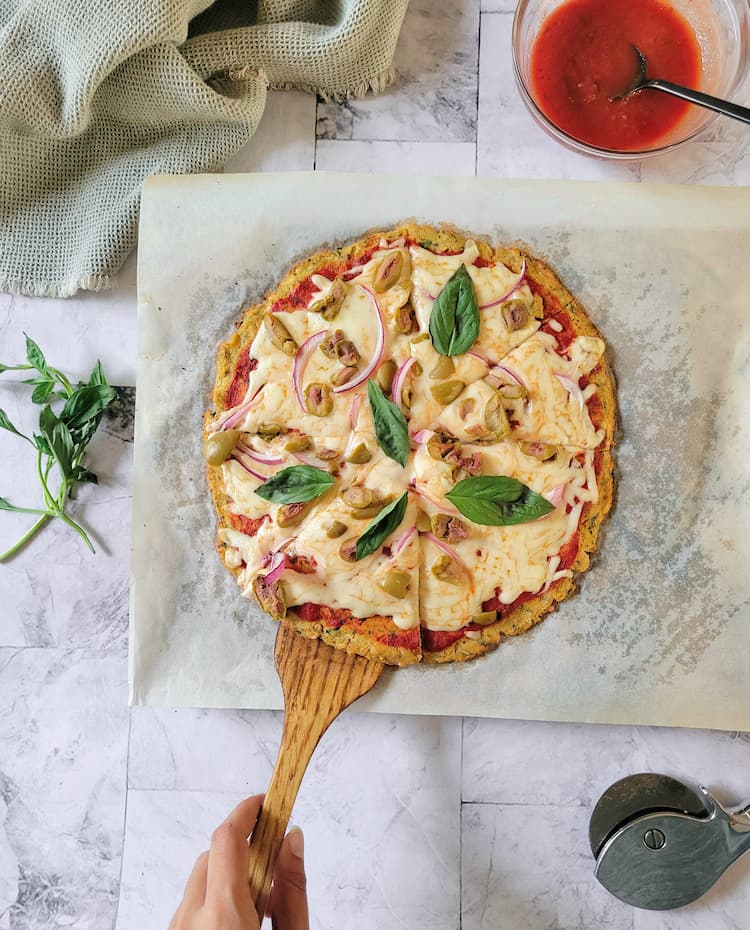
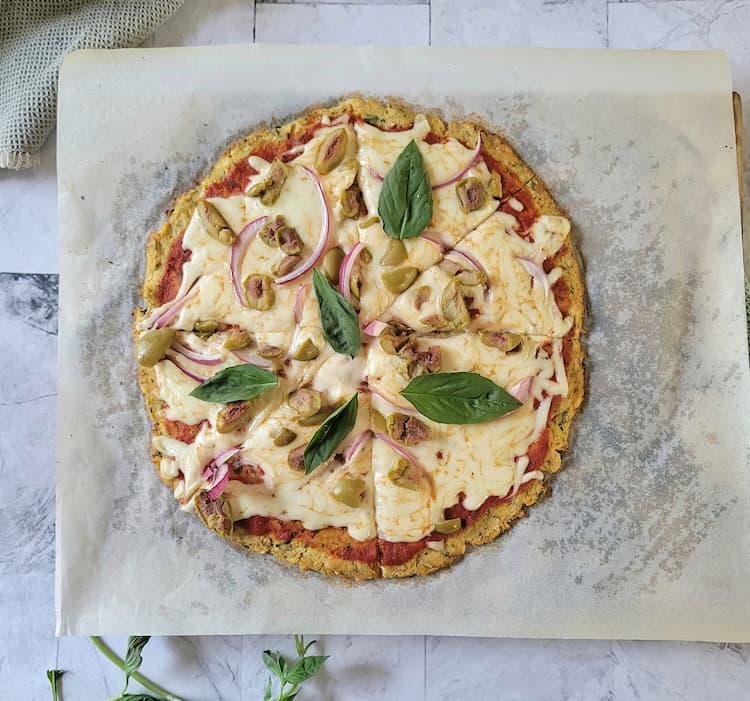
- Slice, top with fresh chopped herbs, if desired, and serve warm.

Notes
Nutrition
Don’t skip the good stuff —
scroll up above the recipe card for ingredient notes, tips & tricks, and easy swaps/variations.Made it? Tell me everything.
I LOVE seeing what you made! Tag @hiphipgourmet on Instagram (or use #hiphipgourmet) so I can see it — then rate it + upload your photo below. 💖
The links in this post are affiliate links. Thanks for supporting HipHipGourmet!