✨This post may contain affiliate links. As an Amazon Associate, I earn from qualifying purchases.
Yes, you can make a creamy, flavour packed garlic hummus recipe without tahini, and honestly, you might not even miss it. This easy homemade version is smooth, garlicky, bright from fresh lemon juice, and comes together with a handful of simple ingredients.
If you’re craving hummus but don’t have tahini in the pantry, don’t worry. This garlic hummus recipe without tahini delivers all the creamy texture and savoury flavour you’d expect from classic hummus, without the extra ingredient. A little olive oil, fresh garlic, chickpeas, and lemon juice work together to create a dip that’s rich, satisfying, and perfect for everything from snacking to sandwich spreads.
I love keeping a batch in the fridge for easy lunches, afternoon snack attacks, or last minute entertaining. And if you’re as hummus obsessed as I am, be sure to check out my butter bean hummus, dill pickle hummus, and low carb cauliflower hummus for a few fun twists on the classic. They’re all packed with flavour and just as easy to make at home.

✳︎ Why You’ll Love This Garlic Hummus Recipe Without Tahini
- No tahini required, making it perfect for those last minute hummus cravings.
- Smooth, creamy, and packed with fresh garlic flavour in every bite.
- Made with pantry staples you likely already have on hand.
- Works as a dip, spread, snack, or addition to wraps and grain bowls.
- Ready in minutes with minimal prep and cleanup.
Can You Make Hummus Without Tahini?
Absolutely! While tahini is a traditional ingredient in hummus, it’s not essential for creating a smooth, creamy, and flavourful dip. Chickpeas, olive oil, fresh lemon juice, and garlic do most of the heavy lifting, giving hummus its signature texture and taste.
In fact, making hummus without tahini is a great option if you’ve run out, don’t enjoy its strong sesame flavour, or simply want a more budget friendly version. This no tahini hummus recipe is every bit as creamy and satisfying as the classic, with plenty of fresh, garlicky flavour in every bite.
What You’ll Need to Make This Garlic Hummus Recipe Without Tahini

This garlic hummus recipe without tahini comes together with a handful of simple ingredients you may already have in your kitchen. Here’s what you’ll need:
- Chickpeas (Garbanzo Beans): The foundation of any good hummus. Canned chickpeas make this recipe quick and convenient, while still delivering that classic creamy texture.
- Olive Oil: Adds richness and helps create a smooth, velvety consistency. Use a good quality olive oil since its flavour really shines through.
- Fresh Lemon Juice: Brightens the hummus and balances the richness of the chickpeas and olive oil. Freshly squeezed is best if you have it.
- Garlic Cloves: The star ingredient. Start with one clove for a milder flavour or add more if you’re a garlic lover like me.
- Ground Cumin: Adds a subtle earthy warmth that gives the hummus a little extra depth.
- Smoked Paprika: Optional, but it adds a hint of smokiness and makes a beautiful garnish.
- Salt: Brings all the flavours together. Adjust to taste after blending.
- Water: Helps loosen the hummus and create that smooth, creamy texture. Add it gradually until you reach your desired consistency.
- Greek Yogurt (Optional): A small spoonful makes the hummus extra creamy and adds a slight tang, but it’s just as tasty without it.
Find the full ingredient list and exact measurements in the recipe card below.

Key Tips for the Creamiest Hummus
You can find the full recipe in the recipe card below, but these quick tips will help you make the smoothest, creamiest garlic hummus possible:
- Rinse the chickpeas well. This helps remove excess starch and any canned flavour so the hummus tastes fresher and blends more smoothly.
- Use fresh lemon juice and garlic. Fresh ingredients make a big difference here, adding brightness and bold flavour you just won’t get from bottled juice or garlic powder.
- Add water gradually. Start with a couple of tablespoons, then add more as needed. A little extra water can transform thick hummus into a silky, scoopable dip.
- Scrape down the sides of the food processor. Stopping once or twice to scrape everything back into the bowl ensures a smoother, more evenly blended hummus.
- Taste before serving. Depending on your chickpeas and lemon, you may want an extra pinch of salt, a squeeze of lemon juice, or another clove of garlic.
- Let it chill before serving. If you have the time, refrigerate the hummus for about 30 minutes. The flavours meld together beautifully and the texture becomes even creamier.

Andrea Says
Want ultra-smooth hummus? Remove the skins from the chickpeas before blending. It’s an extra step, but it creates an exceptionally silky texture.

Serving Suggestions
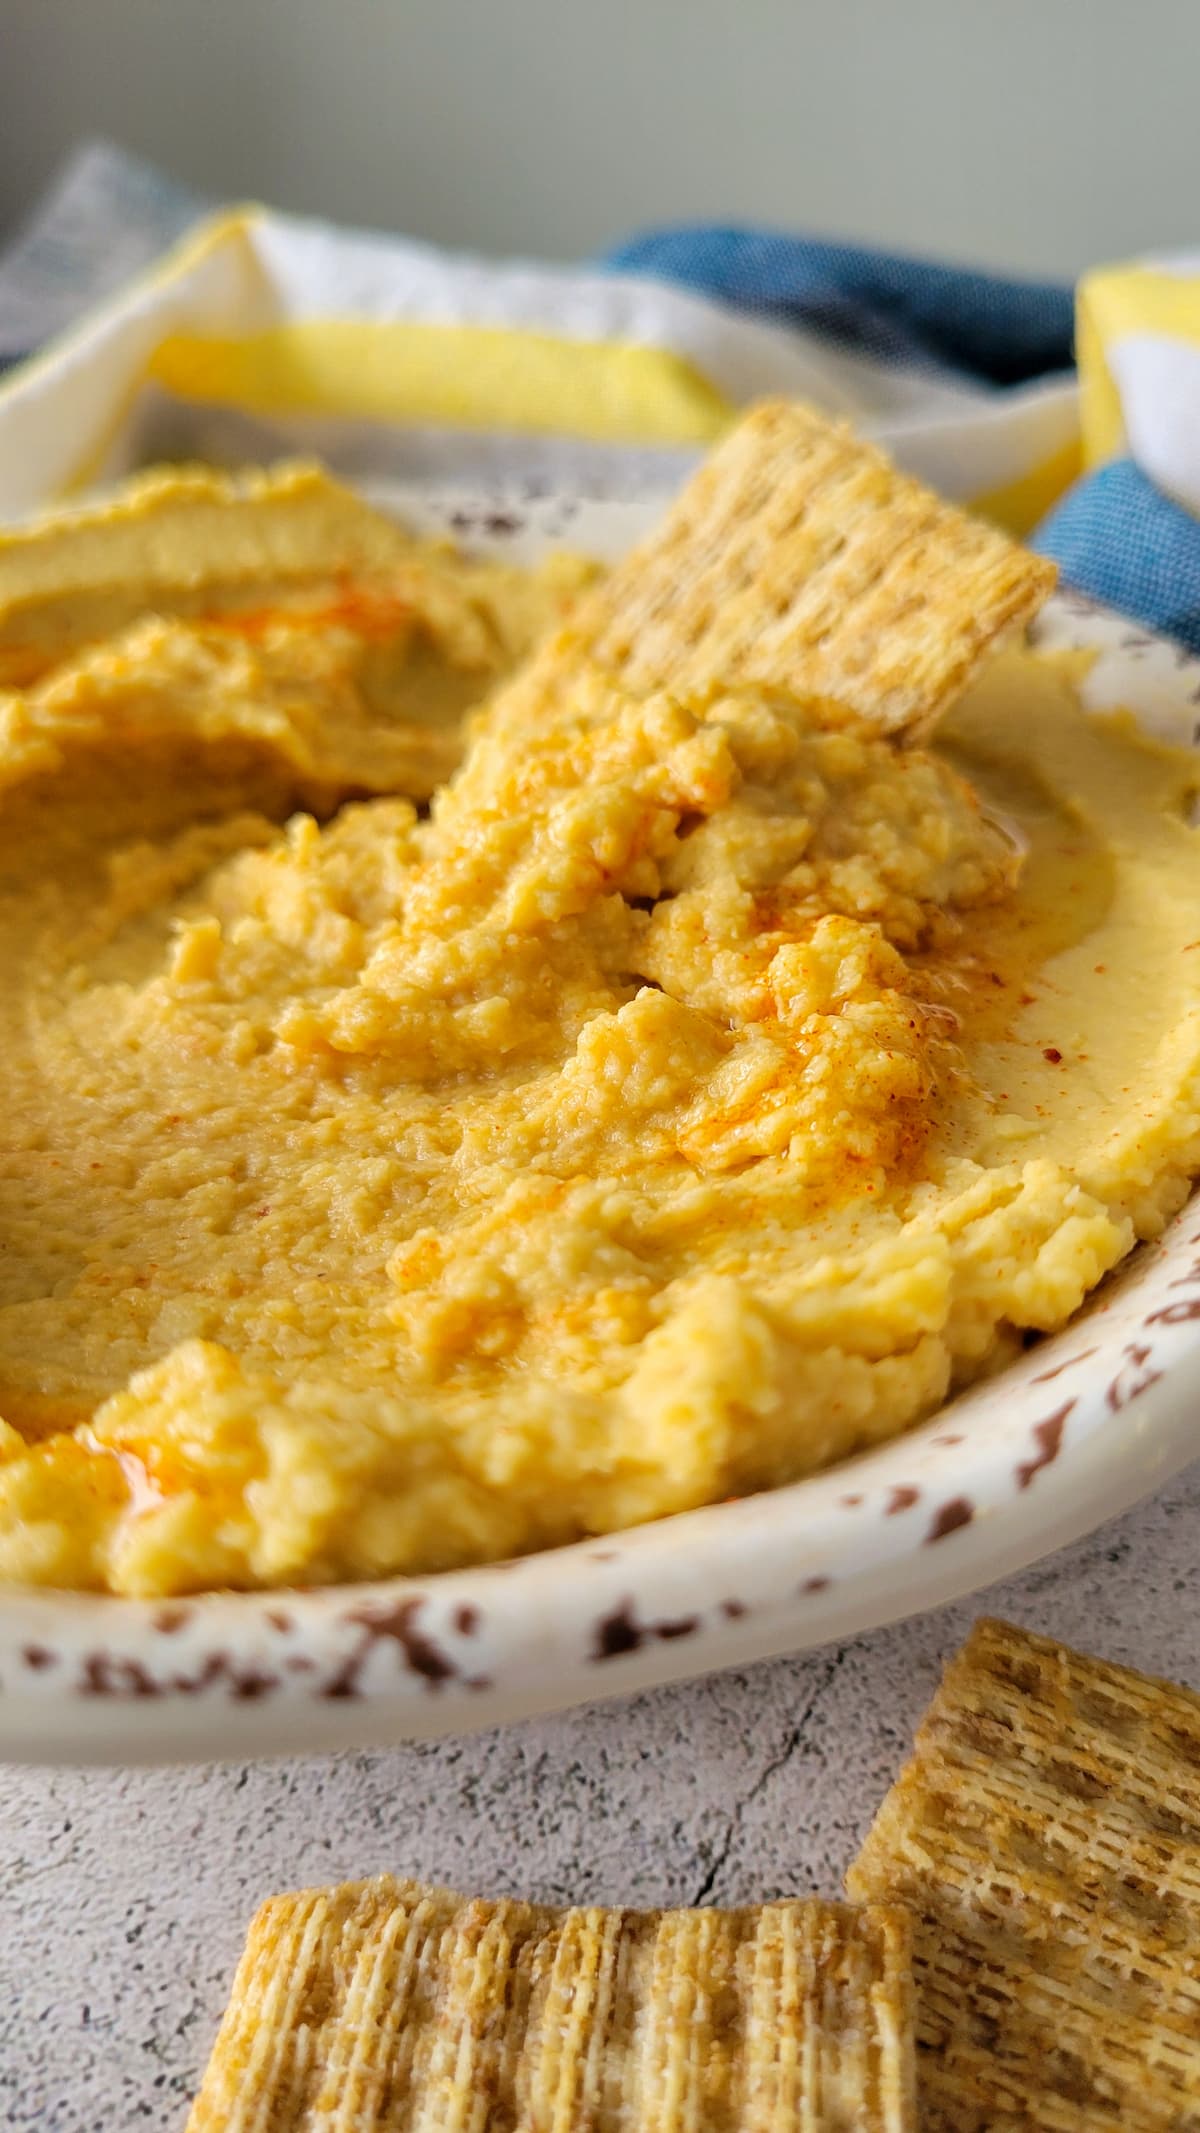
This easy garlic hummus recipe is one of those versatile staples that works with just about everything. Serve it with fresh veggies like carrots, cucumbers, bell peppers, and celery for an easy snack, or pair it with crunchy tortilla chips, crackers, or pita chips for dipping.
It also makes a great spread for sandwiches and wraps, and it’s a delicious addition to grain bowls, snack boards, and Mediterranean-inspired meals. If you’re putting together a snack platter, try adding some toasted pepitas for a little extra crunch. Finish it all off with a drizzle of olive oil and a sprinkle of smoked paprika for a simple but impressive presentation.
Storage
Store leftover hummus in an airtight container in the refrigerator for up to 5 days. If you notice a little liquid on top after chilling, simply give it a quick stir before serving.
For the freshest flavour and creamiest texture, I like to let the hummus sit at room temperature for 10 to 15 minutes before serving. This takes the chill off and helps the flavours shine.
You can also freeze hummus for up to 3 months. Transfer it to a freezer safe container, leaving a little room for expansion, then thaw it overnight in the refrigerator before enjoying.
Frequently Asked Questions
more delicious dip ideas
If you’re anything like me, one dip is never enough. Whether you’re putting together a snack board, hosting friends, or just looking for a new favourite, these homemade dips are always a hit:
- Olive Oil Bread Dip. Rich and herbaceous.
- Greek Yogurt Spinach and Artichoke Dip. Creamy and comforting.
- Tangy Dill Pickle Dip. Bold and briny.
- Mom’s Famous Nacho Dip. A party favourite.
- Easy Guacamole. Fresh and creamy.
- Blackened Ranch Dip. Smoky and flavourful.
Quick Favour ⭐️ If you make this recipe, I’d love it if you left a quick rating + review. It’s the easiest way to support Hip Hip Gourmet, and I read every one.
Garlic Hummus Recipe Without Tahini
Video
Equipment
Ingredients
- 1 (15-ounce) can chickpeas (drained and rinsed)
- 3 tbsp extra virgin olive oil (divided)
- 2 tbsp fresh lemon juice
- 1-2 cloves garlic (minced (adjust to taste))
- ½ tsp ground cumin
- ½ tsp smoked paprika (plus more for garnish (optional))
- ¼ tsp salt (or to taste)
- 2-4 tbsp water (as needed)
- 1 tbsp Greek yogurt (optional, for extra creaminess)
Instructions
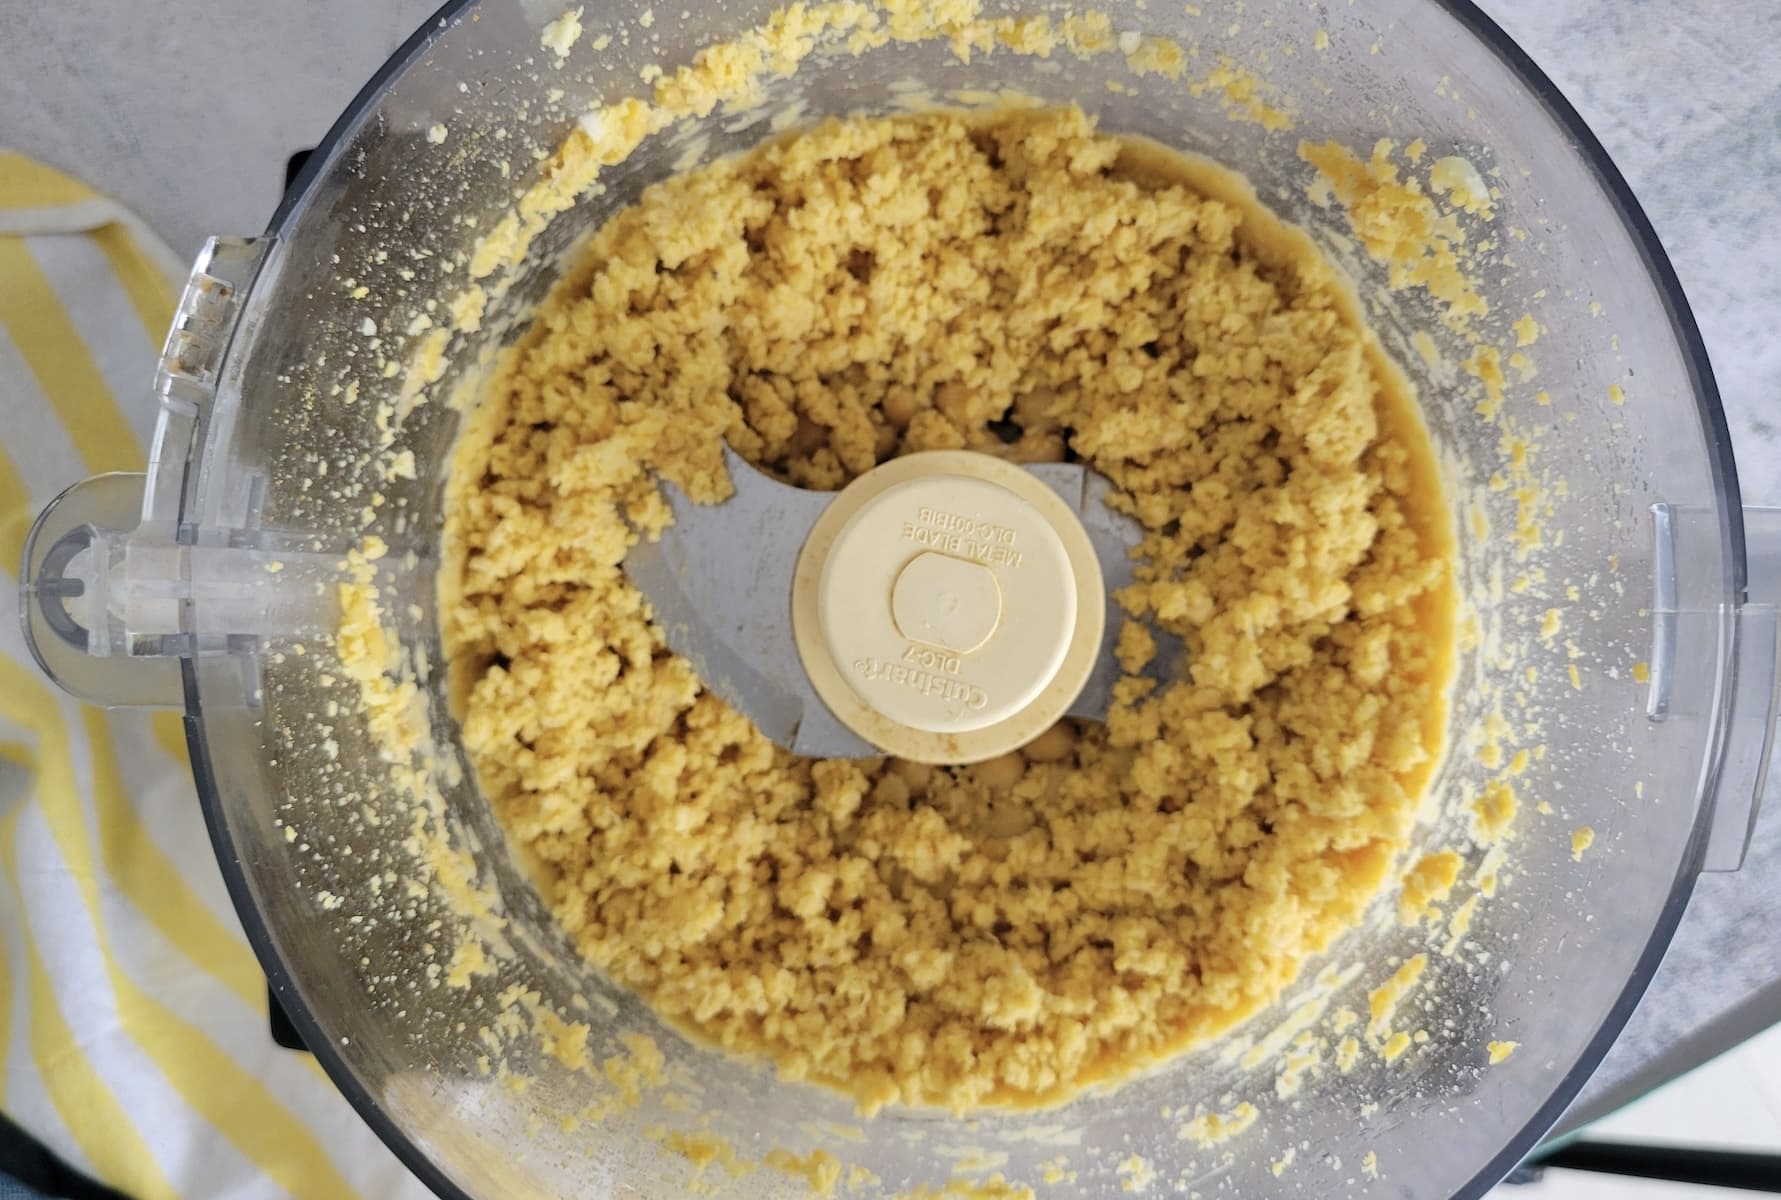
- Add the chickpeas, garlic, lemon juice, cumin, salt, and 2 tablespoons of olive oil to a food processor. Blend until mostly smooth.

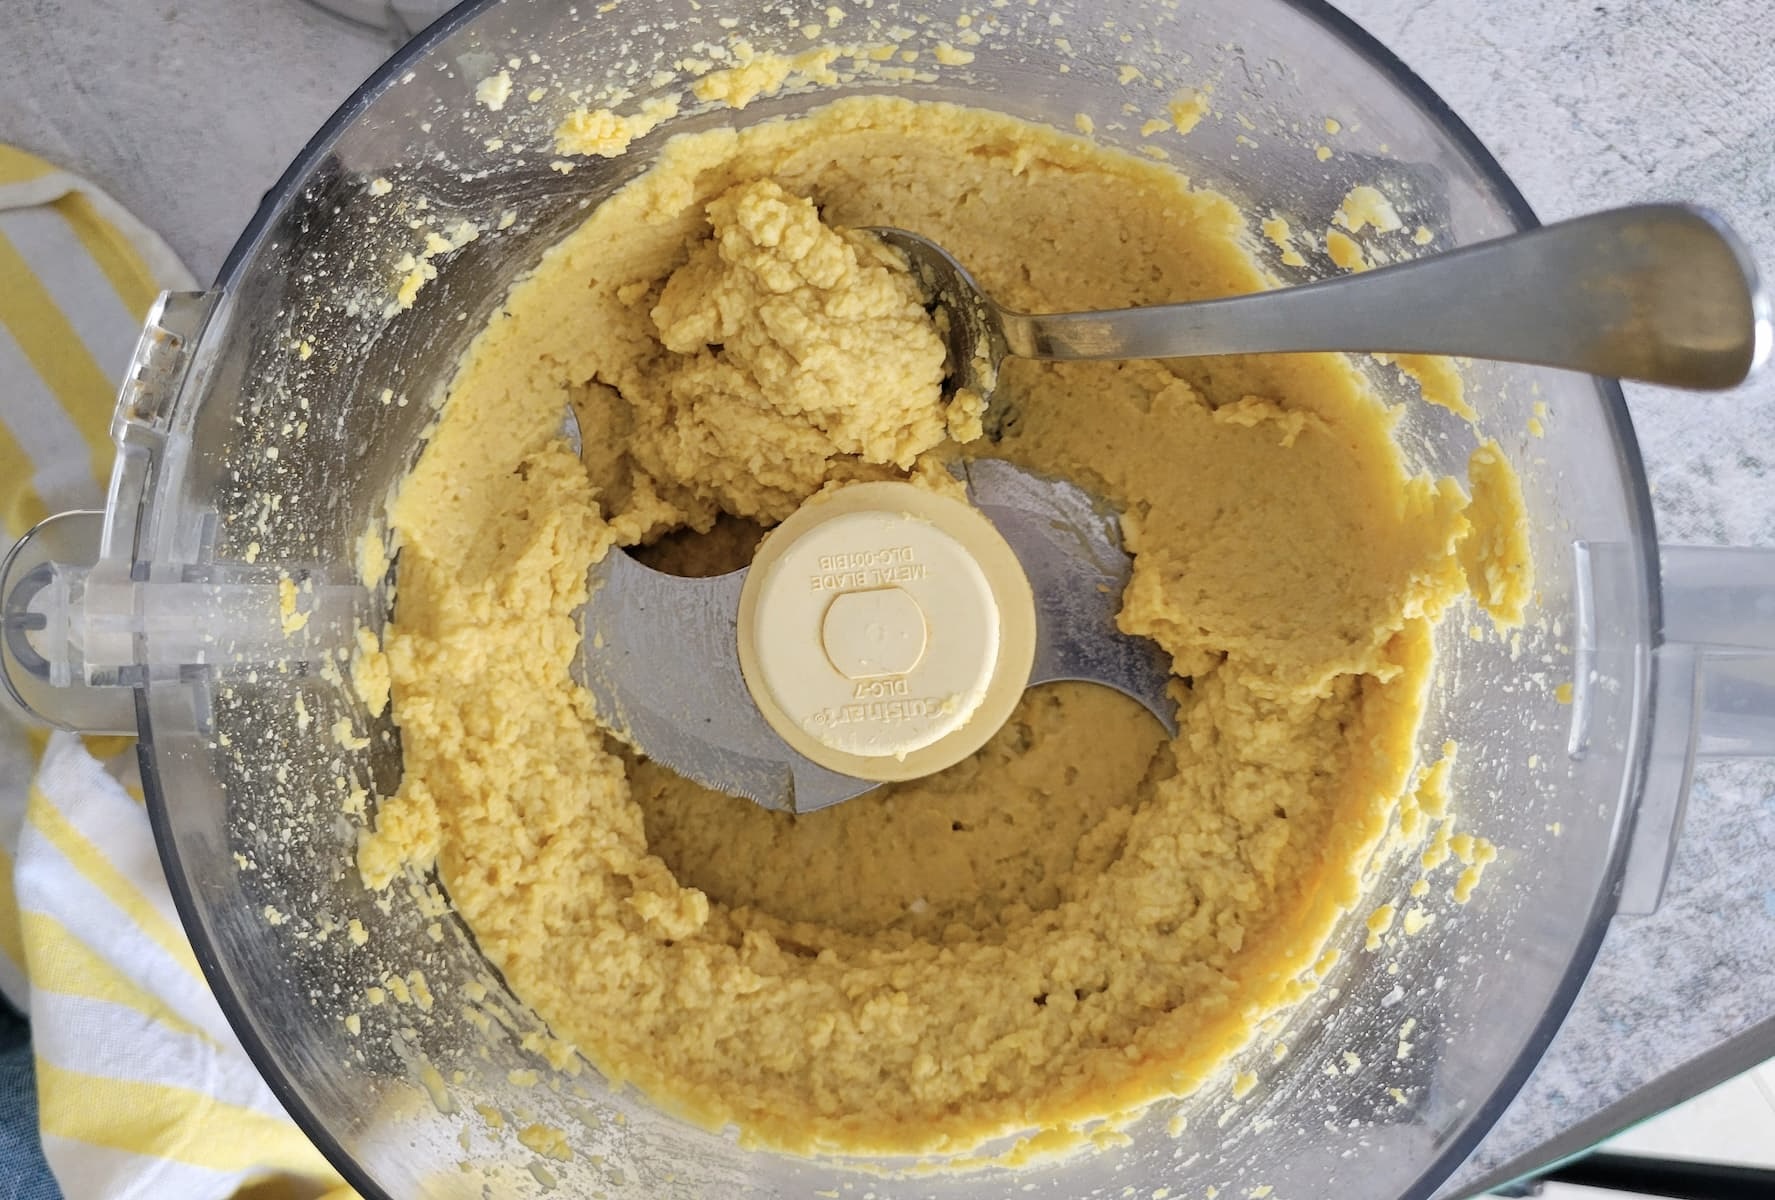
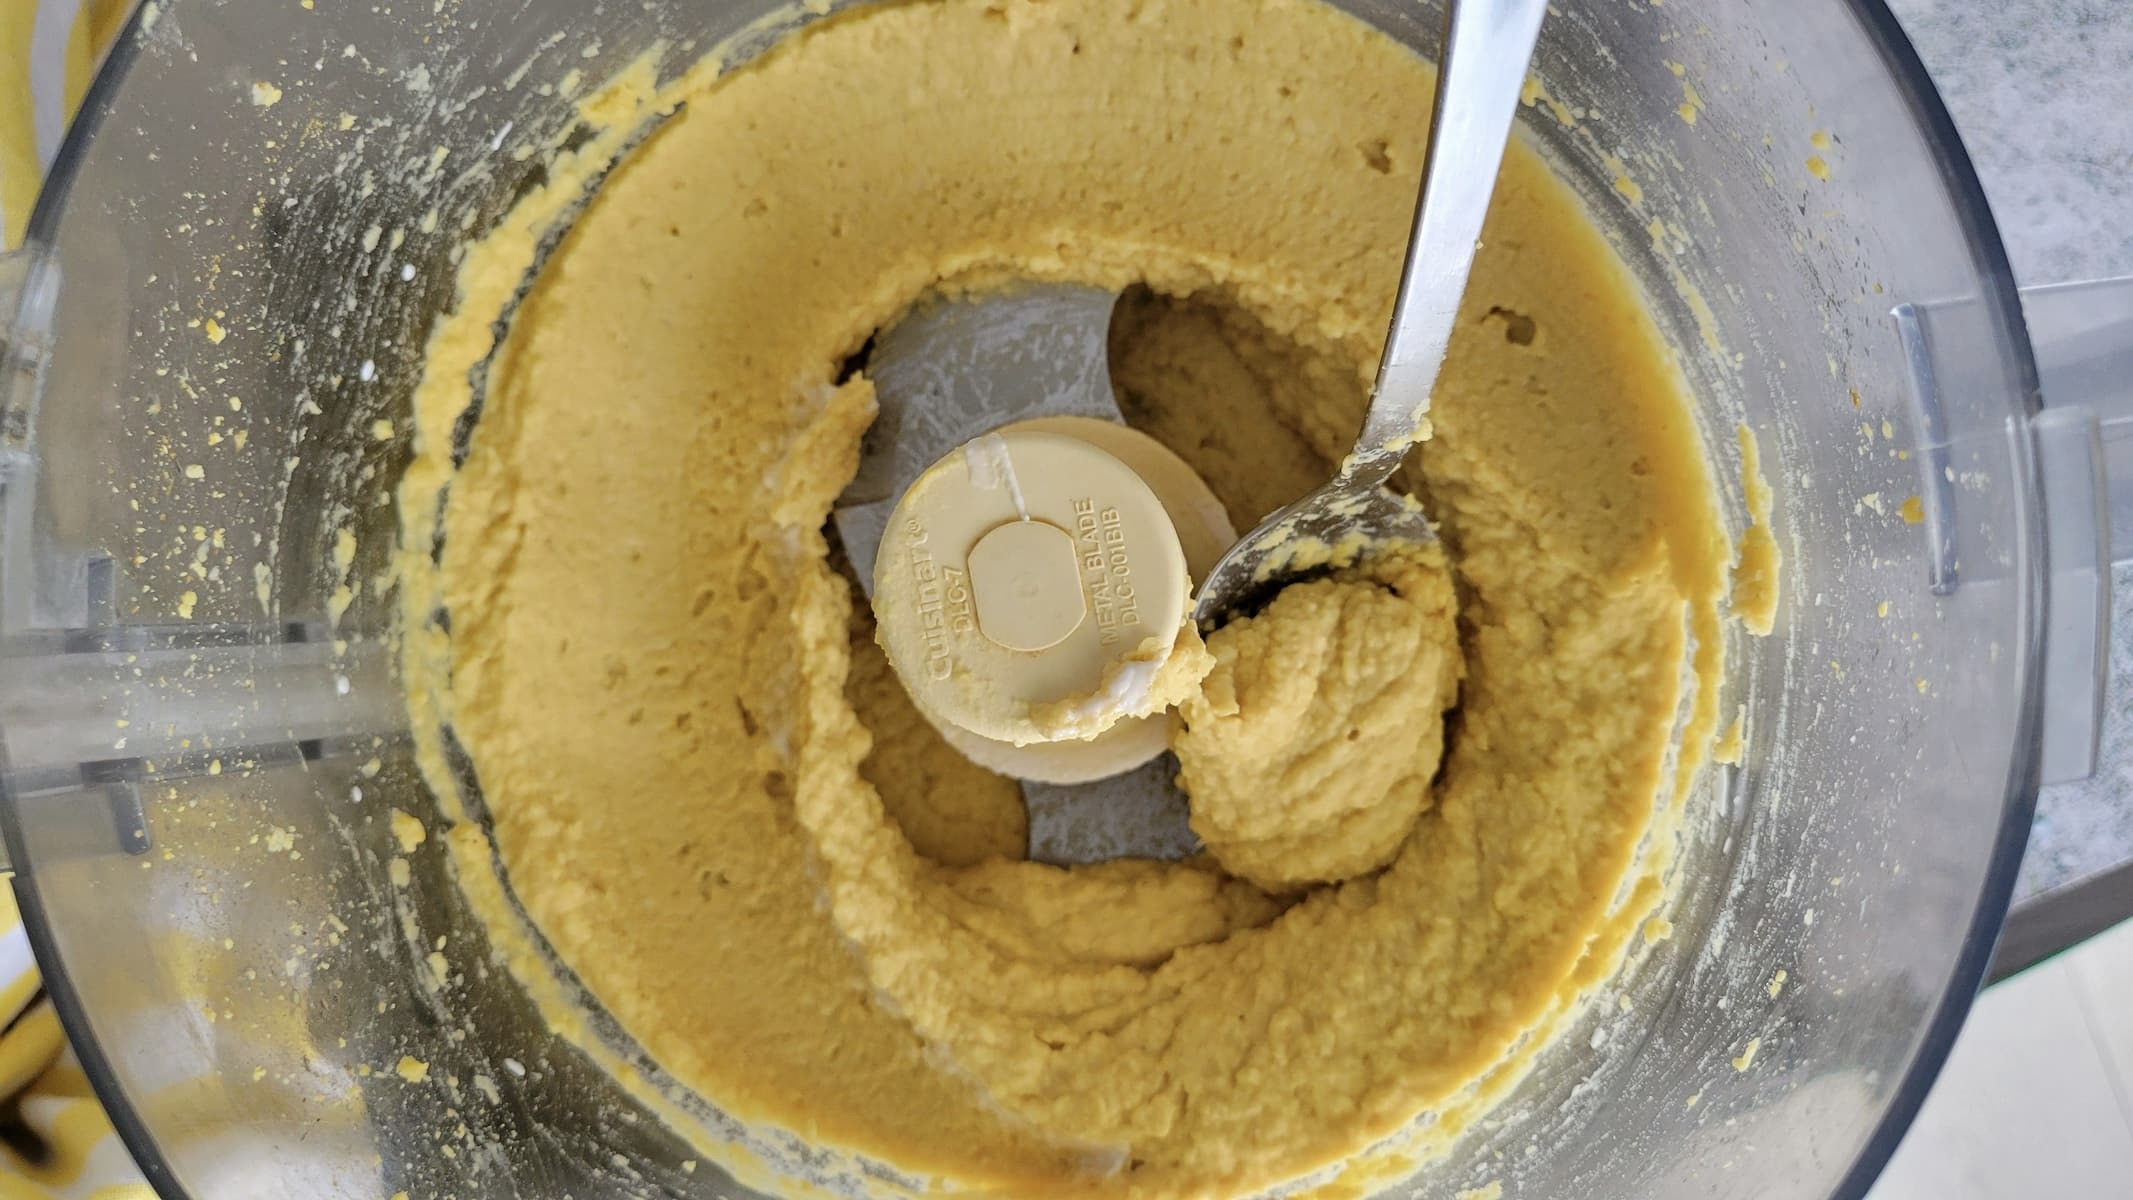
- With the food processor running, add the water 1 tablespoon at a time until the hummus reaches your desired consistency.

- For an extra creamy texture, blend in the Greek yogurt, if using. Taste and adjust the seasoning with additional salt, lemon juice, or garlic as needed.

- Transfer the hummus to a serving bowl. Drizzle with the remaining olive oil and garnish with smoked paprika, if desired. Serve immediately, or refrigerate for 30 minutes to allow the flavours to meld before serving.


Notes
Nutrition
Don’t skip the good stuff —
scroll up above the recipe card for ingredient notes, tips & tricks, and easy swaps/variations.Made it? Tell me everything.
I LOVE seeing what you made! Tag @hiphipgourmet on Instagram (or use #hiphipgourmet) so I can see it — then rate it + upload your photo below. 💖
I hope you love this homemade hummus without tahini as much as I do! If you give it a try, be sure to leave a comment below and tag @HipHipGourmet on Instagram so I can see your delicious creations.
Save this one for later?
