This Recipe for Beef Jerky in a Dehydrator is a must have for any fellow dehydrator owners and knocks any store bought beef jerky out of the park. It’s just so delicious that I’m willing to bet you’ll never want to buy it from the store again!
If there’s one thing, besides saucy chicken wings and ranch dressing, of course, that I absolutely just can’t live without, it’s definitely beef jerky. I mean, there was a point in my life (my late night bartending days, ok!!) where I literally lived off of beef jerky (and had no complaints about it!).
And still, all these years later, I can proudly eat my weight of it in a single sitting without a flinch. The only difference is that these days I’m making my own beef jerky instead of buying the convenient store packages. While undeniably addicting and of course, convenient, I’m a lot wiser in my old age.
Aside from the fact that I simply make way better jerky than Jack Links (sorry not sorry), some of the ingredients in those manufactured varieties I can’t even pronounce. Aka my cue to run far and wide.
Truth be told, other than my parent’s famous sun dried tomato recipe, beef jerky was my only other reason for ever wanting to own a dehydrator. I mean, it’s practically a crime to own a dehydrator, be a meat eater (especially a lover of beef jerky), and not make your own. I promise that once you do it, good jerky will have a whole new meaning and this easy to follow method will be one you keep making again and again.
As a lover of all things jerky, I can confidently say that since I’ve been making my own at home, I’ve yet to find a comparable buy-able version. And yes, that includes the very high end butcher shop who so nicely thinly slices my beef for me.
Homemade jerky is such an easy process and once you get the hang of it (I believe in you!!!), let’s just say that you and your dehydrator are going to become new best friends as there is NO ONE in this world who’ll make better jerky than you!
INGREDIENTS YOU’LL NEED TO MAKE HOMEMADE BEEF JERKY
It may look like you need a lot of ingredients to make beef jerky from scratch yourself at home. However, keep in mind that the recipe includes ingredients for two different kinds of jerky. One flavour is teriyaki and the other we’ll call smoky pepper.
Let’s break them down in a little bit more detail down below:
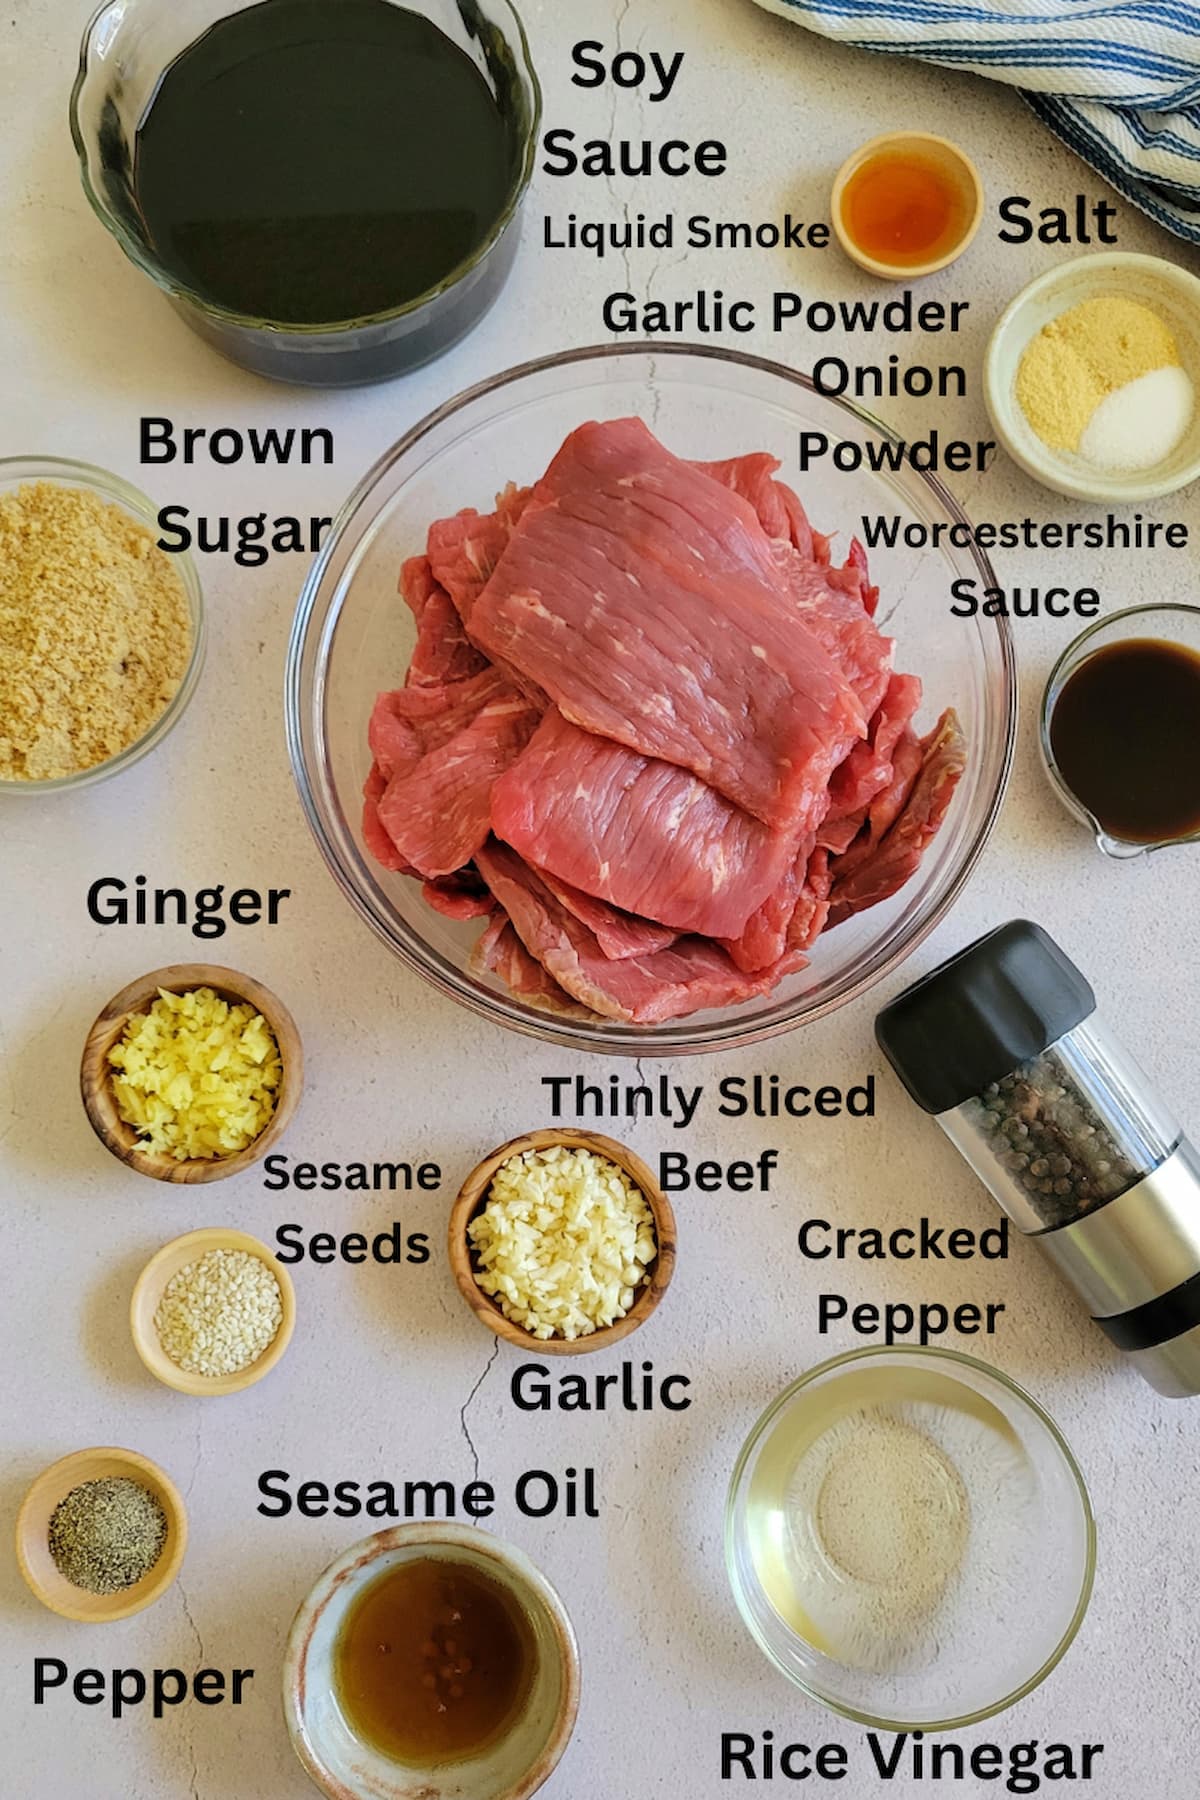
- Thinly Sliced Beef: Choose tender, lean cuts of meat. I’ve experimented with a few different cuts of beef to make homemade beef jerky. I’ve had great results with the following cuts: brisket, rouladen, top or bottom round, eye of round, sirloin tip, or flank steak. The important thing to remember is that it has to be thinly sliced for best results.
- Soy Sauce: Adds flavour and saltiness to the beef jerky. Used in both recipes. For gluten free or keto jerky, feel free to use coconut aminos instead.
TERIYAKI BEEF JERKY
- Brown Sugar: Adds a nice caramelized taste and perfect sweetness to the teriyaki beef jerky. You can use regular sugar or sweetener instead, if you prefer.
- Sesame Oil: Adds a light nutty taste to this teriyaki jerky recipe. A little sesame oil goes a long way.
- Rice Vinegar: Adds acidity and a bit of tang. Balances out the flavours from the rest of the ingredients. If you don’t have any rice vinegar on hand, you can use apple cider vinegar or plain white vinegar instead.
- Ginger: Adds a delicious distinct flavour that beautifully compliments the rest of the ingredients. I like using fresh minced ginger in this recipe. However, if all you have on hand is ground ginger, use 1/2 a teaspoon instead of the 1-inch fresh knob.
- Garlic: Adds flavour and freshness to the jerky. I like using fresh minced garlic for this recipe. However, you can use garlic powder instead, if that’s all you have on hand. Use 1 teaspoon instead of the 4 fresh cloves.
- Sesame Seeds: Adds a nice texture and gives this teriyaki beef jerky the perfect finished look.
- Pepper: Adds a nice kick to this teriyaki jerky recipe. Ground pepper works best in this recipe.
SMOKY PEPPER BEEF JERKY
- Liquid Smoke: Does wonders in this recipe for homemade beef jerky! It adds a delicious deep but not overpowering smoky flavour to the jerky. An ingredient I wouldn’t skip in this recipe for beef jerky.
- Worcestershire Sauce: Adds a savoury, salty bite to this smoky pepper beef jerky Recipe.
- Onion Powder: Adds the perfect onion-y bite. Onion powder, as opposed to fresh onion, works best in this recipe.
- Garlic Powder: Adds freshness and flavour. Since we want the surface of the jerky to mostly be covered in fresh cracked pepper, garlic powder, and not fresh garlic, works best in this recipe.
- Salt: Adds balance and flavour to this homemade pepper jerky recipe.
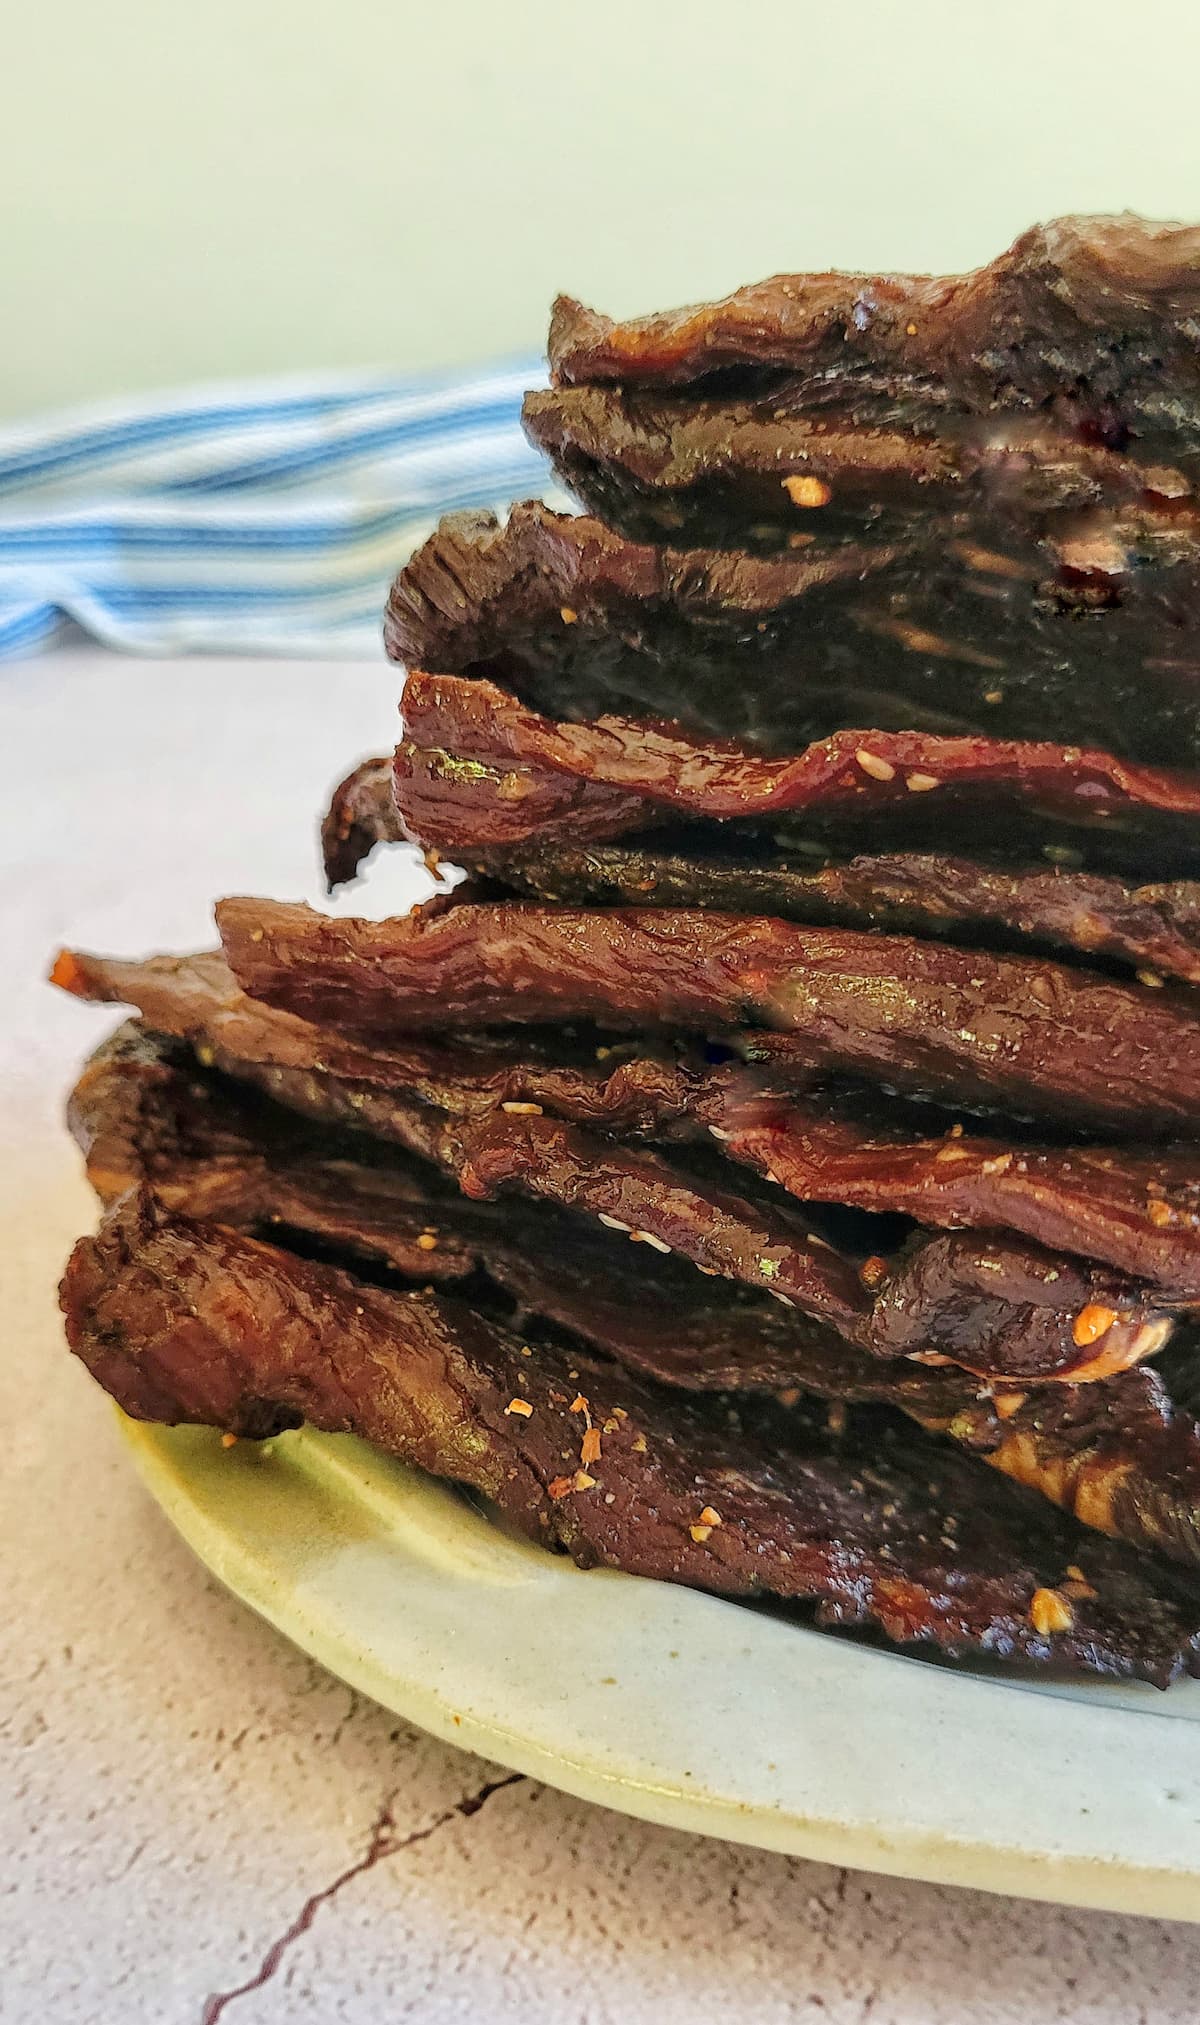
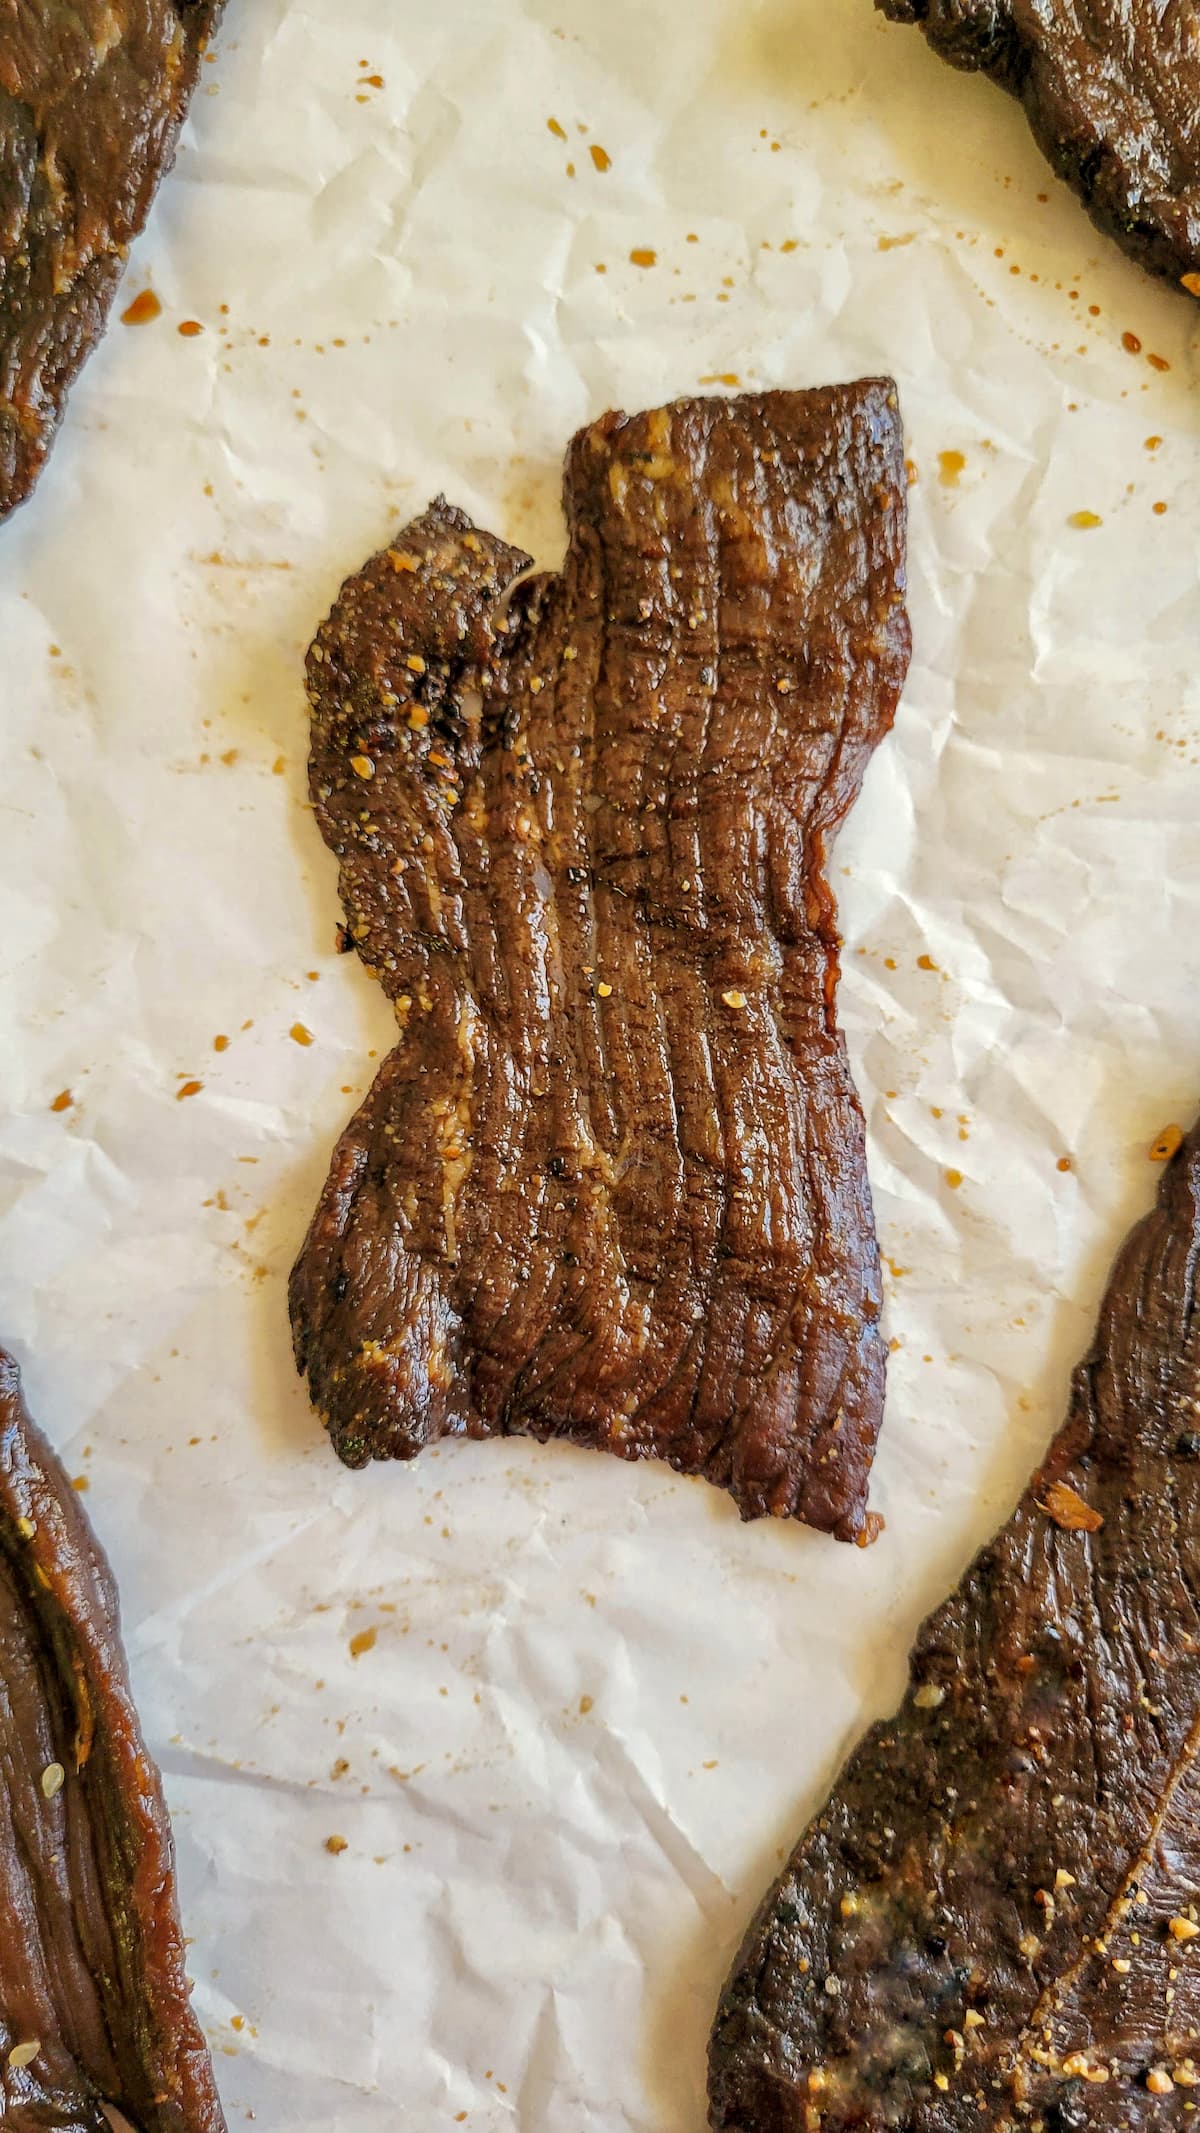
- Cracked Pepper: Adds bold flavour and the perfect peppery bite to this homemade jerky recipe. And yes, while still acceptable, it will make a difference in both taste and appearance if you use regular ground pepper instead of coarsely ground pepper. One of my favourite parts of this particular flavour of jerky is how you can see and taste the bits of cracked pepper on the surface after it’s done dehydrating.

MAKING BEEF JERKY WITH A DEHYDRATOR (KEY TIPS)

You can find full instructions for how to make this dehydrator beef jerky in the recipe card down below, but here are a few quick tips to keep in mind:
- Choose lean cuts of meat and trim off any fat from the meat before beginning. The leaner, the better. Little to no fat works best in this recipe.
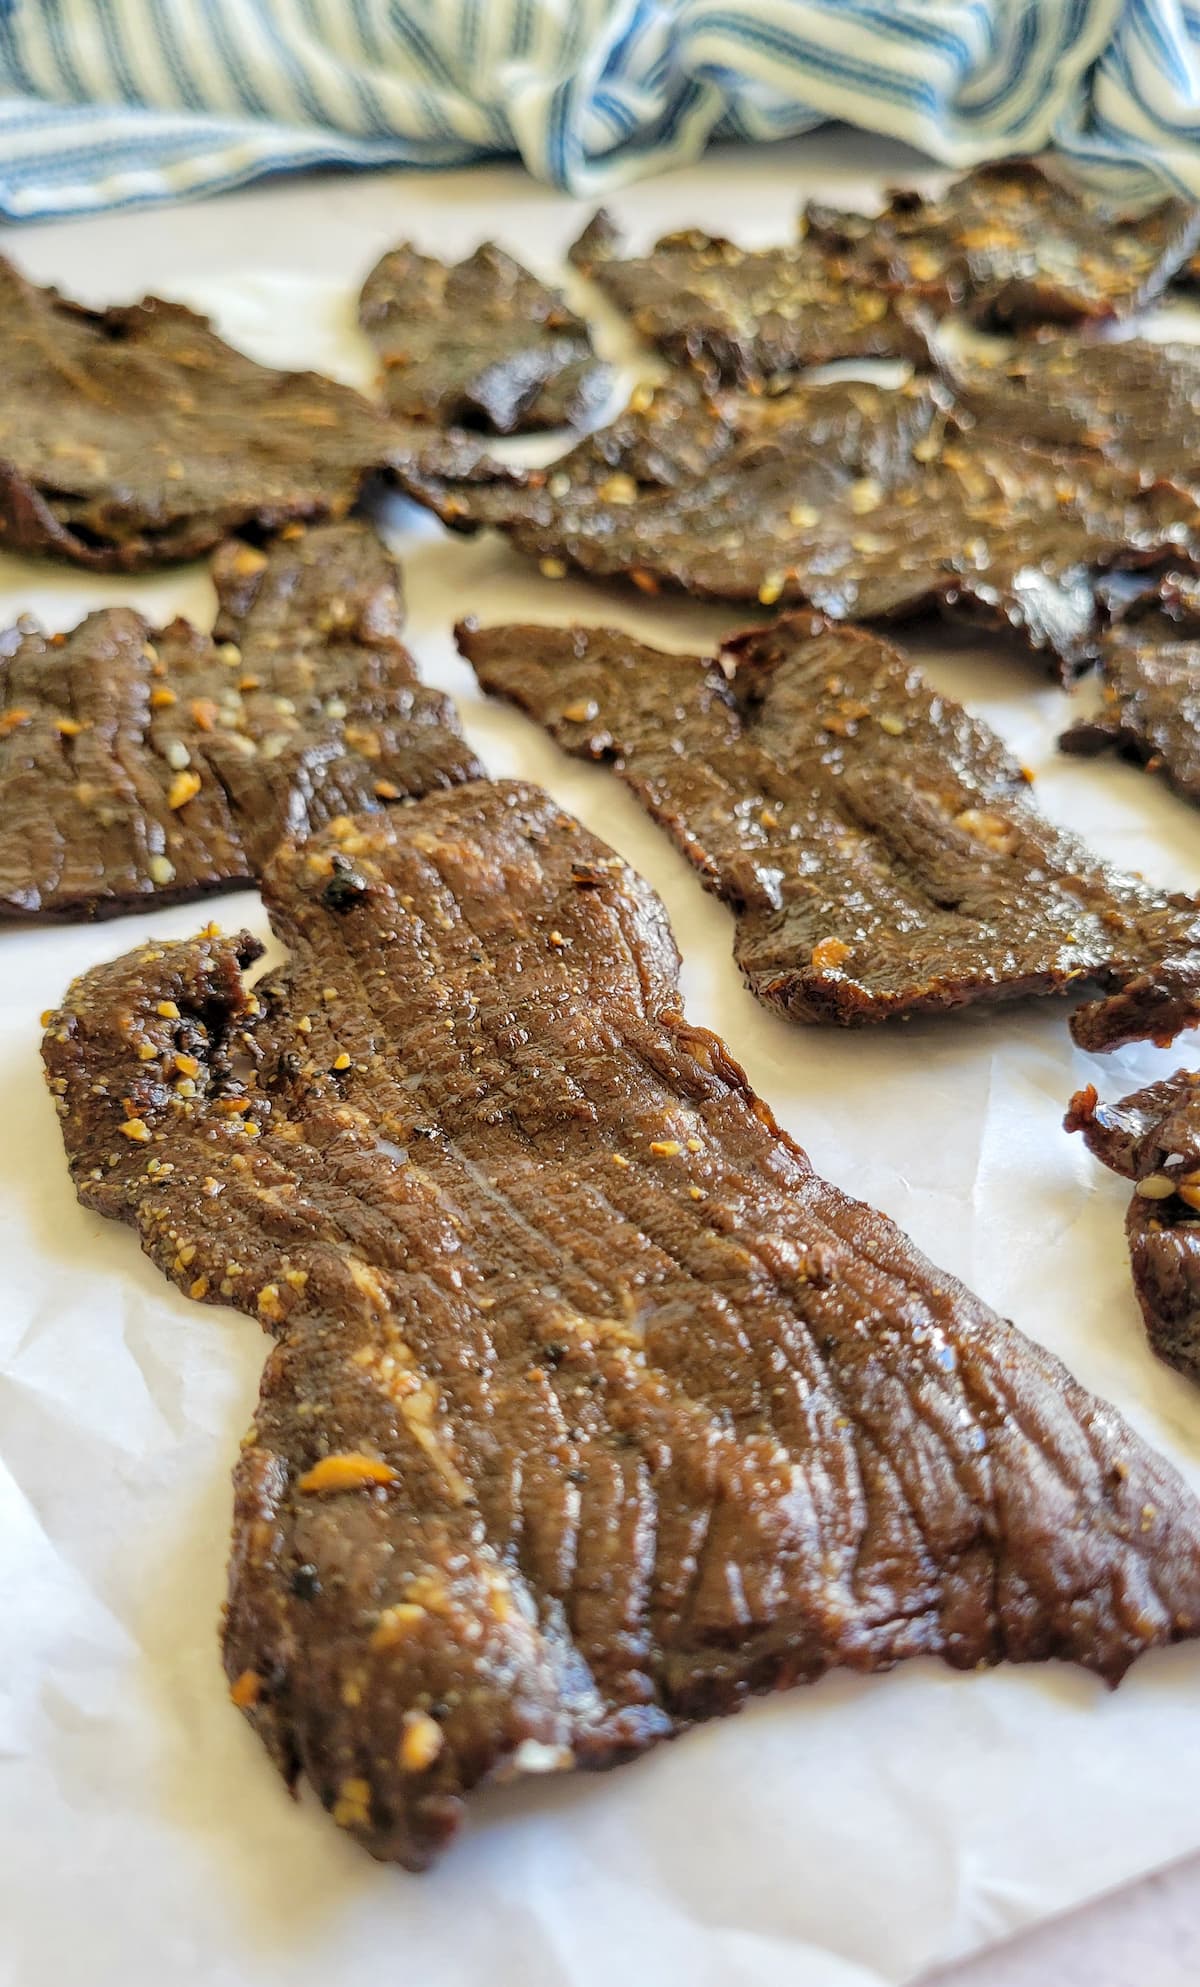
- SLICING BEEF JERKY: I’m lucky enough to have a butcher who doesn’t mind slicing the beef into thin slices for me. Simply ask and, in most cases, you shall receive. However, if you have to, want to, or like to cut the beef into slices yourself, make sure you’re using a proper sharp knife and go as thin as possible. Meat slices should be no more than 1/4-inch thick, 4 inches long, and 2 inches wide.
EXTRA TIP: Wrap the piece of beef in saran wrap and stick it in the freezer for 1 hour before slicing. It will firm up making it much easier for you to thinly slice in uniform pieces.
- Slice against the grain for softer, more tender jerky. Slice with the grain for chewier, tougher jerky. There really isn’t a right or wrong way of doing this and IMHO, it really depends on your preference and the type of meat you’re using. Try both with different cuts and see what combinations you personally enjoy!
- Pat the meat dry with paper towels both before and after marinating which is key to even cooking. You want to absorb as much of the excess moisture as you can since the point is to dry out the meat. You’re also going to pat the meat dry when it’s completely done (after it comes out of the oven) to remove any fats that have made their way to the surface.
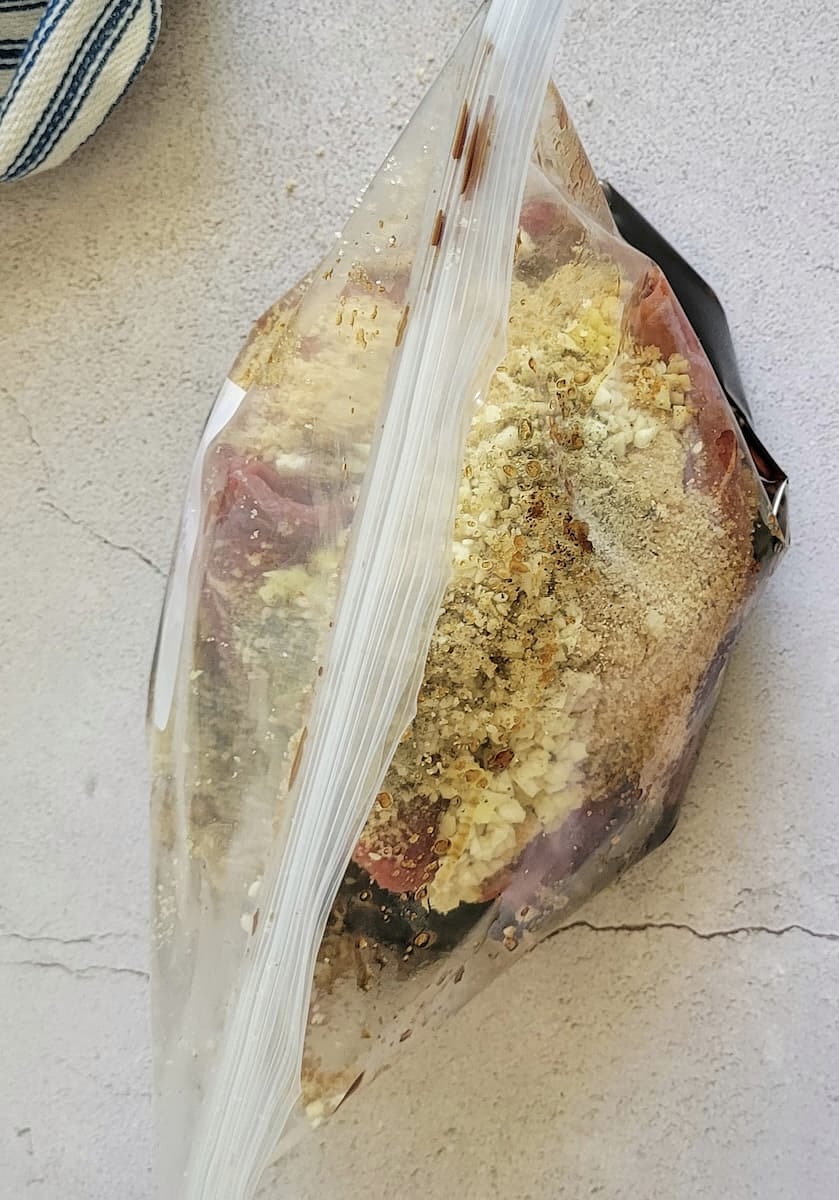
- Marinate the beef for best results. Don’t skip this step for maximum flavour. Anywhere from 4-24 hours is acceptable with longer times producing more flavourful results. I always say the longer the better and in this homemade recipe for beef jerky, that is especially true. EXTRA TIP: For easiest clean up, throw all the ingredients into a plastic ziploc bag and marinate the jerky that way.
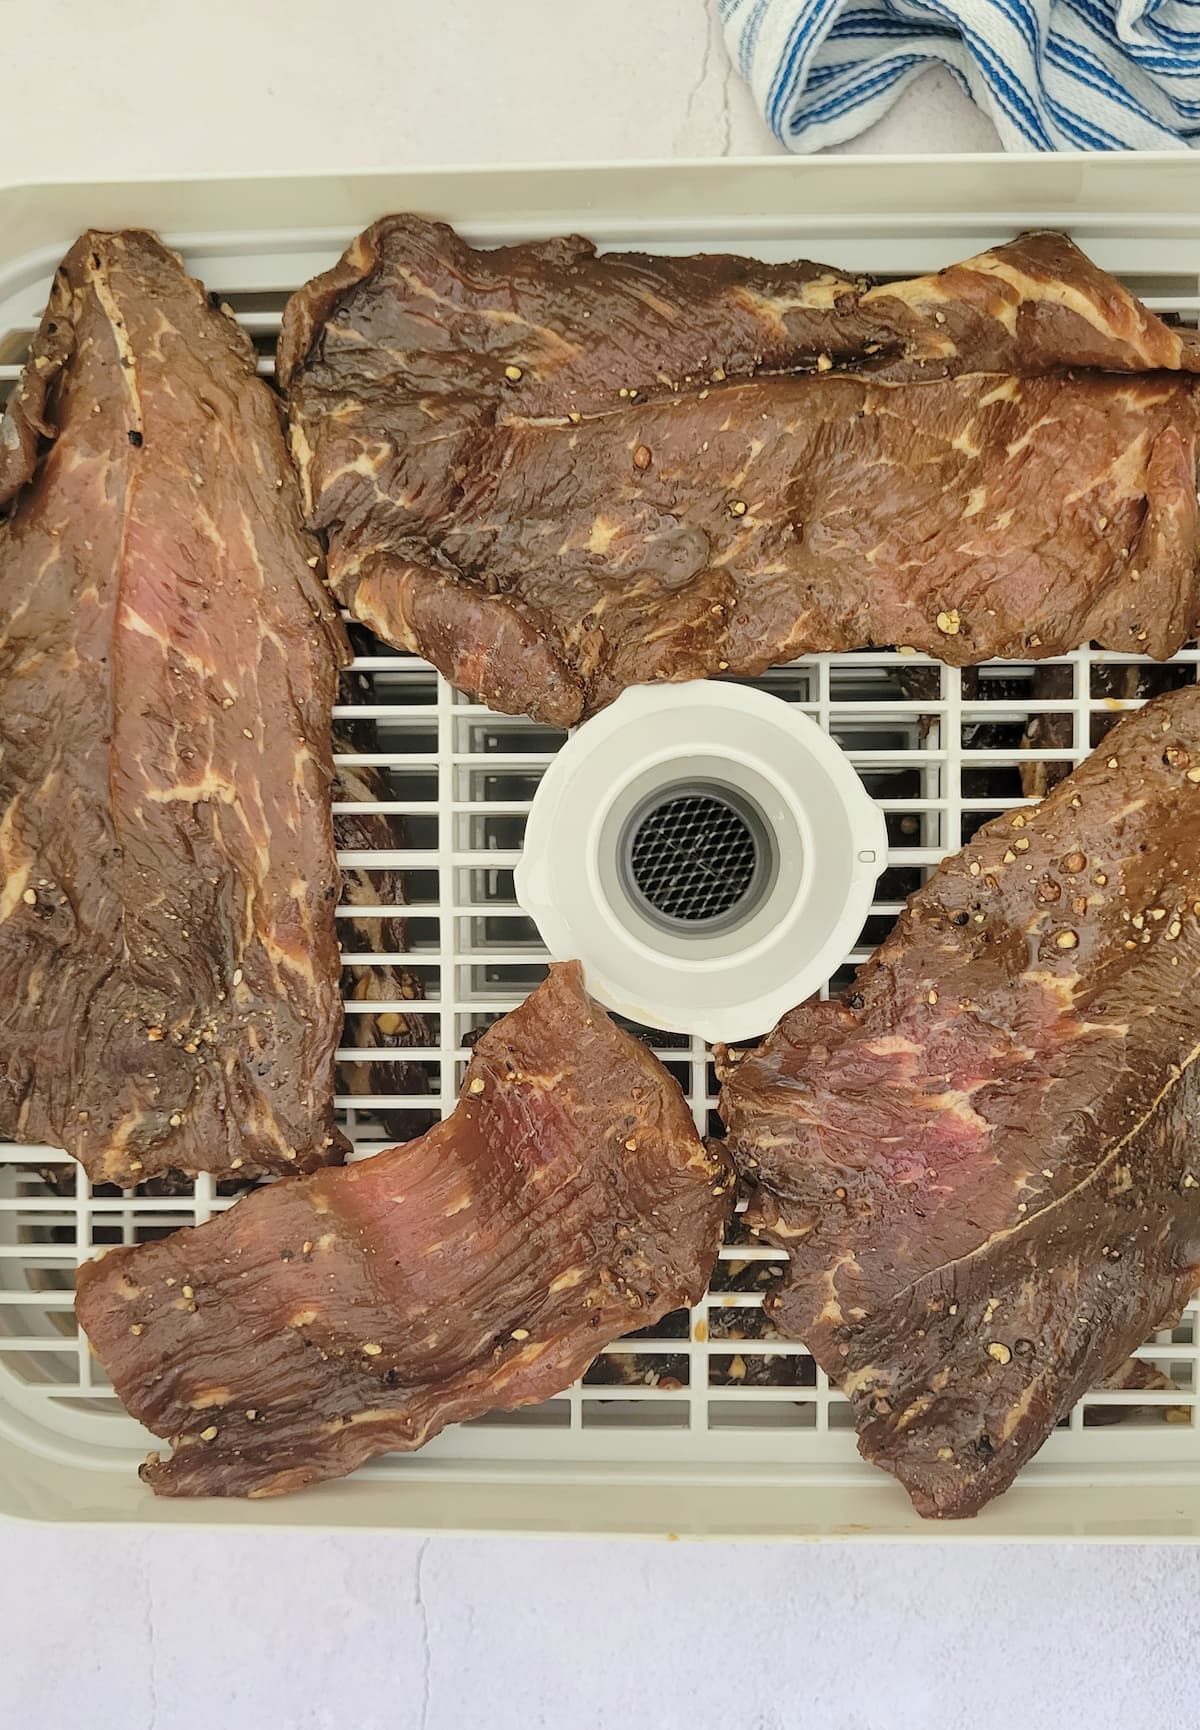
- Don’t overcrowd the trays in the dehydrator and keep the meat in a single layer. You should leave a little bit of space between each slice of meat so that air has room to circulate and all the pieces are able to fully dry out all the way around.
- All dehydrators are different and therefore, the the time it takes your beef to fully dehydrate might be slightly different than the time it takes mine. Start checking the jerky after 4 hours and every 30 minutes after to ensure it doesn’t overdry. The beef is fully dry when you can bend it and the top cracks but the slice doesn’t break. EXTRA TIP: Some pieces of beef might take less time than others to dry out. Simply remove the pieces (starting after the 4 hour mark) as they’re ready.
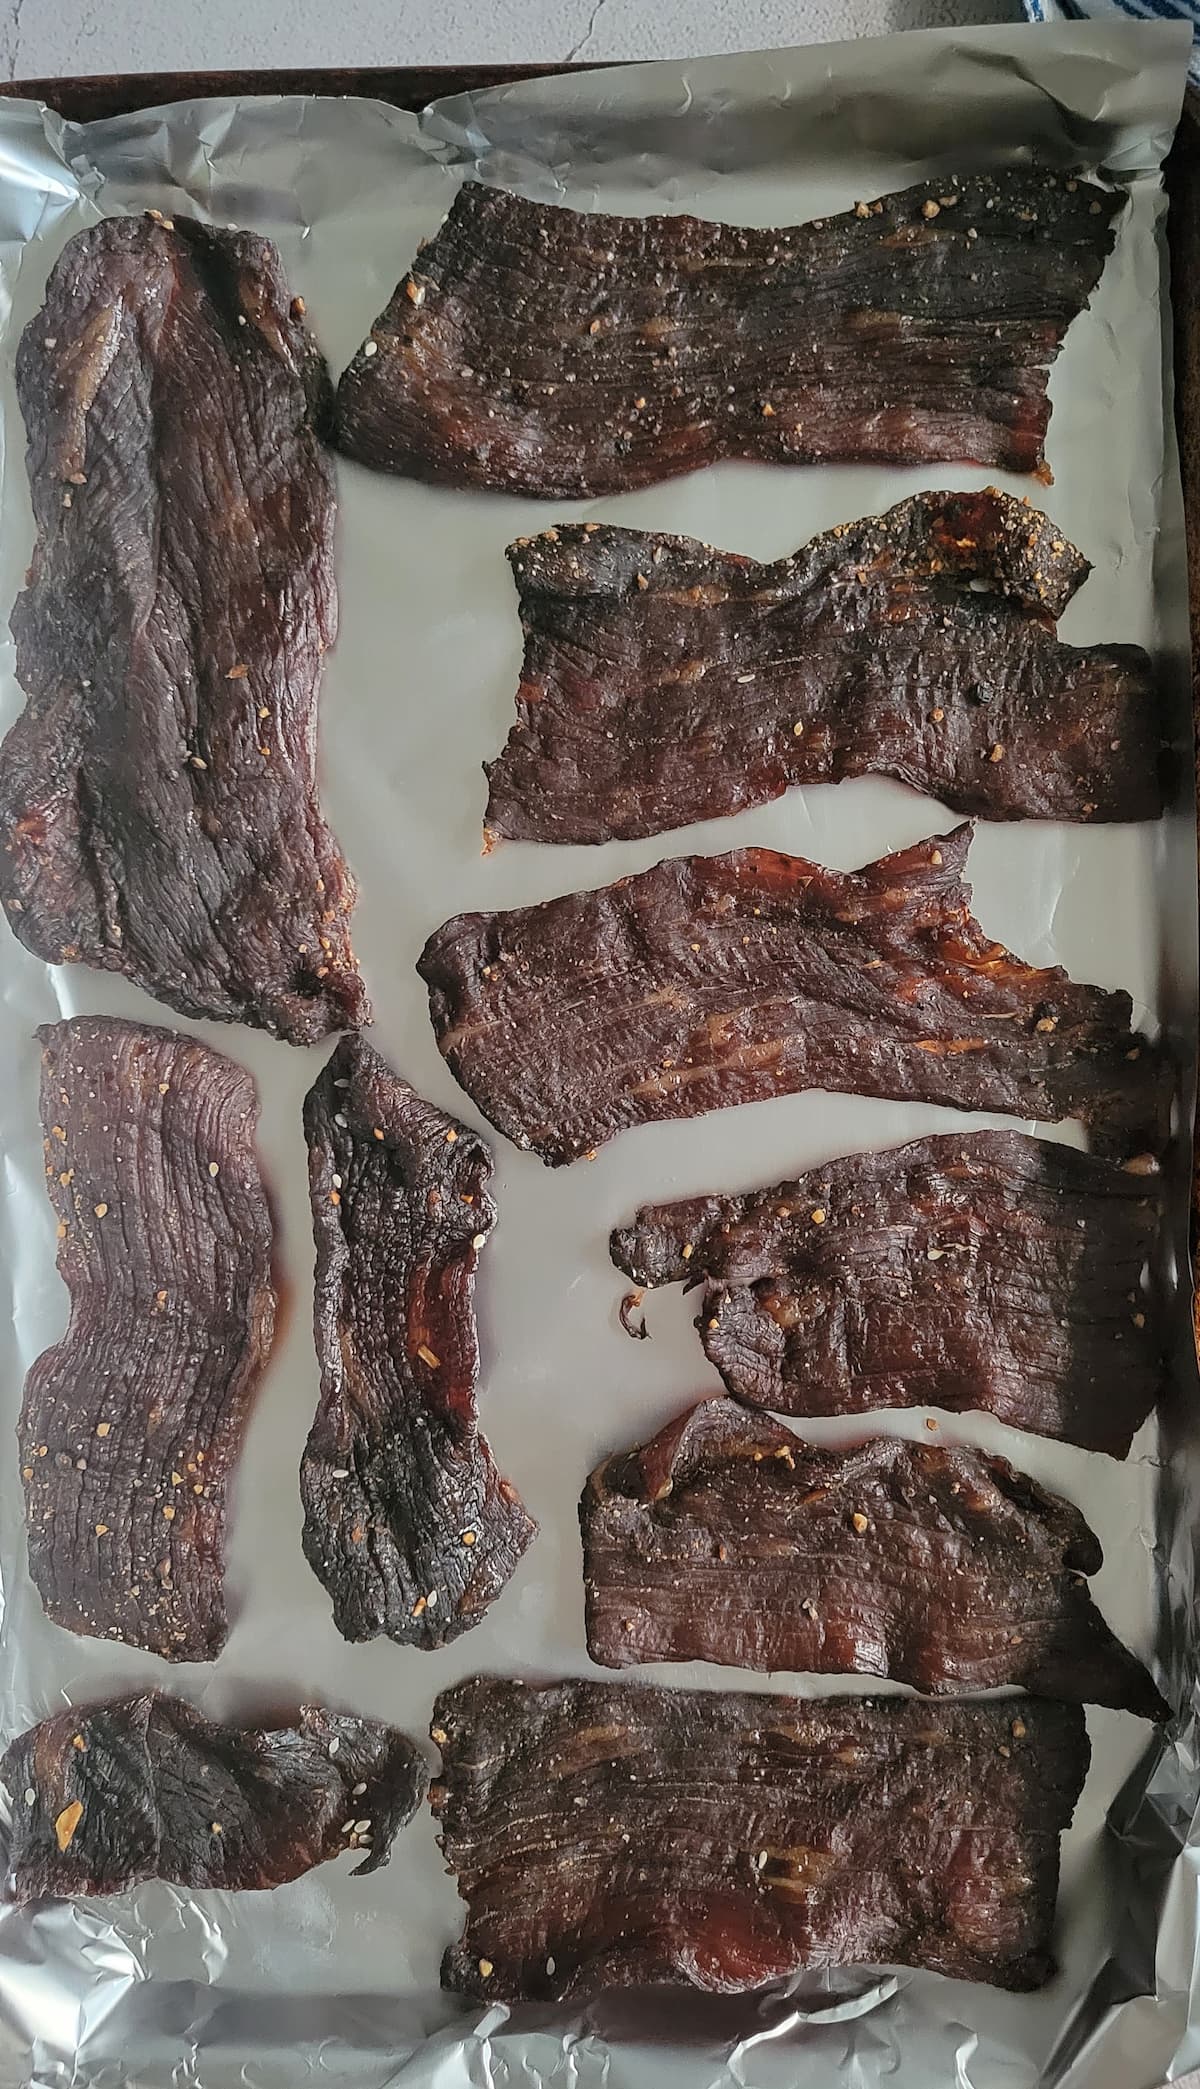
- Finish it in the oven! While completely optional, this step is life changing. TRUST ME. The dehydrated jerky goes on a sheet pan and into the oven on low heat for about 10 minutes where complete magic happens. The results is notably different (and way better) than if you skip this step, is our secret to making killer beef jerky from scratch at home and is simply a mandatory part of our jerky routine.


FREQUENTLY ASKED QUESTIONS
All dehydrators are different so the time it takes beef jerky to dehydrate will vary. The thickness of your slices will also affect the time it takes for drying – try to aim for no thicker than 1/4-inch per slice. However, generally speaking, it should take anywhere from 4-6 hours to dehydrate jerky in a dehydrator set to 160°F.
Lean, tender cuts of meat are best for making homemade beef jerky in a dehydrator. Ask your butcher if you’re not sure what that looks like. In the past, I’ve had great success with the following cuts: brisket, rouladen, top or bottom round, eye of round, sirloin tip or flank steak. Either which way you go, the important part to remember is to make sure the beef is thinly sliced.
Marinating jerky before dehydrating is a crucial step to delicious and flavourful jerky and I don’t recommend ever skipping it. The longer you marinate, the more tender and flavourful your jerky will come out. For best results, allow the jerky to marinate for at least 4 hours but up to 24. Always remember to keep your meat in the fridge while marinating. I personally like to let it hang out in the fridge overnight then continue on with the process the following day.
PRO TIP: Optional but you can swish around the jerky in the marinade a few times throughout the marinating process, if desired.
Yes, unfortunately it is possible to overcook beef jerky in a dehydrator. To avoid this, start checking your jerky at the 4 hour mark and then again every 30 minutes after. Remove the pieces that are done before the others.
HOW DO YOU KNOW WHEN DEHYDRATED JERKY IS DONE? To check for doneness, simply bend a piece with your fingers. If it cracks on top without breaking, the jerky is done. You’ll also visually be able to see that it’s darker in colour and that it just looks dried out.
No, you do not need to flip jerky in a dehydrator. It’s actually a pretty hands off process once the meat hits the dehydrator. The trays have holes in them which allows the air to circulate all the way throughout for even cooking with no flipping required.
However, with that said, some dehydrators are different (like my parents’ ancient circular one) and may require you to rotate the trays throughout the drying process.
If jerky has been properly dried, cooled, and packaged it may be stored at room temperature for up to 2 months. You can keep it in the fridge if you wish. However, that might cause it to release back some of its moisture. Either way, for best results, store it in a vacuum sealed or air tight container.
MORE CROWD PLEASING SNACKS
BACON WRAPPED JALAPEÑO POPPERS
LOVE THIS RECIPE? PIN IT FOR LATER!

BEEF JERKY IN A DEHYDRATOR (TWO WAYS)
Video
Ingredients
TERIYAKI BEEF JERKY
- 2 pounds Beef (thinly sliced*)
- ½ cup Soy Sauce
- ½ cup Brown Sugar
- ¼ cup Rice Vinegar
- 1 tbsp Sesame Oil
- 1 tbsp Sesame Seeds
- 4 Cloves Garlic (minced)
- 1- inch piece Ginger (minced)
- 1 tsp Ground Black Pepper
SMOKY PEPPER BEEF JERKY
- 2 pounds Beef (thinly sliced*)
- ½ cup Soy Sauce
- 2 tbsp Worcestershire Sauce
- 2 tsp Fresh Cracked Coarsely Ground Black Pepper
- 1 tsp Liquid Smoke
- 1 tsp Onion Powder
- 1 tsp Salt
- ½ tsp Garlic Powder
Instructions
- Pat the sliced beef dry with paper towel then add it to a large ziploc bag (alternatively, use a bowl).

- Add in the ingredients for your choice of marinade (alternatively, whisk them together in a bowl first).

- Seal the bag and use your hands and fingers to mix the ingredients and massage the marinade into the meat.

- Refrigerate for at least 4 hours but up to 24 (the longer the better).

- Drain and discard the marinade, remove the jerky from the bag and pat dry with clean paper towel to remove some of the moisture. Lay the strips out in a single layer, leaving space around each slice for proper drying. Set the dehydrator to 160°F for 4 to 6 hours.

- Start checking for doneness at the 4 hour mark and then again every 30 minutes after.

- Jerky is done when you can bend it and the top cracks but the slice does not break.

- OPTIONAL (but HIGHLY recommended!): Lay the jerky in a single layer on an aluminum foil lined baking sheet, leaving a small space around each slice.

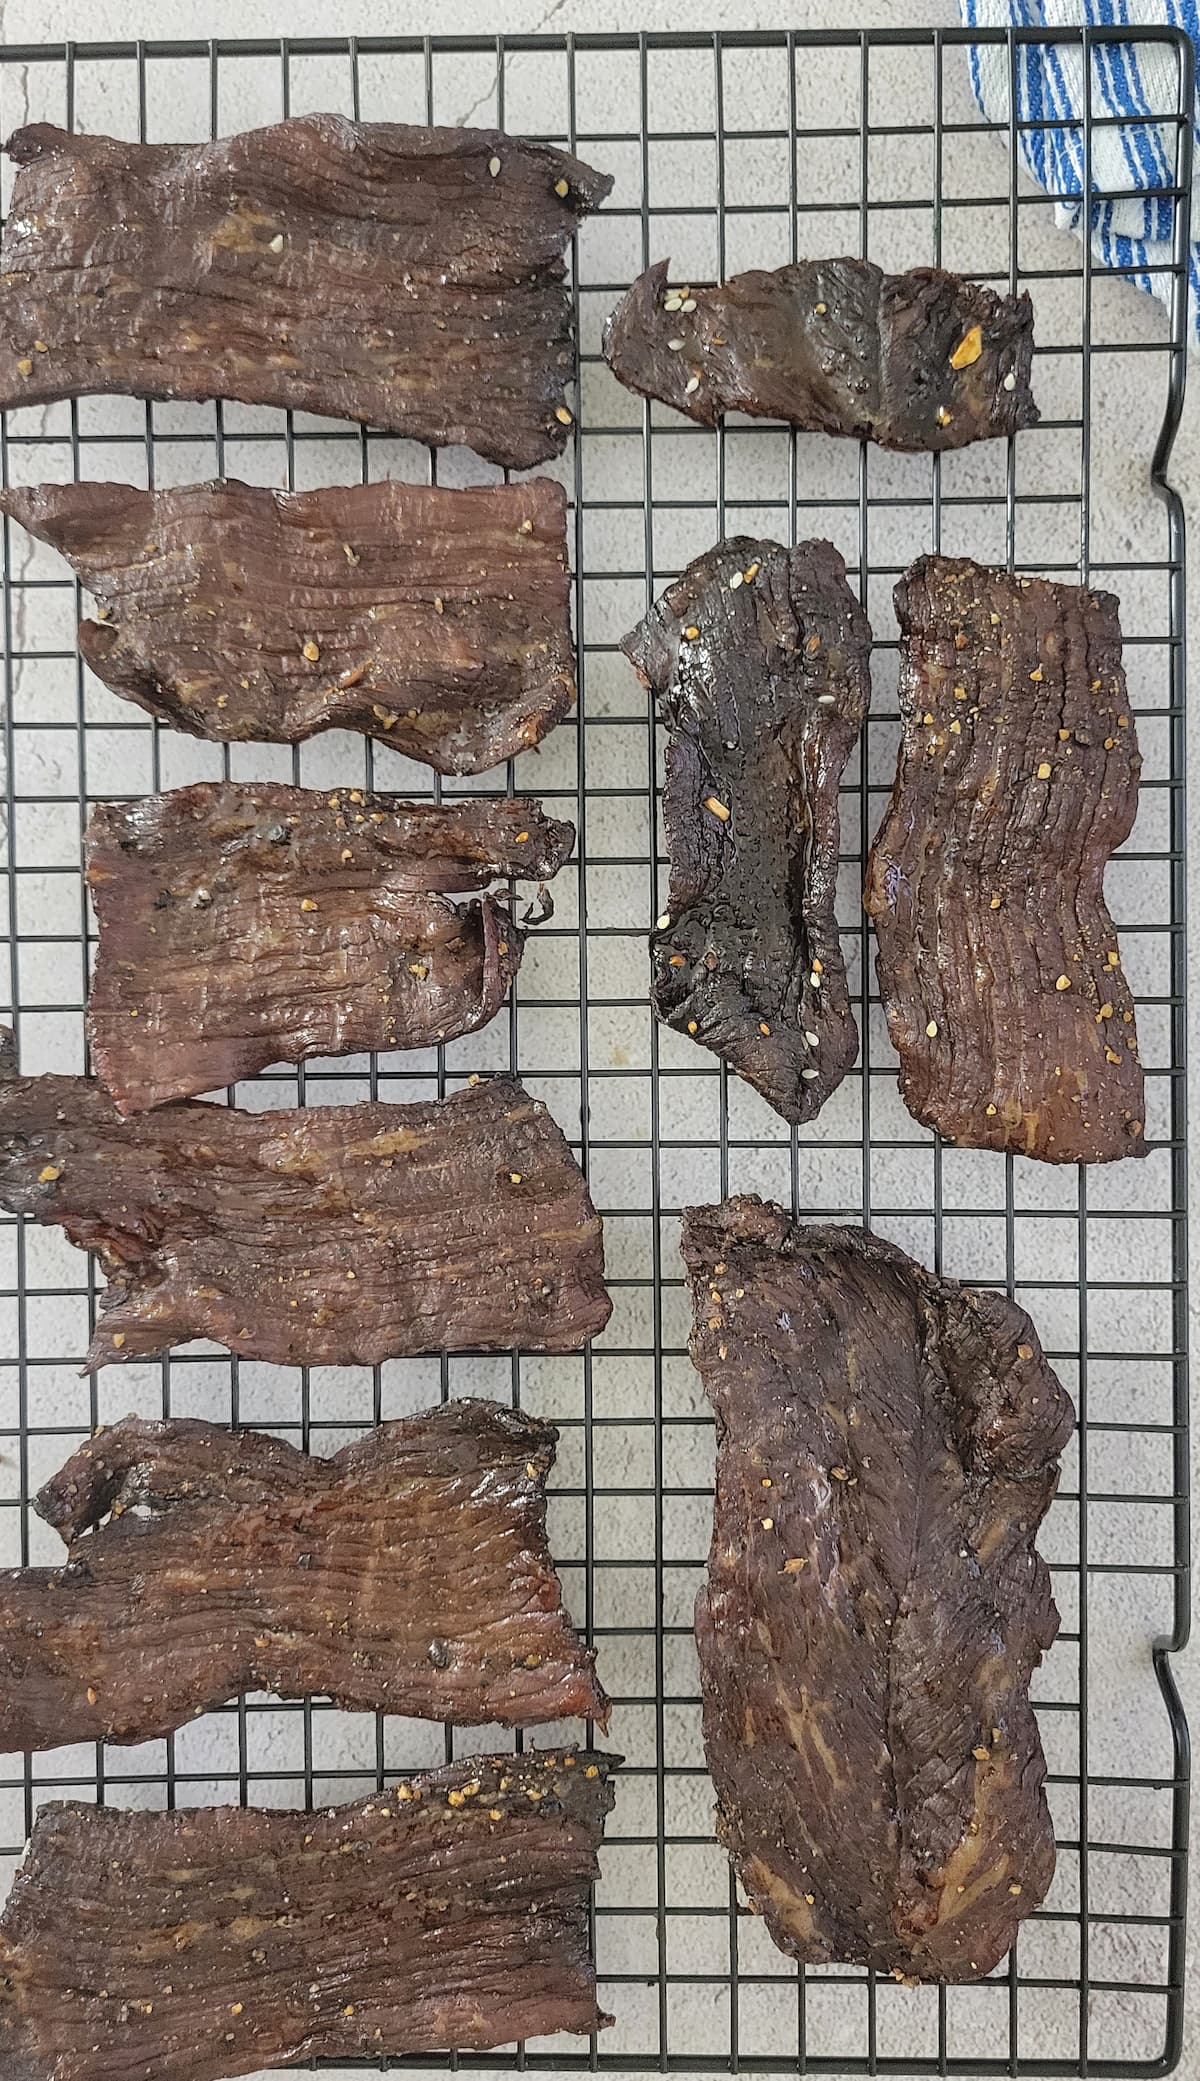
- Bake for 10-12 minutes in a 275°F oven. Pat dry with paper towels to remove some of the surface fat. Cool on a wire rack completely before transferring to an airtight container and storing.


Notes
Nutrition
Don’t skip the good stuff —
scroll up above the recipe card for ingredient notes, tips & tricks, and easy swaps/variations.Made it? Tell me everything.
I LOVE seeing what you made! Tag @hiphipgourmet on Instagram (or use #hiphipgourmet) so I can see it — then rate it + upload your photo below. 💖
The links in this post are affiliate links. Thanks for supporting HipHipGourmet!