✨This post may contain affiliate links. As an Amazon Associate, I earn from qualifying purchases.
If you’ve ever wondered how to make condensed milk at home, you’re in the right place. This easy recipe for condensed milk comes together with just 3 simple ingredients and tastes every bit as rich and creamy as the canned version.
Making homemade sweetened condensed milk is surprisingly simple. All you need is milk, sugar, and a little butter to create a thick, silky mixture that’s perfect for everything from coffee and desserts to homemade caramel sauce.
Whether you ran out of a can at the worst possible moment or simply prefer making things from scratch, this homemade condensed milk recipe is an easy way to keep a kitchen staple on hand using ingredients you probably already have.
What Is Condensed Milk?
Sweetened condensed milk is simply milk that’s been slowly simmered to remove much of its water content. As the milk reduces, sugar is added, creating a thick, rich, and noticeably sweeter product than regular milk.
The process of making condensed milk is actually quite simple. Milk and sugar are cooked together over low heat until the mixture thickens into a smooth, creamy consistency. Some homemade condensed milk recipes, like this one, also include a little butter for added richness and flavour. The result is a versatile kitchen staple that’s commonly used in everything from baked goods and candies to coffee drinks and homemade caramel sauce.
Ingredients You’ll Need to Make Homemade Condensed Milk
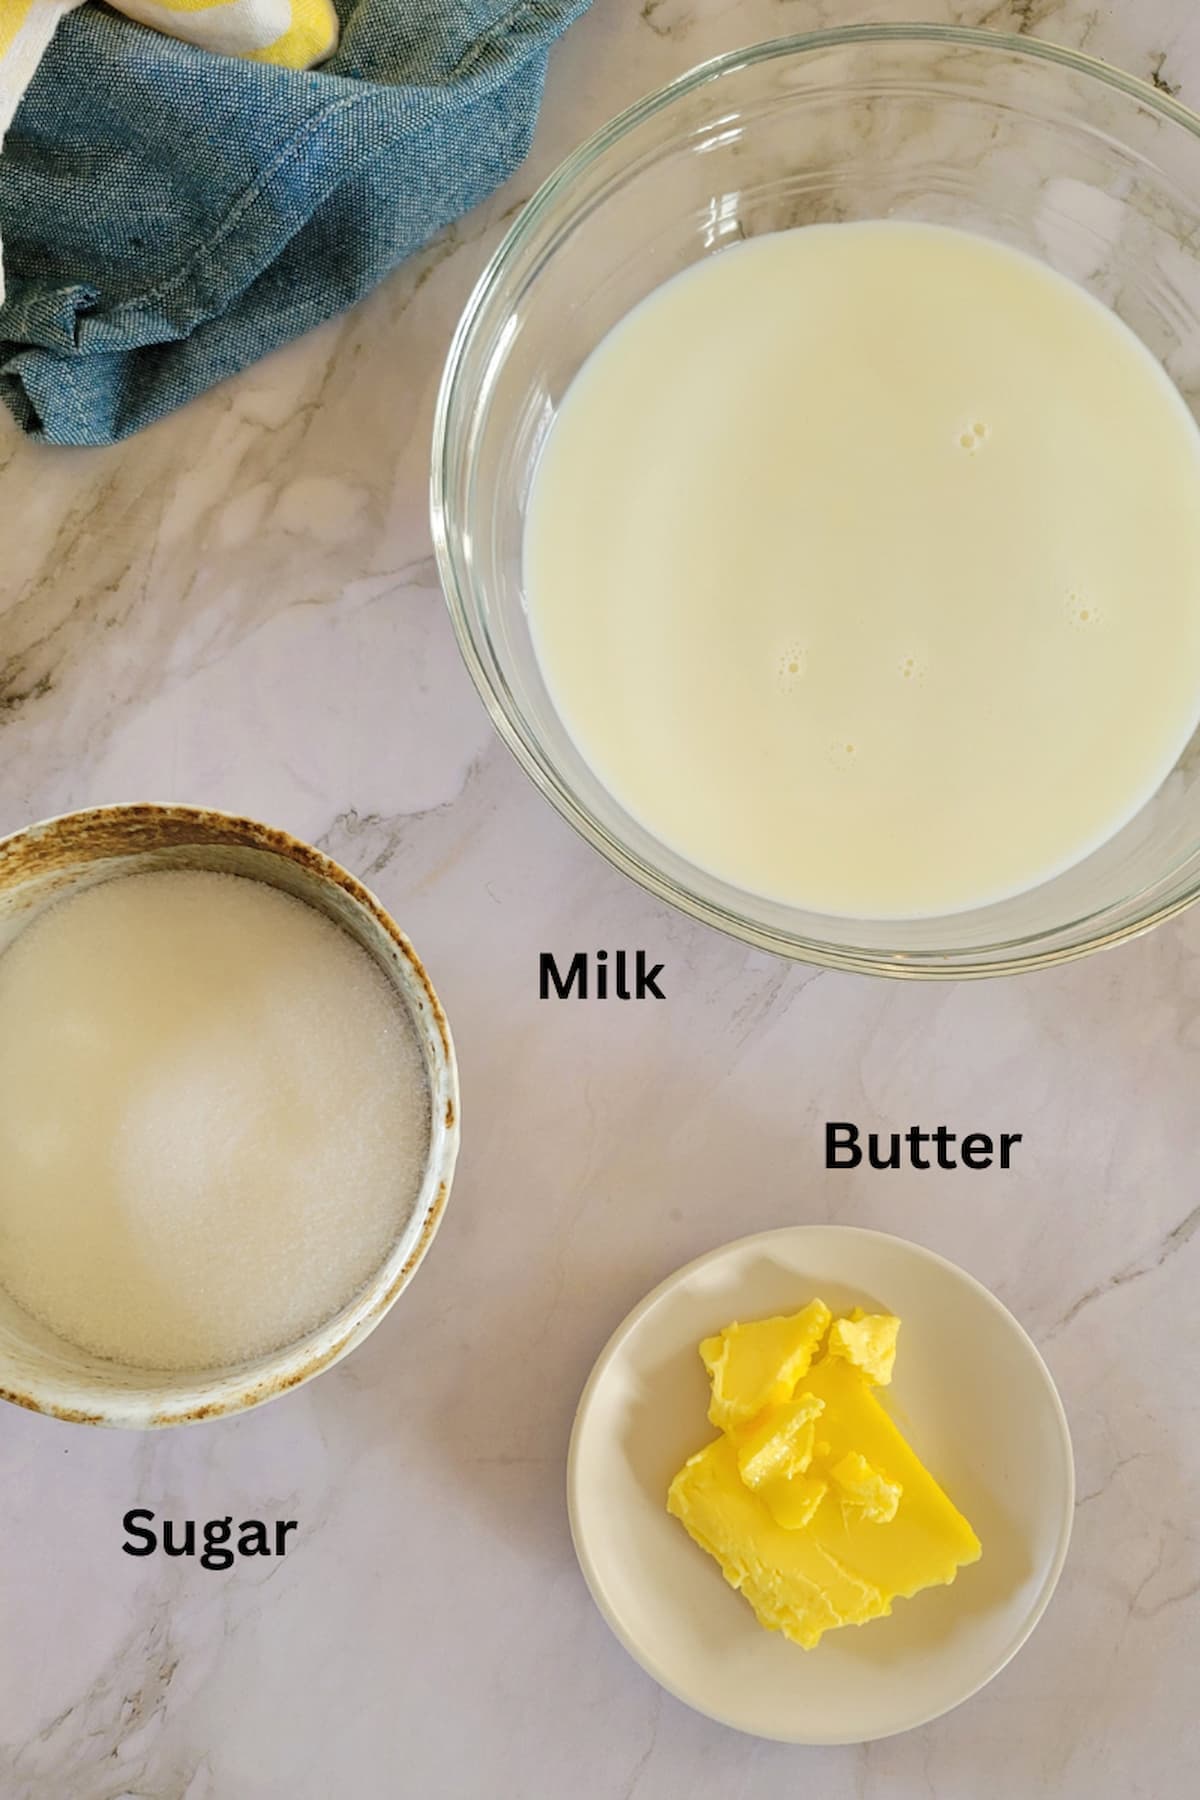
Who knew that making homemade sweetened condensed milk is as simple as combining three basic ingredients? Milk, sugar, and butter are all you need to create a rich, creamy substitute for the canned version. Here’s what each ingredient brings to the recipe:
- Milk: The foundation of homemade condensed milk. As it slowly simmers, the liquid reduces and becomes thicker and more concentrated. Whole milk will give you the richest flavour and texture, but 2% milk can work in a pinch.
- Sugar: Sweetened condensed milk wouldn’t be the same without it. Sugar sweetens the mixture while also helping create the thick, syrupy consistency condensed milk is known for.
- Butter: A small amount of butter adds richness, flavour, and a silky texture. I recommend using unsalted butter so you can control the overall flavour of the finished condensed milk.
Find the full ingredient list and exact measurements in the recipe card below.

Helpful Tips for Making Condensed Milk
Cook It Low and Slow
Patience is key when making homemade condensed milk. Keep the heat low and allow the milk and sugar mixture to reduce gradually. Cooking it too quickly can cause scorching, uneven thickening, or a slightly burnt flavour.
Watch for the Right Texture
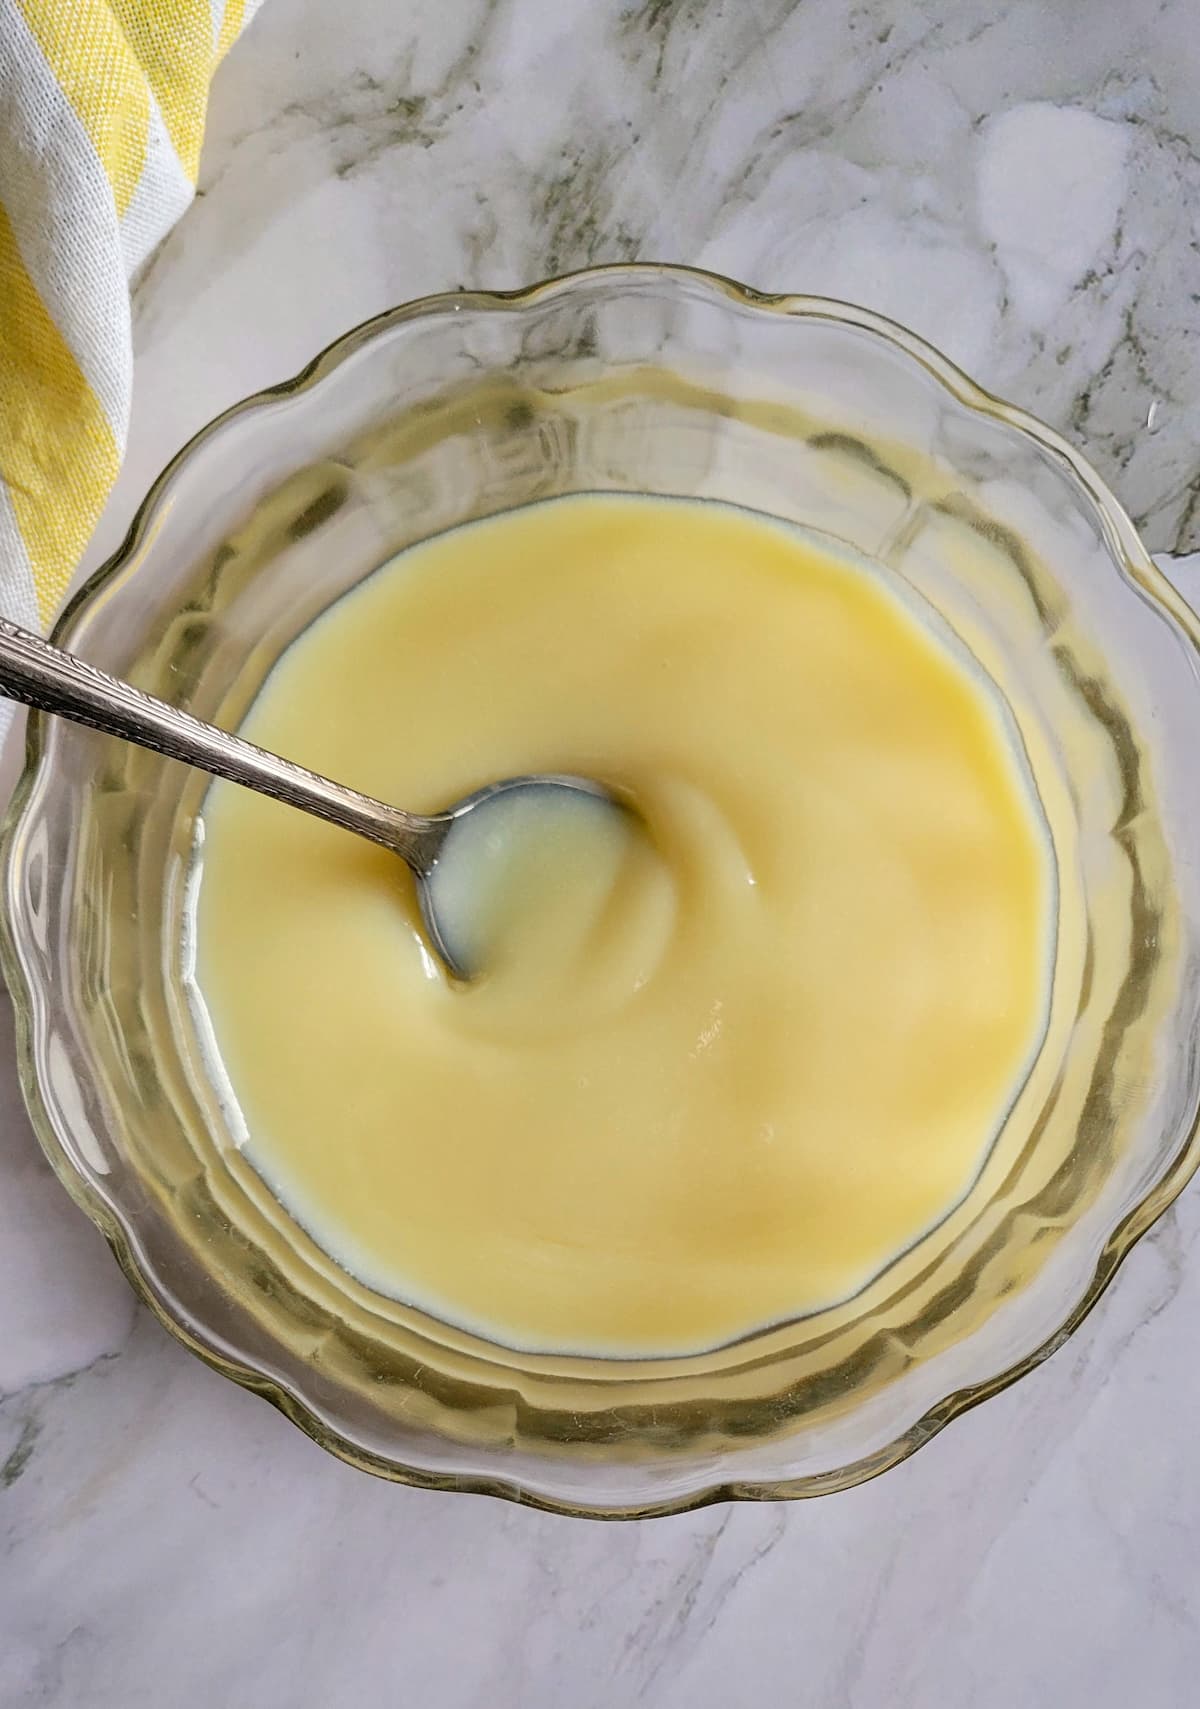
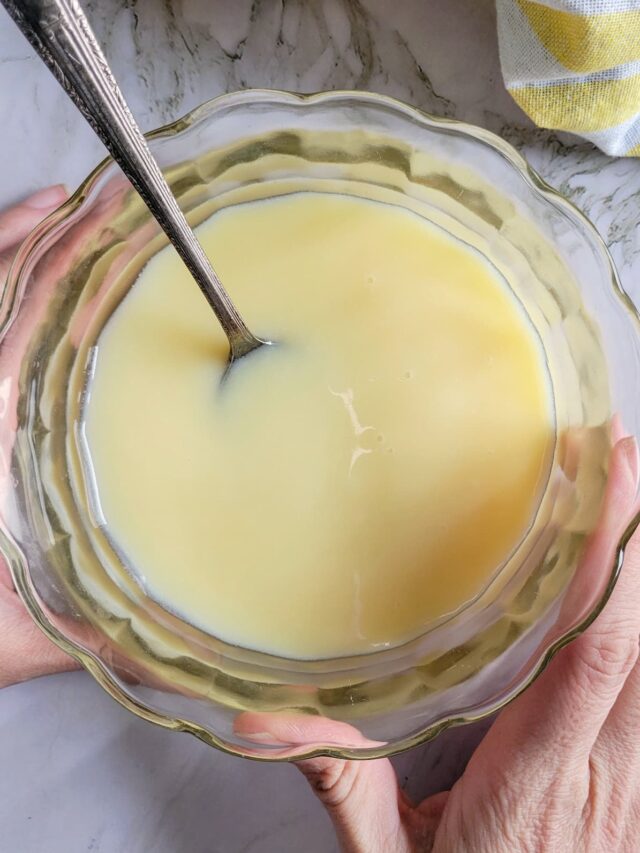
The condensed milk is ready when it has noticeably thickened and coats the back of a spoon. It should still be pourable when hot, so don’t worry if it seems a little thinner than expected at first.
It Thickens as It Cools
One of the most common mistakes is cooking condensed milk for too long. Keep in mind that it will continue to thicken as it cools, and even more once refrigerated. If it reaches a thick, creamy consistency on the stovetop, it’s usually ready to come off the heat.
Condensed Milk vs Evaporated Milk
Although they’re often found side by side on grocery store shelves, condensed milk and evaporated milk are not the same thing.
Both are made by simmering milk to remove some of its water content. The biggest difference is that sweetened condensed milk contains added sugar, while evaporated milk does not. As a result, condensed milk is thick, rich, and sweet, whereas evaporated milk has a more neutral flavour.
Because of the added sugar, evaporated milk and sweetened condensed milk can’t always be used interchangeably in recipes. If a recipe specifically calls for sweetened condensed milk, using evaporated milk instead will significantly change both the flavour and texture of the finished dish.
Frequently Asked Questions

ways to put that homemade condensed milk to good use
Now that you’ve got a batch of homemade sweetened condensed milk ready to go, here are a few sweet treats that would be right at home on your must-make list.
- Condensed Milk Caramel. Turn your homemade condensed milk into a rich, silky caramel sauce with just one extra step.
- Easy Peanut Butter Fudge. Rich, creamy, and practically made for condensed milk lovers.
- 2 Ingredient Chocolate Fudge. Rich, creamy, and made with just two ingredients for the ultimate easy dessert.
- Coffee Ice Cream. Smooth, creamy, and packed with bold coffee flavour for an easy homemade frozen treat.
Quick Favour ⭐️ If you make this recipe, I’d love it if you left a quick rating + review. It’s the easiest way to support Hip Hip Gourmet, and I read every one.
Homemade Sweetened Condensed Milk (3 Ingredients)
Ingredients
- 2 cups whole milk
- ¾ cups granulated sugar
- 2 tbsp unsalted butter
Instructions
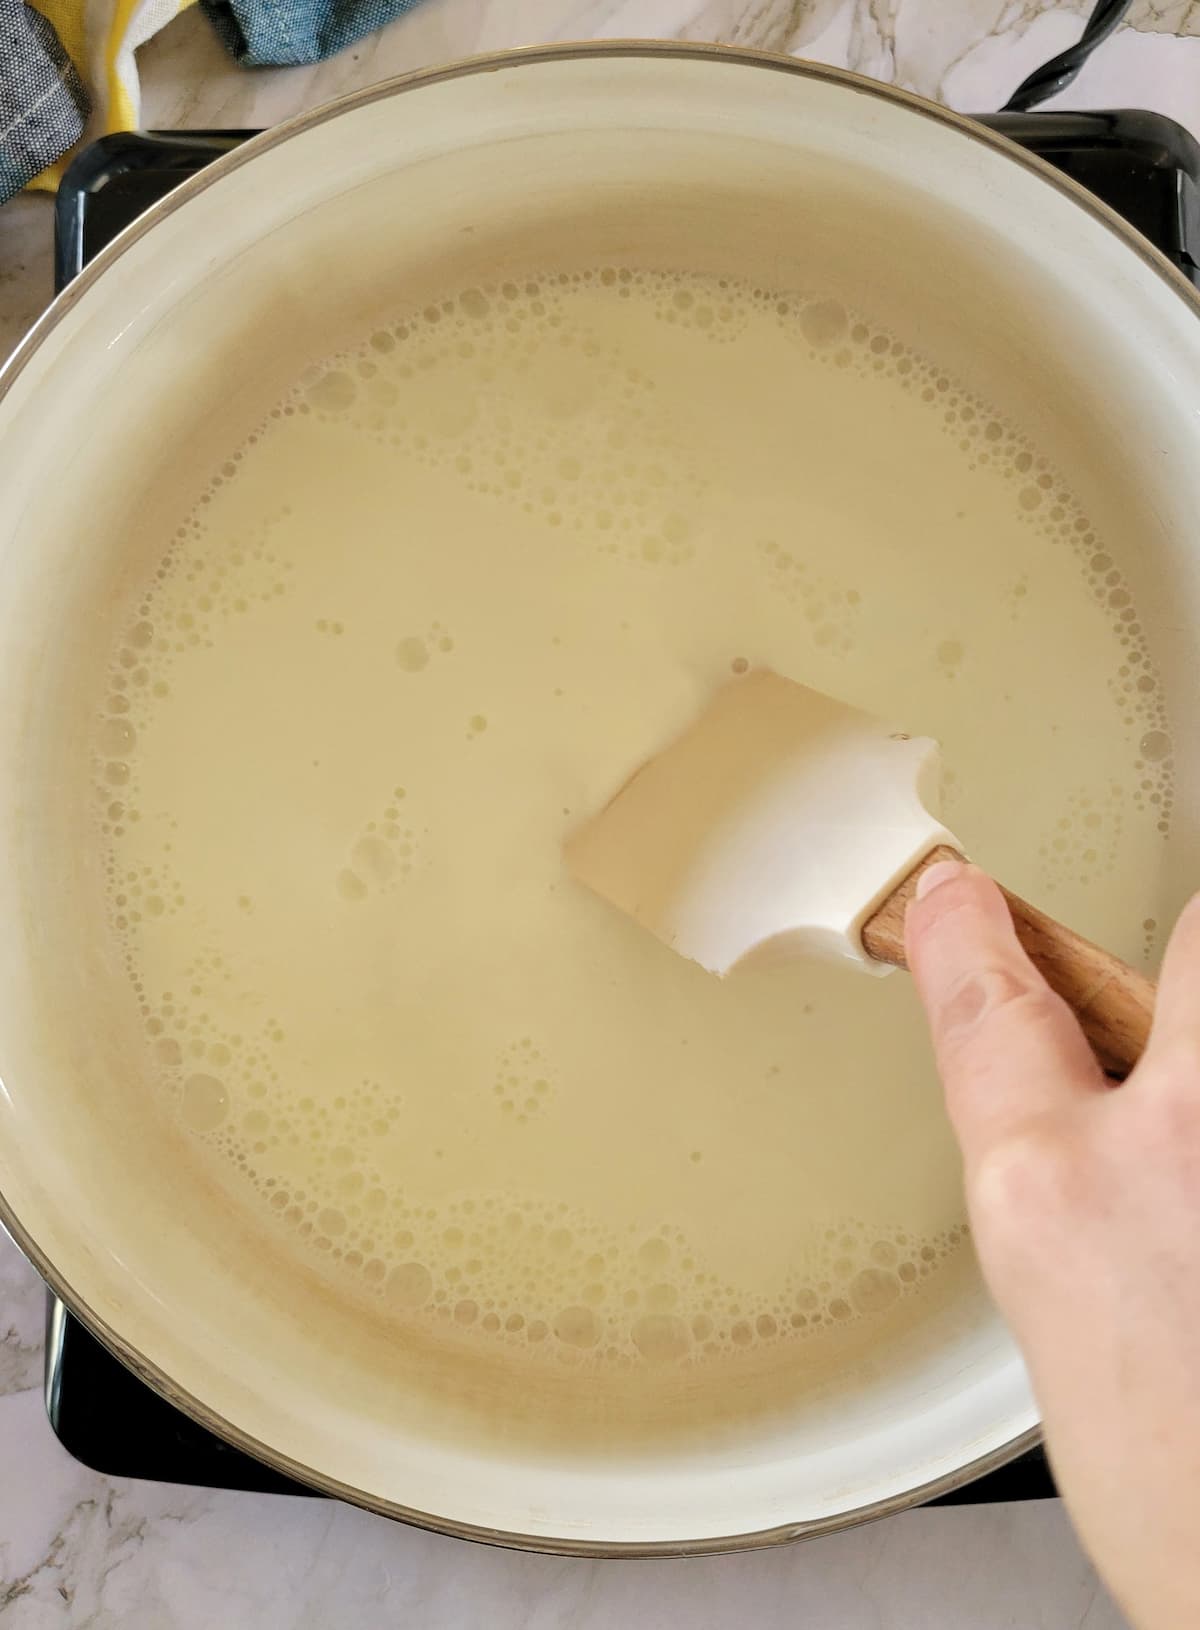
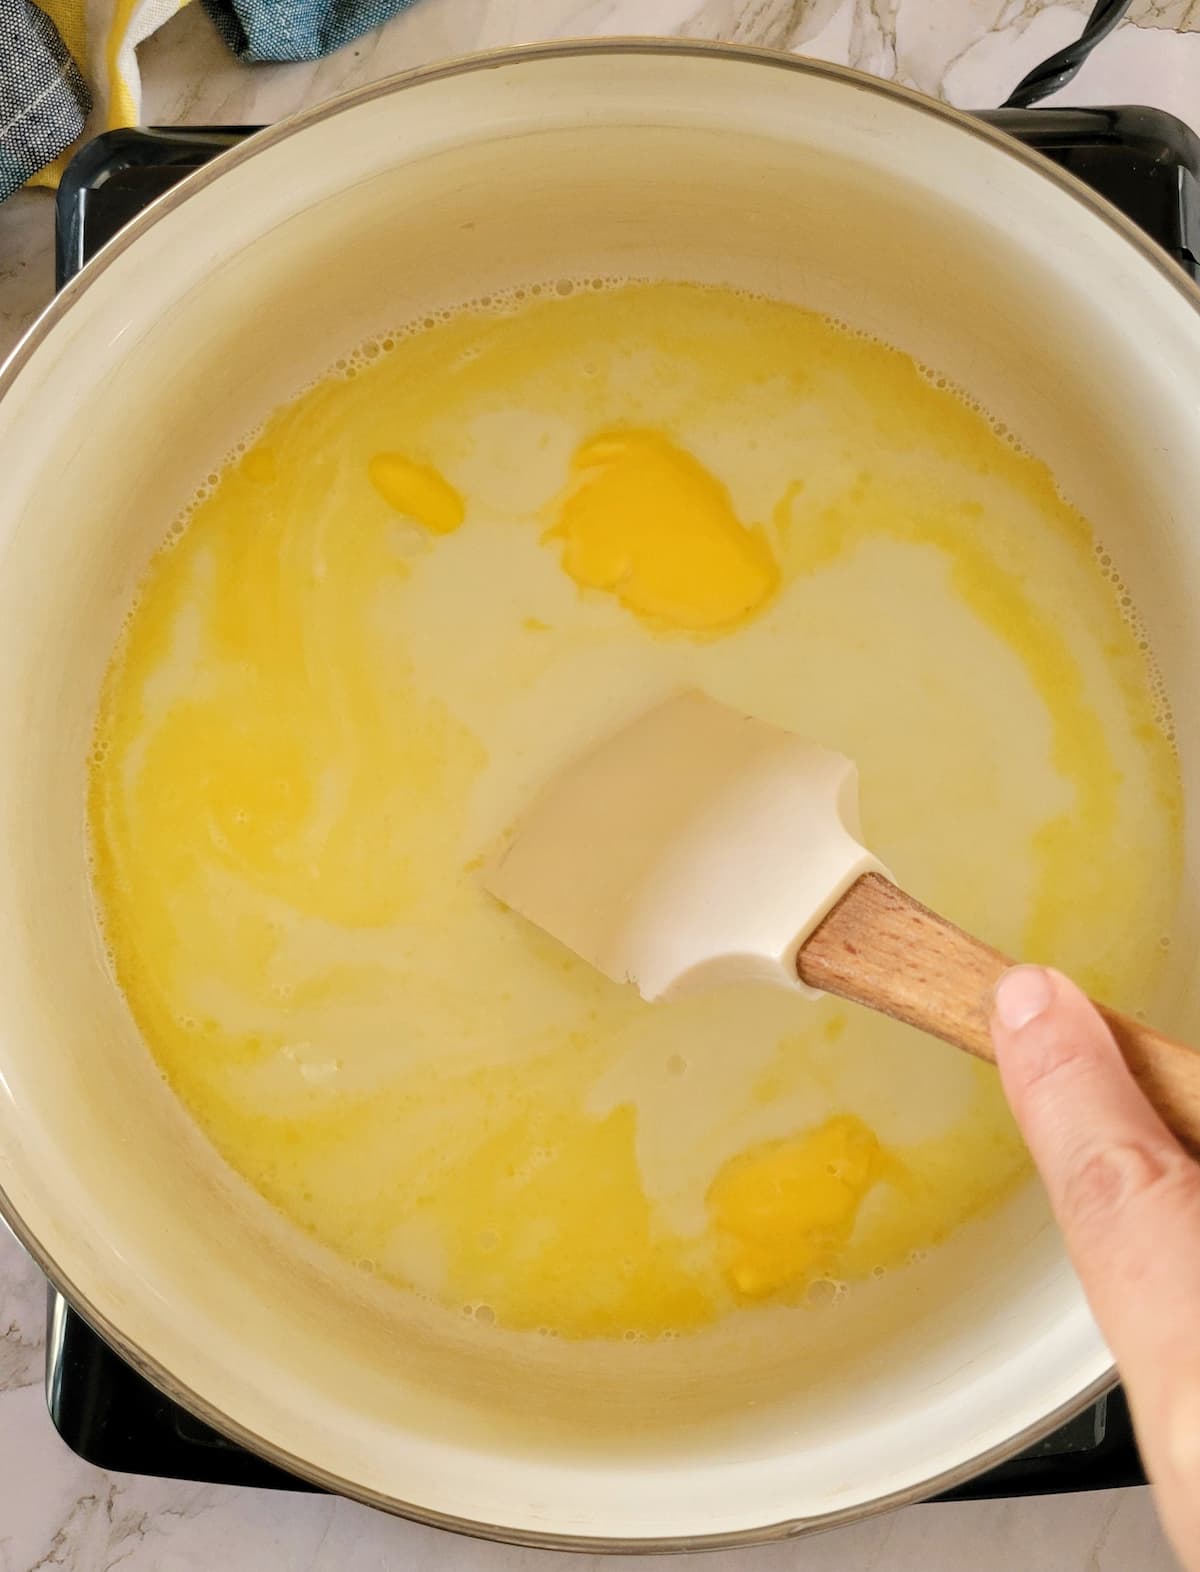
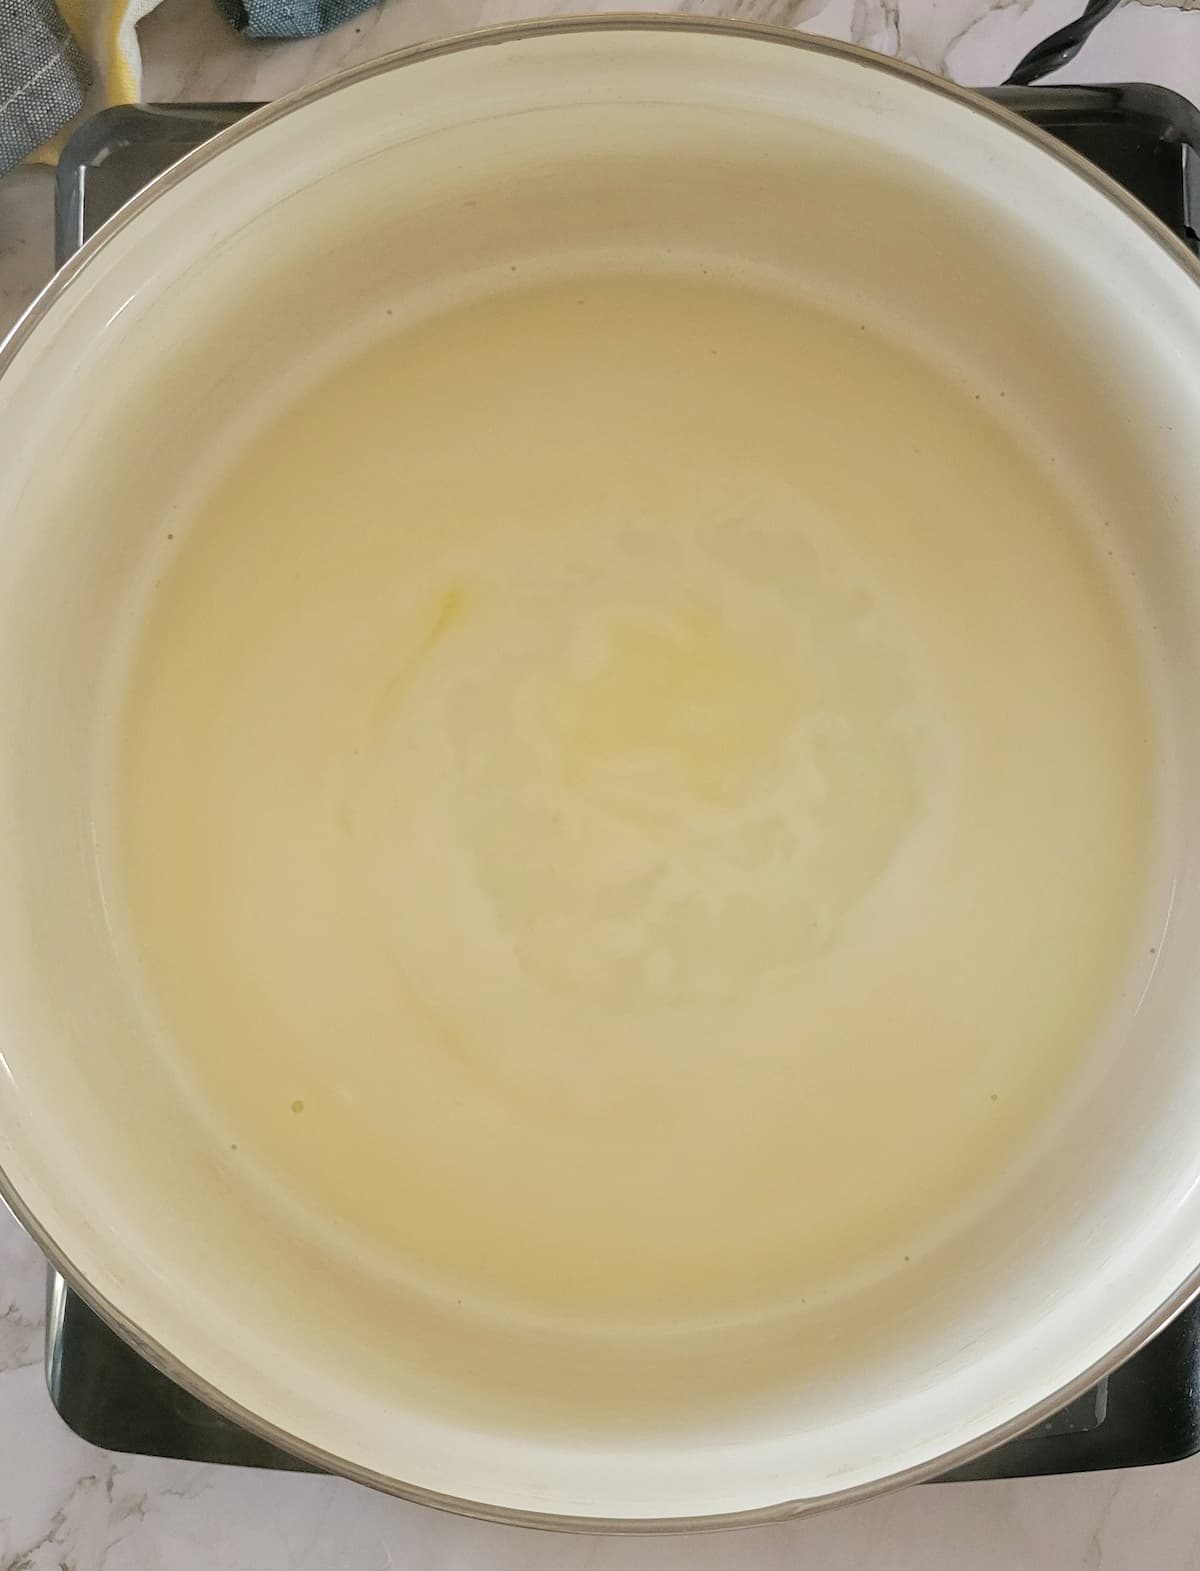
- In a medium saucepan, combine the milk and sugar over medium heat. Stir until the sugar has completely dissolved.

- Add the butter and bring the mixture to a gentle boil, stirring frequently.

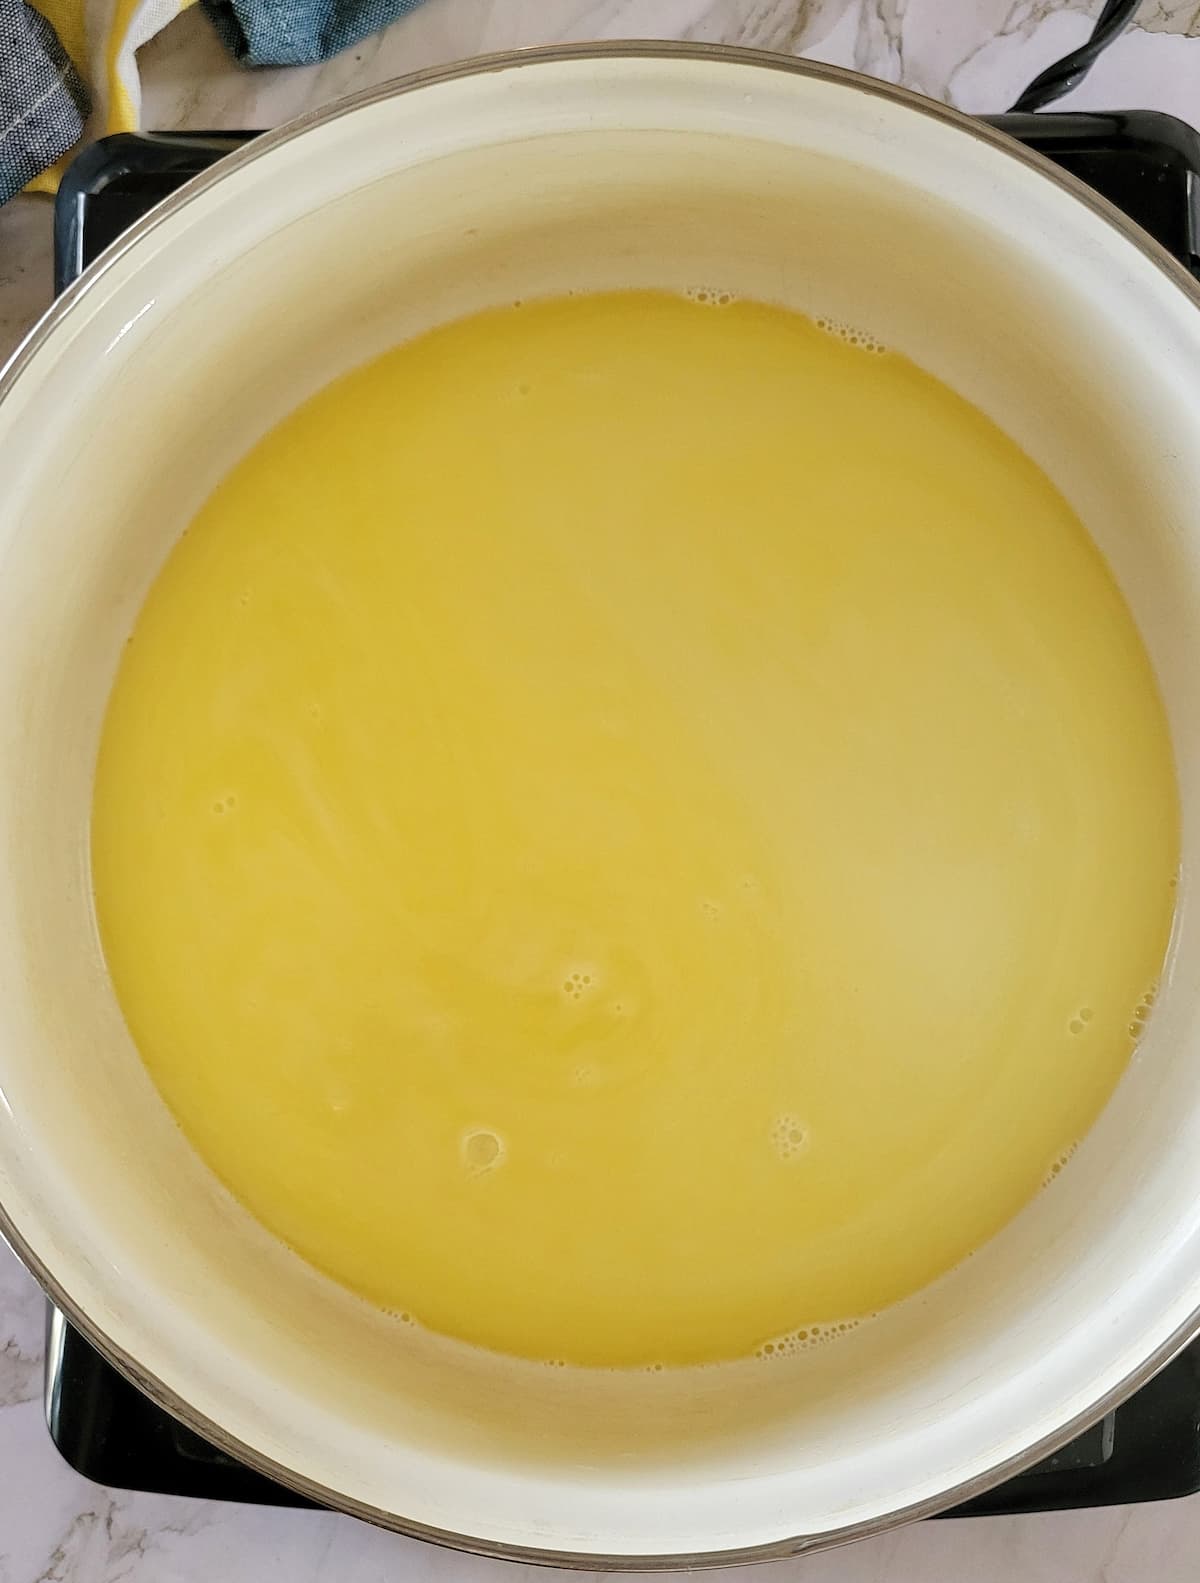
- Reduce the heat to low and simmer, stirring often, until the mixture has reduced and thickened to a creamy consistency, about 30 to 40 minutes.

- Remove from the heat and let cool completely. The condensed milk will continue to thicken as it cools. Transfer to an airtight container and refrigerate for up to 2 weeks.

Notes
Nutrition
Don’t skip the good stuff —
scroll up above the recipe card for ingredient notes, tips & tricks, and easy swaps/variations.Made it? Tell me everything.
I LOVE seeing what you made! Tag @hiphipgourmet on Instagram (or use #hiphipgourmet) so I can see it — then rate it + upload your photo below. 💖
Made your own condensed milk at home? Leave a comment below and tag @HipHipGourmet on Instagram so I can see how you used it!
Save this one for later?
